|


What's the difference between a DA upper and ATRS lower from CanAm and a DA upper with an ATRS lower from ATRS besides over $1,000.00 ?

Machining to make upper fit lower???
Originally Posted by atr

Revolvers RULE; remember that next time you BEND over to pick up brass OR ejected brass pings off the precision gear.
Looking for a car pool buddy for weekly weekday trips from Burnaby to POCO. Better yet I'll drive weekly and you take me hunting.

its the same. just that CA doesnt have any right now.
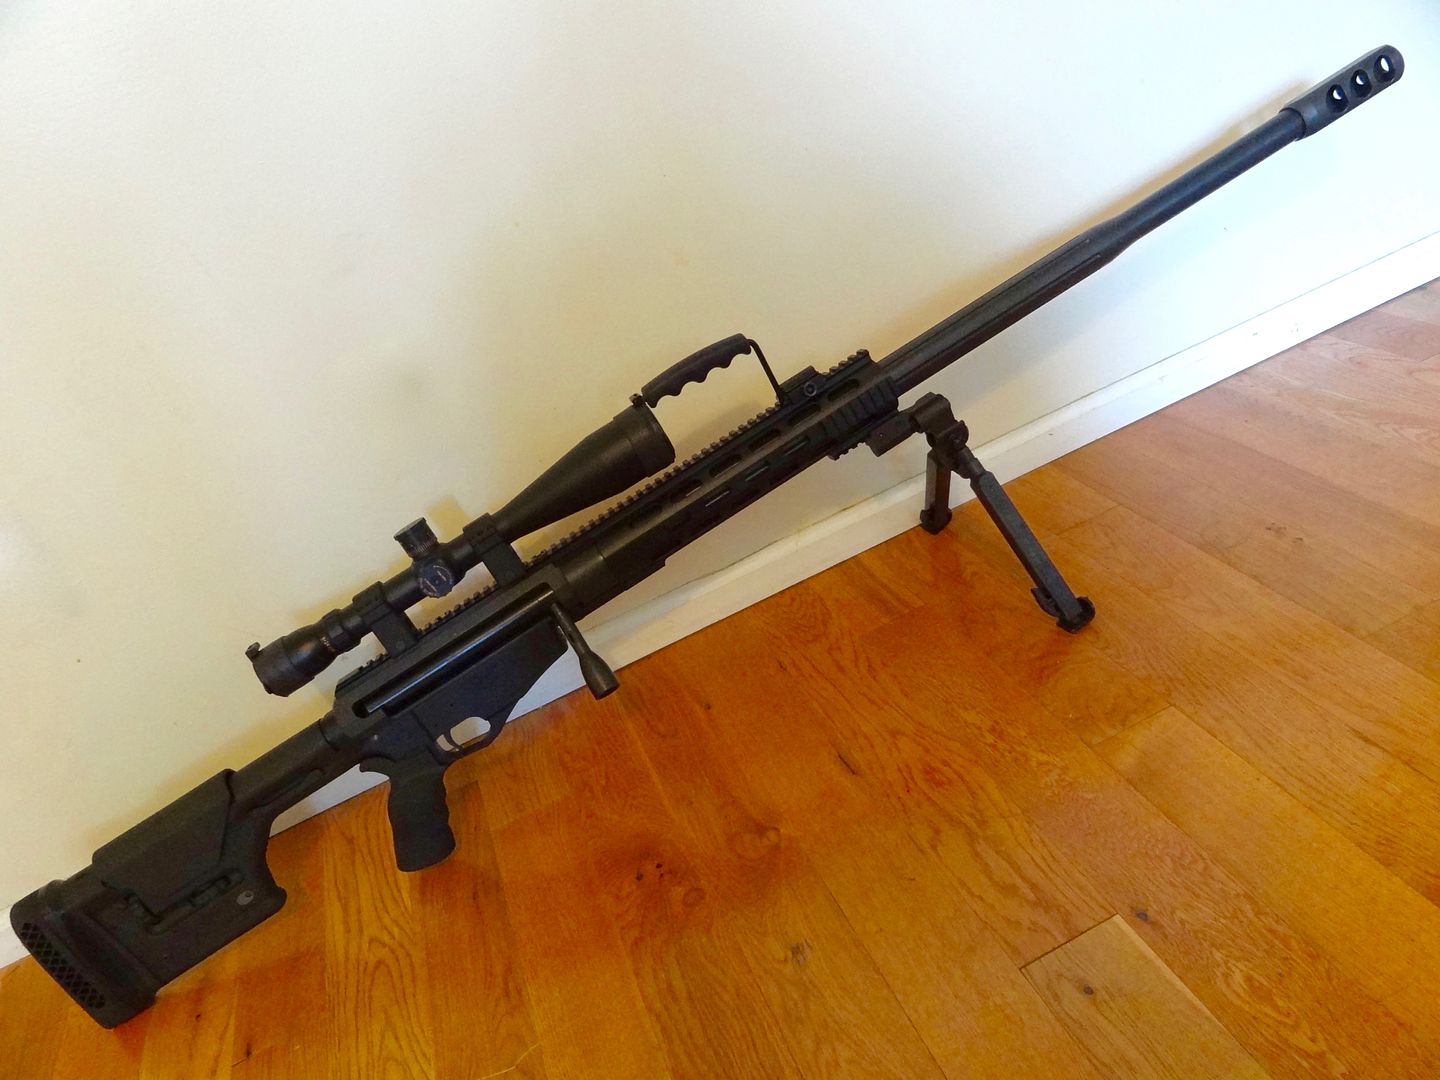
8 rounds of imi 661 gr so far in one outing. 4 rounds for me to get it on paper reasonably, then 4 round group, had to let my buddies try it so 2 guys 2 rounds each. First guy, one hole 2 shots, second guy, same hole first shot, shot 2 for him, about 1" off. Said he was developing a flinch, but the trigger was horrendous, like shoveling my spalling concrete driveway. We literally giggled. At 100 with a cheap scope on 6 x. So the first 3 group shots had 1 ragged arse hole about 3/4" across, shot 4 a bit of a flyer but not by much.
Trigger fixed now, stoned everything using lanskey stones that I can't sharpen anything with. Will continue to use my safety shooting technique to get rid of the creep but way better trigger now.
Not a big test of potential, but I was real happy with it. Slow mo video makes us look like rag dolls when you shoot; look for the longest eye relief at power scope you can find. My bargain bin cabelas 6-18 pine ridge would likely leave a mark at 18x!
All in all the most fun I've had shooting in a while, non restricted 50, Life is good!
Until the wife sees the mc bill...
As an added, if anybody is thinking trigger cleanup let me know and I will post a quick how to, it ain't an ar, there are a few tricks.

Cool
Last edited by Divermike; 10-10-2020 at 11:17 PM.

]It's simple and not really pretty. The rail adapter is a larger one that I drilled and tapped to take bolts. It's bolted to 2pc of angle iron that is cut at an angle and welded to 2pc of square tubing to make an inverted V. That tubing has a hole drilled in it near the bottom. Smaller tubing fits and slides inside it, with multiple holes in it. There are pins to hold it in place and on the bottom of the legs are some rubber table/chair leg end pieces.
I used to use a Harris style one from Can Am and would mount it backwards so the legs wouldn't collapse, but this rifle doesn't need to be too portable, gets shot often, and lots of new shooters shoot it and I wan'ted it very sturdy and heavy. Mine is overkill but I didn't want to buy a $500 bipod and this was just a bit of work and a few $ in parts.
.In your picture is that just a shooter happy to get out the range or a gal with a 50 cal grin
That pic is after she shot
9mm Beretta
45ACP Glock 21
357 Mag revolver
Mossberg 500
Recoil O/U 16" barrel
Beretta CX4 9mm
Kriss Vector 45ACP
AR15
MKA 1919 wit slugs
Tavor
SKS with scope and bipod
DA 50BMG
So I think it's a bit of everything
375 Ruger is the NEW KING of the .375's. ALL HAIL THE NEW KING!
Ok , gotta be quick as it's walking dead then bed!
From memory so ymmv...
Fist off, don't do this if you are a tool, you can seriously fup. I will assume we are on the same page.
Everything's looking down at the lower with the pointy end forward
Look at the lower and figure out what rubs where, utube is your friend but there is no disconnector.
The lower has Allen screws, almost like set screws, on the left side for the hammer and trigger pins. Locktited I would guess. Unscrew the hammer one first then use a slave pin and a bit of wiggling to pop the hammer pin out to the left, bobs your uncle. Note which way the pin cuts are, want to put it back the same way.
You can't get the trigger group out without removing the grip and safety, unscrewing the little Allen key screw from under the grip, remove the ball and spring, then push down on the back of the trigger(safety catch) a bit to slide the safety left and out. Then unscrew the Allen head from the trigger pin and slave pin it out to the left. Get the trigger out.
I'll assume you all know how a trigger works, play with the parts to see where to stone. I used lanskey stones clamped in a vice and lots of oil. Don't change the angles or round the edges! And for crumbs sake don't use a dremel. Slow and steady, I only went one direction on the stones, slow, slow slow, make sure you don't rock or bevel anything. See utube, understand what you are doing...
You will eventually work your way up to a mirror finish on what was a couple of seriously machined marked surfaces. After that comes the fun part, reassembly.
The tricky bit is that you cannot put a large enough slave pin thru the right hand side of the receiver, the pins bottom "blind" on the right... so using the normal stuff and hammer technique is a real bad idea.
What I did was use a slave pin (from the right) to get the pins (inserted from left) thru the hammer/trigger assemblies until the pin hits the inside right of the receiver, you might luck out with some wiggling to get the pin farther but I doubt it. The pin (trigger first) is now sitting against the right receiver wall, cockeyed. Insert the Allen screw from the left and just take the slack out of it.
Now while putting a bit of tension on the Allen screw, wiggle the trigger group around the pin hole (inside right receiver) until you suddenly realize the Allen screw will turn easily, meaning you hit the right hole! No Turkish lane changes here...
Sounds complicated, took a while to get it right but easy now.
Almost forgot, when you put the safety back you need to adjust the Allen screw "just so" so your safety works. All the way in or out you got grief...
Ive likely missed a few critical steps but I'm sure you boys will let me know,
Cheers!
Last edited by Peace River; 03-20-2017 at 12:27 AM.

Im running the Versa-pod .50bmg HD bipod , not cheap but solid as hell and works well . If you get this bipod make sure you get the HD Picatinny Rail Versa-Pod Bipod Adapter to go with it .
 Posting Permissions