


You are using an out of date browser. It may not display this or other websites correctly.
You should upgrade or use an alternative browser.
You should upgrade or use an alternative browser.
Did a CZ Shadow 2 Cajun Pro Kit build
- Thread starter DSG03
- Start date


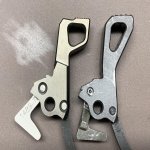
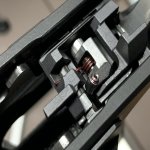
Ordered another hammer strut so if the build screwed up I could re-install and have functionality. Used a steel bench block as suggested by CGW to get the hammer pins in. Made it and the trigger pin easy. Also a good comparison here of the SA hammer hooks on the CGW competition hammer compared to the stock Shadow 2 hammer.
Attachments
Last edited:

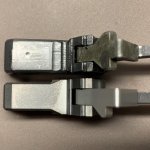


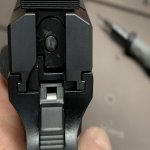
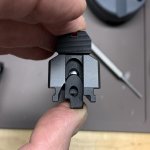
Spacer for non firing pin block CZ’s. Also shown is the ‘extended’ 10% reduced sear spring from Eemann. The extended spring tip let’s you pick it up with your finger to remove the safety without having to use a pick. Seems minor but really helpful when disassembling to clean.

Attachments

Last edited:


Started with, on my gauge, DA 10.5 and SA 4.0
After just the 11.5 lb hammer DA 7.4 and SA 3.8
After both the 11.5 lb hammer spring and reduced power trigger return spring DA 6.11 and SA 3.1
After an 11.5 lb hammer spring, reduced power trigger spring and the CGW Pro Kit, now on my gauge DA 6.5 and SA 2.8
Gauges are really just relative so a DA reduction of 38% and a SA reduction of 30%
And an incredibly clean SA break with zero creep past the wall
No light primer strikes with the new hammer and CGW reduced power firing pin spring but that’s on factory Federal American Eagle with Federal primers. CCI primers may be a different story as their harder. I do have the uninstalled CGW extended firing pin if necessary.
Last edited:
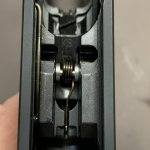
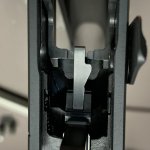
After. DA take-up now very short and the SA reset is just a couple of mm. Left enough play so once it heats up and gets dirty hopefully it won’t be a problem. 1/4” squares on the graph paper so approx 6.3 mm less free travel.

Attachments
Last edited:
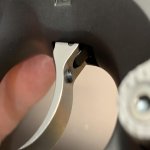
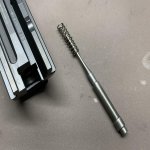
CGW 10X barrel bushing installed. Very tight fit in and out but imuo as close as you can get to the lockup of a 1911 style barrel bushing.
View attachment 597874
I’m interested in installing a barrel bushing on my S2 Canadian Edition. Any chance you could PM me where you ordered it. It seems like the roll pin CZ installed that holds the front sight and factory bushing on mine is loose.
You already know the front sight roll pin holds in both the sight and the barrel bushing. Try CGN site sponsor Double Tap for CGW parts. I bought a #47 front sight pin drill but didn’t need it. The bushing was easy to line up and tap in with a nylon hammer but I greased both the bushing and barrel prior. Pin went in easy. If your pin is loose you can order a new one with the bushing from Double Tap.


Great work. The CZ platform is a lot of fun to work on. I've had a number of projects over the years. When you get to polishing, consider buying a decent ceramic stone small enough to hit the surfaces that rub against each other. It'll remove those light surface finishes, so keep that in mind.
Great work. The CZ platform is a lot of fun to work on. I've had a number of projects over the years. When you get to polishing, consider buying a decent ceramic stone small enough to hit the surfaces that rub against each other. It'll remove those light surface finishes, so keep that in mind.
Will do. Thanks!


