Help needed, exposed-hammer SXS needs firing pins properly sized

yorgi

CGN frequent flyer
Rating - 100%
151   0   0
Location
Toronto, Ontario
Have had a nice (for it's age) exposed-hammer Belgian Guild SXS for a while now, bought it with both firing pins missing. A "friend with a lathe" was kind enough to devote his effort and time to make a couple of firing pins for it. Was not easy, apparently the two nipples differed in size, he had to spend a bit of time filing and refitting to get them in place. His efforts did not go unnoticed and were rewarded with the appropriate sized and quality liquor...

The new pins are in place, they slide in and out easily, no slop in the movement. My friend left both the hammer and pin ends intentionally long. Now it's up to me to appropriately size them by filing. First timer, so any advice would be welcome...

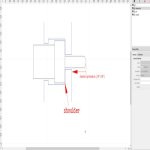
Here's how it looks with the pins in place and the hammer at full rest, hammer-end is long enough that it gets pushed-in by hammer...
a1EDDCS.jpg


Here's how it looks if I use a vise-grip and gently push the pin it, to a point where I guess it will end up looking like.
O30gdkA.jpg


Here's what it looks like with the hammer cocked.
QwC69Hs.jpg


Here's what it looks like with my grubby, shriveled finger pushing the hammer as far forward as I can get it, around 1/16th ahead of hammer at rest.
5T2kjTR.jpg


And here is where my rapid-fire questions start... What distance should the face of the hammer be from the head of the firing pin, at rest (A)? How about the distance when fully pushed forward (B)?
I'm guessing that when the hammer strikes the pin head, it travels even further than the position I can push it forward to, at rest. I'm a wrong?
0ZpIkR5.jpg


As for the pin end, I've read that it should protrude 50 to 60 thous past face when struck, I think I'll just deal with that part AFTER I determine the SAFE dimensions of the firing pin head.

Would appreciate any advice, especially with anyone who owns a similar vintage shotgun and would be kind enough to measure their own A and B distances.
 
Last edited:
Well they are rebounding otherwise the hammer will rest on the pins when not cocked. If you do not pull the trigger (or push the hammer) then I think the distance A just needs to be more than zero. While pulling the trigger and pressing the hammer, distance B must be less than zero. I wouldn't push against the hammer without pulling the trigger as the sear is supposed to stop that motion. Unless I am misunderstanding(?)
I've had a couple guns that were occasionally piercing primers. The smith had a gauge to measure the protuberance and would do this with the trigger pressed while pushing on the hammer. To reprofile the pins he chucked them in a drill and ran them over emory cloth

Sorry...incomplete description on my part. The drilled tumbler(?) is square in shape, the bottom of the hammer attaches to it with a slotted screw, there's a bit of play there. The hammer slot is not perfectly square and I see that someone has peened the inside edges to tighten the slack. So the hammer does slightly move even with the trigger not pressed, with the trigger pressed, the hammer moves all the way, but just short, of the nipple.
 
A rebounding hammer will go all the way forward when the trigger is pressed; it will then bounce back. If the trigger is not pressed, the hammer will be held back by the sear and will not contact the firing pin.
So, with the hammer at rest (down), it will not be touching the firing pin, and the firing pin will not be protruding from the breech face. With the trigger pressed, and the hammer all the way forward - it will have to be pushed there - the firing pin will be pushed forward and will protrude from the breech face, able to indent the primer.

Terrific explanation, thank you! Appreciate your's as well as Londonshooter's sound advice.

Based on your description, my shotgun does have rebounding hammers. My lathe-friend :) noticed that the two hammers are slightly different, ditton for the nipple measurements. Because of this, I think I will remove the new pins and test each one separately. I'll use a feeler gauge with paper on one side, lightly oil the hammer head and record the exact thickness of where the hammer touches the nipple. More than likely it will be different on each side.

After taking the measurements and using the info you supplied, I will file each pin head to the correct height, pin end work to follow...

Thanks again.
 
I'm not a Hammer gun expert so perhaps I'm missing something. Generally speaking I would be primarily concerned with firing pin protrusion with the pin fully forward against its shoulder. You want reliable ignition but you also want the pin end as short as possible as its the most fragile. I would then file the hammer end to suit.
Screenshot (112).jpg
These numbers are generic and don't take into account potential loose lock up or headspace.

also, (I'm sure you already know this) make sure you harden both ends when you are finished or it will likely deform after 10-20 shots.

Cheers!
Paul.
 

Attachments

  • Screenshot (112).jpg
    Screenshot (112).jpg
    15.9 KB · Views: 100
I'm not a Hammer gun expert so perhaps I'm missing something. Generally speaking I would be primarily concerned with firing pin protrusion with the pin fully forward against its shoulder. You want reliable ignition but you also want the pin end as short as possible as its the most fragile. I would then file the hammer end to suit.
View attachment 658938
These numbers are generic and don't take into account potential loose lock up or headspace.

also, (I'm sure you already know this) make sure you harden both ends when you are finished or it will likely deform after 10-20 shots.

Cheers!
Paul.

Thanks Paul, all good points. I plan on getting everything properly sized and tested with an improvised snap cap (sacrificial shell with everything but primer removed) before I heat treat it.
As for the shoulder, it never reaches the wall of the pocket because the return spring is in the way, further complicating any precise measurements on that end of the pin.
 
Seems to me that dressing/sizing the pins is the easy part. As has already been said, measure for pin protrusion with the pins fully forward then remove material from the back so that the rebound lifts the hammer off the pins. I’d be more concerned about proper hardening and tempering. With small parts like this, doing it right requires a small heat treating furnace. An expert can do it with a torch and some quench oil, but if you get it wrong they will be brittle and they’ll just break again. The same goes for tempering. Temper it back too much and they’ll be soft and deform quickly. This process depends on the type of steel used. For example 1080 and 4140 have similar critical temperatures, but steels like w2 require less heat. In larger work you can gauge this by colour, but for small parts it not easy to see. Then again, I might be making too much of this issue.
 
One thing you can do it empty some shells out so they just have the primer and fire it and make sure it doesn't perforate the primers. Any reason when it never had pins in the first place.
 
most of these had springs to keep the pins back so they don't snag when opening and closing the gun,
both pins should be the same size , but looks like it has been messed with quite a bit
 
Back
Top Bottom