- Location
- Edmonton area, Alberta
Back when I relined my Broomhandle and posted in this forum how I did it (and it miraculously worked. See thread here) I was contacted by a gentleman that had sent his broomhandle to a shop. The story of that is the chamber was messed up, he sent it back to them and they had it for an insane amount of time and sent it back still broken.
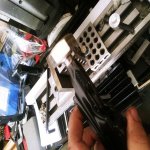
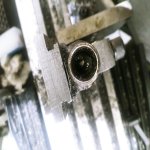
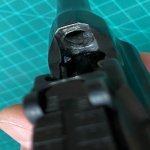
The photos kind of explain.

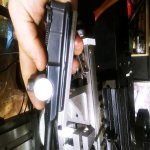
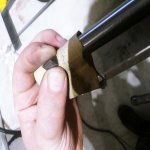
Looks good from here.

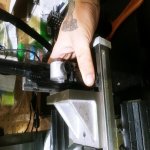
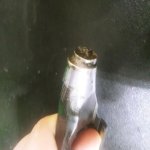
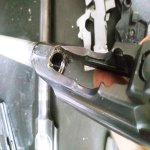
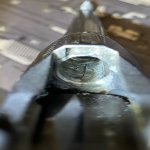
Oh dear...

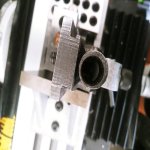
Oh the humanity!
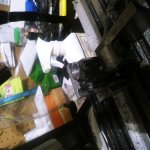
He asked if I'd be willing to see if I could do something to fix it. Me, being super obsessed with early automatic pistols and hating seeing his in that state said yes. So the owner sent me just the upper half of his broomhandle to avoid any hassle with ATTs and borrowing permissions for the full pistol.
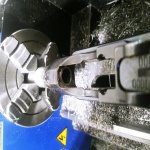
I had trepidations of how trying to ream out the liner would go. The liner was modern barrel steel and the steel a broomhandle is made of isn't nearly as tough. I had fears of my cutting tools breaking through the liner and following the path of least resistance through the original barrel breaking through the side. And that's exactly what happened. I swore a lot.
I didn't think to grab a picture of my failure but I told the owner of my great dishonor and he informed me he was cool with chopping off the barrel and making a new one. I happened to have a 9mm blank handy so the owner wanted to do a caliber swap as well.

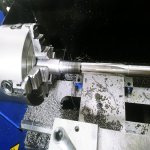
I'm sure somewhere in a poorly translated owner's manual it says something about this machine's limitations.
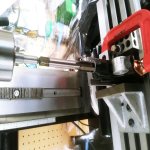
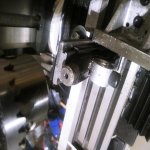
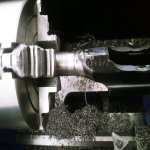
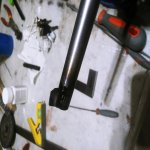
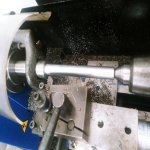
Turning a big cylinder into a little cylinder on a lathe makes for boring pictures but here it is.

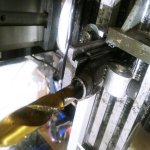
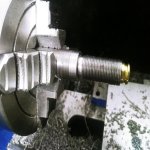
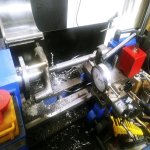
After making a bucket load of chips, I formulated a plan on how to thread the barrel extension that resembled the concept of square and straight to the rest of the pistol. To the mill!

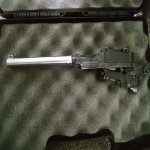
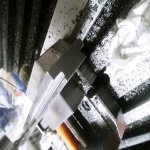
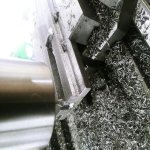
Bear with me.

See what I'm getting at?


Why these photos are all sideways or upside down is beyond me.
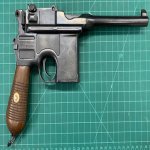
To be continued next post.
The photos kind of explain.
Looks good from here.
Oh dear...
Oh the humanity!
He asked if I'd be willing to see if I could do something to fix it. Me, being super obsessed with early automatic pistols and hating seeing his in that state said yes. So the owner sent me just the upper half of his broomhandle to avoid any hassle with ATTs and borrowing permissions for the full pistol.
I had trepidations of how trying to ream out the liner would go. The liner was modern barrel steel and the steel a broomhandle is made of isn't nearly as tough. I had fears of my cutting tools breaking through the liner and following the path of least resistance through the original barrel breaking through the side. And that's exactly what happened. I swore a lot.
I didn't think to grab a picture of my failure but I told the owner of my great dishonor and he informed me he was cool with chopping off the barrel and making a new one. I happened to have a 9mm blank handy so the owner wanted to do a caliber swap as well.
I'm sure somewhere in a poorly translated owner's manual it says something about this machine's limitations.
Turning a big cylinder into a little cylinder on a lathe makes for boring pictures but here it is.
After making a bucket load of chips, I formulated a plan on how to thread the barrel extension that resembled the concept of square and straight to the rest of the pistol. To the mill!
Bear with me.
See what I'm getting at?
Why these photos are all sideways or upside down is beyond me.
To be continued next post.
Attachments
-
 IMG_0983.jpeg96.5 KB · Views: 911
 -
 IMG_0985.jpeg68 KB · Views: 908
 -
 IMG_0991.jpeg59.3 KB · Views: 909
 -
 20211009_181951.jpg73.3 KB · Views: 909
 -
 20210709_183624.jpg79 KB · Views: 910
 -
 20210709_183532.jpg124.1 KB · Views: 905
 -
 20210709_183610.jpg90.4 KB · Views: 910
 -
 20210710_091851.jpg91 KB · Views: 904
 -
 20210710_233957.jpg123.2 KB · Views: 911
Last edited: