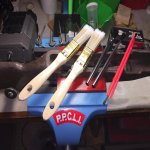
So did we talk about the tools needed for Precision work on a Norinco?? ha ha ha

I cannot resist....

Let's get this clear... I'm showing you how to do the MINOR tweaks and save some $$ so that you can upgrade your rig down the road and USE your local gunsmith for the LARGE projects (rebarreling, glass bedding, stock upgrading) and all the others things I teach on DAY 2 of an M14 clinic/camp.

For example: Doug at Ellwood Epps and I often "trade notes" on rebarreling, restocking, and other large Garand projects. So that said, I do help the Gunsmiths, too. It's a win-win situation. What's not to like ?

Another example: Casey at TacOrd and I often "trade insights" on rebarreling and Cerakoting M14 rigs. I continue to send clients like you guys to these real experts!

Okay... back at 'er....
How to Install a Boyd's Finished M1A Walnut Stock
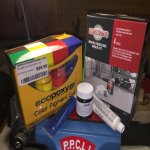
Big shout out to KCCO1988 for supplying the materials for this upgrade / project. He purchased the Boyd's Stock from the factory and then bought all the stock metalwork from Randy at TreelineM14 dot com. All that you see in the pictures are from these suppliers.
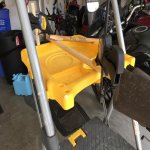
So wipe the drool off the Boyd's walnut stock before you begin to work on it.... Then using a Stock Liner tool (t-handle) or other improvised tool (ground down needle nose pliers, Like I used to do) ; begin by tightening the stock liner screws. Push on the inside of the stock liner so that the screw commences it's "bite"

The stock holes drilled are tight, tight, madafaking tight.... push hard. Put down your purse if you have to... ha ha ha ha

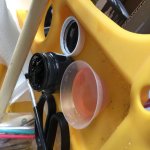
Now, since the stock is marketed to "Muricans" the M1A receivers ALL come with longer (read: correct length connector locks that are longer than Kommunist Zhinese connector locks). Notice that on your M14S / M305 receiver, the connector locks sits FLUSH when it's closed to secure the op rod spring and guide? Under magazine tension (while firing), this Xhinese connector lock can migrate/work loose and no longer contains the op rod spring and guide, and you cannot yank the magazine OUT...
You now have a major cluster fornication....
Especially of that magazine has booolits in it...
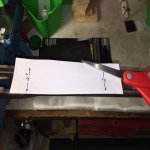
So popsicle stick fix to the rescue, or something else more aesthetically or tactical fitting needed....

Cut the popsicle stick to length ... how long? Just enough to run the length of that cutout for longer M1A connector lock (really 'Murican).

See how it fits into the cutout just nicely?

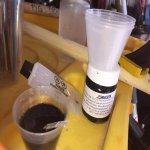
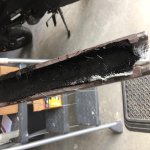
Now you are ready to glue/resin/JB Weld/Devcon (a little overkill) that portion of popsicle stick into place. Folded up duct/masking/hockey tape works but not always reliable.
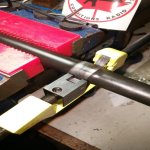
The front ferrule has to be added to the Boyd's stock. It does not come from Boyd's factory.... Align it and dry fit it without any glue/JB Weld / Devcon/ Marine Tex
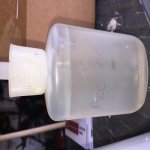
I am now ready to glue that ferrule (TreelineM14 dot com) into place... JB Weld is cheap and easy to work with. JB Kwik is nice with the 10 minute work time....

Okay now it's time to work on the sling swivel plate up front. Here are the bits and pieces that came from Randy at TreelineM14 dot com:

You will see the blackened "Phillips" screws likely about 3/8" because they don't know how thick YOUR stock can/will/should/might be when you get it. They don't know that type of stock you will be installing things on....
So here I come along with Allen drive button head 3/8" long screws .... with # 10 x 24 tpi bolts that I bought for 49 cents a pound at a local Princess Auto

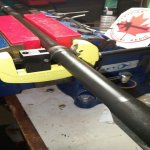
Okay position and "dry run" your screw / hardware setting including the washers and see how they come together:

Kinda hard to work upside down but be ready anyways with your sling plate:

Now be warned, the Boyd's stock is a little FAT or Phat and we had to use some 1/2" long button head Allen drive, center of the picture. See the difference?

The longer screws give you a few more options because one never knows how thick the stock will turn out to be. Many of you experts out there know that in the past I have laid down up to 5-10 layers of 10 ounce fiberglass cloth and resin in order to stiffen up that noodley front end of the USGI glass stock
The prepared holes are really small/tight/narrow and need some 'thread chasing' done; so we just screwed things in and out a few times. Then install washers and bolts...

Okay, so we have a couple of threads too long. Before we start dremel'ing things down, take your barreled receiver and trial fit to see if the gas cylinder contacts/conflicts/interferes. I do this by taping the bottom of my gas cylinder (clear hockey tape, thin masking tape, red Tuck tape) and seeing if the tape is scratched/abraded/rubbed/torn/ripped.
So either dremel them down or leave them be. You don't need me to show you how to use a dremel tool do you?

I love Milwaukee M18 fun because I have a sparky background and did work in construction....

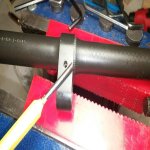
So as you can see, both the 1/2" shank screws might need some dremeling or grinding down...

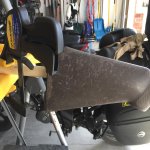
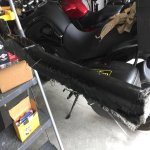
And here we are with the very clean/tactical/professional looking hardware securing the sling plate on:

Oh yeah, did I mention NOT to install the sling plate on BACKWARDS? I did this once....
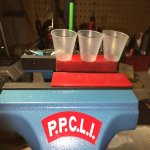
Okay, have a cold Stella or Rikards Red and watch Band of Brothers (boxed set) while fondling your walnut stocked M1A/M305/M14
Cheers and thanks for reading this post...
Barney aka Hungry aka TacticalTeacher