M1903A4-gery Build

95chris

New member
Rating - 100%
2   0   0
Location
ON
Hey everyone,

Always wanted to have the a sniper variant of the 1903 without handing over big cash for a real one. Over time I've slowly collected the pieces needed to put one together while keeping my #1 rule of not drilling an original rifle. Thought it may be fun to project to tackle as well as returning a rifle to a former glory of its time, in addition to documenting whatever troubles I may encounter. I may also include measurement and images of parts that I find of interest which may help others.

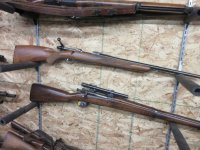
Below is the candidate rifle I've selected for the project. It's a sporterized Remington 1942 1903A3 model which looks to have been re-barreled in July, 1944. It's been drilled for Redfield Jr mount with a Tasco scope mounted on top along with a jeweled bolt which looks to have been made to clear the scope. Looks to have been reblued at some point in its life.

3bscto4h.jpg


With all that said, here is pretty much all the hardware in a exploded view. A mixed variety of [mostly] reproduction and original hardware. Please note that I'm by no means a professional so I'm learning quite a bit as I go along while reading online for methods other people have taken.

I have done some work already on smaller bits and pieces so I'll post those first. Inletting the stock will be priority #1... as soon as I get the paste I need for the job!

Looking forward to the final product as well as firing it at the range. To any who happens to join in, hope you enjoy as well!

 
Here's mine. Claven2 helped out with the scant stock. Sported rifle, various holes added to the receiver. Bolt is from a PH Midland. Looks odd because it is not closed all the way in the photo. 330 scope. Most of the stock fittings came from Numrich. Good shooter.
Is your scope a Weaver 330 or the Hi-Lux reproduction? Don't forget to remove your front sight unit.
IMG_0662.JPG
 
Is your scope a Weaver 330 or the Hi-Lux reproduction? Don't forget to remove your front sight unit.
View attachment 958218
She's a beaut, thank you sharing and inspiring me even further! I may have questions down the road for you. I'm using a Hi-Lux scope, didn't have any luck finding a 330. Of course now that that I already bought the Hi-Lux, 330s started to pop up on sites. What luck!

Funnily enough, removing the front sight unit was the first thing I did and boy was it a challenge. The sight blade was easy because it was missing half its pin... probably explains why it was wobbly. The cross pin that holes that holes the base in place did not want to come out with a punch. Not wanting to damage any thing I brought it in to work (discretely and stripped...) and had the boys in fabrication shop help me out. We made a make shift base to lay the barrel and sight to the side and used a hand press with the lightest pressure.

Only thing remaining is the key which will probably be another pain to remove.

EQE5TS5h.jpg


Another small job I did before this thread what was assemble the trigger. The rifle had a feather trigger installed which I promptly removed. A big thank you to one of our members who supplied the sear and trigger. Saved me the hassle of having to make another order on Numerich and gambling on what they consider "used" and not rusted to dust.
D0NlnGGm.jpg
wY3d6cxm.jpg


The trigger pin is one of those parts I thought it might be interesting to measure. We have these steel dowel pin that are tad thinner and longer which may work if you cut the length to size. Maybe for another project. Main picture + upper left are measurements of a original pin.

Moving on to the stock. The rear bushing I purchased seems to be larger than the hole in the Minelli stock. I suspect the stock was drilled too small for whatever reason. The trigger guard already lines up perfectly so rather than enlarging the hole I've gone and ask to have a bushing made out of steel, one with a cut and one without. I'm aware the originals have the split, I just want something to compare to.

bihZomUh.jpg
 
You could have just reamed the stock until a GI bushing fits. Your sporterized stock may also have an original bushing in it.

I would assume your new stock will need some fitting. You might want to read up on using inletting black for fit an action to a stock.
 
You could have just reamed the stock until a GI bushing fits. Your sporterized stock may also have an original bushing in it.
I'll probably end up going this route in the end. Unfortunately the sporterized stock does not have a bushing. A previous owner decided to glass bed the area. I assume they used a guide screw on the action to create the space for the bolt to pass through afterwards.
I would assume your new stock will need some fitting. You might want to read up on using inletting black for fit an action to a stock.
Yes. I've been reading a write up from a user on the milsurps forums who provided good details on what to look out for, specifically to fitting the 1903. Also read and watched general practices on inletting in general. Patience seems to be the key ingredient.

Here are the spots I marked for the initial fit. Poorly marked for your viewing:

Recoil lug - Bottom and rear face
Round surface that lead to the recoil lug side faces.
Receiver flat
Tang - "Wings", bottom and rear face

Placed slightly forward then lightly tapped aft and down

TBX0j42h.jpg


Here are the results. Starting from the forward end.

Contact on the receiver flat and a bit on the rear face of the recoil lug. Bottom of lug is clear. Doesn't appear to be any contact from the rounded areas (sides) of the receiver. Seems to be more contact what would be the left side of the receiver flat, may be the result of the tangs.

Rear

There is some contact on the tang, however the forward area of the wings are definitely touching first. Rear tang is clear for now, gap is present but I'll measure it to make sure it's in that 1/32" ballpark I read about.


Let me know your thoughts before I start removing material. Whether it's something I can do better or just general tips and tricks, I appreciate any info I could get.
 
You need to bed the recoil lug in connection with the rear tang. The rear tang must not bear against the wood otherwise it WILL act as a recoil lug and split the stock behind the tang (you see many '03 stocks damaged this way). Shims can be used behind the recoil lug to get some standoff at the rear tang if necessary. Make sure the rear guard screw can still pass freely thru the stock bushing.

The forend tip should contact the barrel so that 5-7 lbs lift are necessary to separate the barrel from the stock. The length of the stock bushing can be a factor here. There should be no contact between the top of the barrel and the metal of the upper band (the "bound barrel" situation). Sometimes it's necessary to grind away some metal from the upper band to establish the necessary amount of clearance. This doesn't show and can be retouched with Oxpho Blue Cream or another cold blue. A tube of milady's lipstick can be used as an expedient spotting agent for inletting.

Proper drilling of a new stock for the upper band screw is important.
 
If it were me, it would want 50% contact or more between the round part of the tang on either side, and 100% contact on the bearing pad flat on the tang. Like purple says, the rear radius of the tang needs a few thou of relief from the back of the tang inlet so it doesn’t act as a wedge to split the stock under recoil.

Once the rear tang is well fitted, you lower the front recoil lug shelf until you get adequate upward pressure at tip of the stock on the underside of the barrel at the muzzle.

Invest in some sharp chisels, 1/4 and 3/8 widths are good choices. You want a flat chisel, a rounded one for scraping, and a 90 degree cornering chisel. Also som fine bent files can help. Princess auto has those, bent in various useful shapes.
 
As for drilling the front screw bushing hole for clearance, I do it in the mill and make a plunge cut. A drill press can work, but get a helper to steady the stock. Start with an undersized drill. Check for fit often. If the receiver hole is off center, enlarge the stock hole with rat tail files until it’s centered again, before you drill to final size. The bushing should press in with firm finger pressure, and not fall out in its own.

If you mess up, worst case, you can oversize the hole and epoxy the busing in place with the action, bottom metal and screw to center the bushing. Use a paste wax as a release agent so you don’t glue the whole affair together.
 
Thank you both for your input. I have a few questions regarding the terms used and locations of the items you mentioned if you don't mind.

You need to bed the recoil lug in connection with the rear tang. The rear tang must not bear against the wood otherwise it WILL act as a recoil lug and split the stock behind the tang. Shims can be used behind the recoil lug to get some standoff at the rear tang if necessary

Noted. The number is see thrown around is roughly 1/32". I've seen some photos online of this exact outcome. This how it fits at this moment. The first image has the action sitting forward and second pushed back. Of course this is all test fitting. From what I understand the rear of the recoil lug has to make contact as well, shimmed or not correct?

7qn5yMHl.jpg
ClMFxKIl.jpg


The forend tip should contact the barrel so that 5-7 lbs lift are necessary to separate the barrel from the stock. The length of the stock bushing can be a factor here. There should be no contact between the top of the barrel and the metal of the upper band (the "bound barrel" situation). Sometimes it's necessary to grind away some metal from the upper band to establish the necessary amount of clearance.

By forend tip, are you referring to this area of the stock and barrel? My apologies for the silly question. If I remember correctly, the rear bushing I purchased is 1.1".

mcq8dQmh.jpg


If it were me, it would want 50% contact or more between the round part of the tang on either side, and 100% contact on the bearing pad flat on the tang. Like purple says, the rear radius of the tang needs a few thou of relief from the back of the tang inlet so it doesn’t act as a wedge to split the stock under recoil.

Judging by the images, would be correct to say that the pad has just started to make contact and is held up by the sides?

Once the rear tang is well fitted, you lower the front recoil lug shelf until you get adequate upward pressure at tip of the stock on the underside of the barrel at the muzzle.

Is the same location that I referred to as the "receiver flat"? Making sure we're referring to the same areas, just with different terminology.

Thank you both for the valuable info.
 
Last edited:
Re the forend tip. This means the end of the stock where the bottom of the barrel is bedded against the wood.

The rear face of the recoil lug must bear hard against the cutout for the lug in the stock. The clearance between the end of the tang and the stock wood isn't specified, but it must be there. For example, my real 03A4 has a .010 separation here-about the thickness of a business card. Ditto on my last project which was a M1903A1 build in a new Boyds stock.

You have already found that some fore and aft movement exists. Get the recoil lug bearing properly and then relieve the stock behing the tang if some clearance doesn't exist.

I see from your pics that the stock is already drilled for the upper band screw. Tip on seating the recoil lug against the corresponding stock cutout for it: draw up the guard screws a bit and then bump the butt end of the stock on a piece of wood before fully tightening the screws. Oh yes, the first step in fitting a stock is always to install the buttplate. Don't ask how I know this. ;)

BTW, the original sporter stock for your rifle looks quite nice. How did it fit at the recoil lug and rear tang?
 
Amazing info, both of you. I'm going to try and tackle the inletting over this week, really take my time on it.

What a coincidence, I just cleaned the buttplate. Looks like I'll be installing it... is what I be saying if the plate was sitting properly :'). Hopefully it lines up better as I removal material. One thing at a time... If anyone has any tips on getting a similar finish/stain to how the stock looks now please let me know lol.


BTW, the original sporter stock for your rifle looks quite nice. How did it fit at the recoil lug and rear tang?

Well I'm obviously not expert in this stuff but I will say that there is no forward and aft movement on the action. It has been glass bedded so that I'm sure that's why. Generous gap on the rear tang.

5uUdVNQm.jpg
 
Had a bit of time to try fitting the action to the stock. The rear of the tang was already making contact on the stock when fitting snug with the trigger guard so I thought I relieve that first. In combination of removing some material on the sides of the tangs, I was able to get a a 0.010" feeler gauge all along the tang. The pad looks a bit better. The lug and flat look pretty much the same, which leads to the next part.


I noticed a few things and would like to know what you think before proceeding any further.

Starting with the side of the tangs. The right side is making contact while the left side is barely touching. I'm able to slide a 0.005" feeler gauge on the left side, as you can clearly see through the sear area. As I mentioned, the rear face of lug and flat didn't improve much. Out of curiosity, I decided to check the length of the barrel with the 0.005" feeler gauge and found that one area has already started to make contact on the stock, and it's not the muzzle tip.


So my questions are:
1. Is the flat and/or pad preventing the sides of the tang to seat further? Would I have to relief the those areas if that's the case?
2. Do I begin to relief the areas where the barrel is already touching?
3. Which one do I begin with?

Thank you in advance.

FYI, these feeler gauges are very accurate for what they are!
 
Last edited:
I`d be inclined to establish some clearance on both sides of the tang to make sure that the recoil lug seats squarely instead of being skewed off center in the stock.

The barrel must be completely free of contact with the stock except in the chamber area (see your glass bedded stock for reference) and the bearing area at the forend tip. Don`t start bedding the forend tip until after the tang and recoil lug are sorted out. Look for 5-7 lbs pressure to lift the barrel away from the forend tip. Go slow on removing wood at the tip and don`t use a tool that will widen the barrel channel (sandpaper on a piece of dowelling the same outside diameter as the barrel works). Using a strip of paper or business card makes a good feeler gauge when working around the barreled action.

Used `03 stocks often show lack of contact at the forend tip because of the bottom of the tang compressing the wood around the stock bushing over time. This can be remedied by drilling out a small washer to fit beneath the tang. The recoil lug seating surface can act as a fulcrum to elevate the barrel out if contact with the forend tip if the wood under the tang has become compressed. This can bring the top of the barrel into contact with the upper band which is bad for accuracy.
 
I`d be inclined to establish some clearance on both sides of the tang to make sure that the recoil lug seats squarely instead of being skewed off center in the stock.

To clear some doubts about the stock itself I decided to measure the height from the plane where the tang pad sits to the where to the be edge line of the side and measured 1/2" all along area. So it's not a manufacturer error and it's just my eyes playing tricks on me. :\

I then decided to install the bushing I had made and buttoned up the trigger guard and the barreled action to a snug fit. To my surprise the tang had aligned to center (or very close to) and I was able to fit that same 0.005" blue feeler gauge with very similar resistance on both sides. The area behind the tang maintained its 0.010" of relief all around. I have another bushing being made which will have the split.


The barrel must be completely free of contact with the stock except in the chamber area (see your glass bedded stock for reference) and the bearing area at the forend tip. Don`t start bedding the forend tip until after the tang and recoil lug are sorted out.

I was under the impression the barrel is free floating except at the muzzle tip? That's the information I see online anyway. That said, there is no contact at the chamber area on this stock. I have removed the very small of contact that was present on the barrel (not near the chamber) and now the only fore end tip remains as the only point of contact on the barrel. Hoping the rear face of the lug and flat have improved once I mark it again.

Assuming the tangs are now good, if I want to improve contact at on the rear lug face and flat, it's the same process as everything else correct? Mark, relieve high spots and recheck?

Thanks again for all the help. Stock fitting is a new experience for me so I'm happy for all the info and help.
 
It's hard to say much more w/o actually examining this stock which is a commercial repro. I've installed a number of new USGI stocks as well as a current Boyds repro C stock and a Boyds sporter stock. The US GI stocks always worked out well, as did the Boyds. Used GI stocks may need a bit of correction, especially when the wood is compressed below the tang or to the rear of the recoil lug or tang.

Although pressure at the forend tip is specified for military stocks, the 03 can shoot equally well with no contact at the forend tip (both my sporters are free floating at the tip and both are MOA shooters). The caution with a military stock is that a floating barrel at the forend tip may result in contact between the barrel and the upper band.

On the barrel bedding, I'd focus on the recoil lug making sure that it bears squarely against the cut out for it. Also, make sure that the receiver behind the lug seats down flat against the wood.

Then check the barrel pressure against the forend tip when the guard screws are drawn up tight. You may need to remove some wood at the forend tip to achieve the 5-7 lbs bearing pressure of the barrel against the wood. As wood is removed from the tip, it may affect the depth of seating of the receiver behind the recoil lug as well as the amount of contact between the bottom of the chamber area and the stock. Go slow on removing the wood at the forend tip with frequent checks for contact pressure here. I just check pressure by hand, but the fastidious could use a spring balance or a 5 lb weight. It's also necessary to trial fit the upper band as work progresses to verify no contact between the top of the barrel and the upper band.

The key is to get the area behind the recoil lug fully seated front to rear and top to bottom. The wood/metal contact below the chamber area is less of an issue, but it must not prevent the receiver from bottoming fully behind the recoil lug. Sometimes a bit of shimming behind the recoil lug or below the receiver to the rear of the lug may be necessary.

Yes, the stock bushing must be split to get some spring pressure against the wood and prevent vertical movement of the bushing after installation.
 
Back
Top Bottom