Hey folks ..... ")
I bought a beautiful new Mauser from a fellow CGN member, but I think I may need a volunteer to help me get the bolt apart at least once, so I can finish doing my standard photo montage of it stripped. After reading all the warnings on other gun boards about NOT taking this particular Mauser bolt apart, I haven't attempted it so far .....
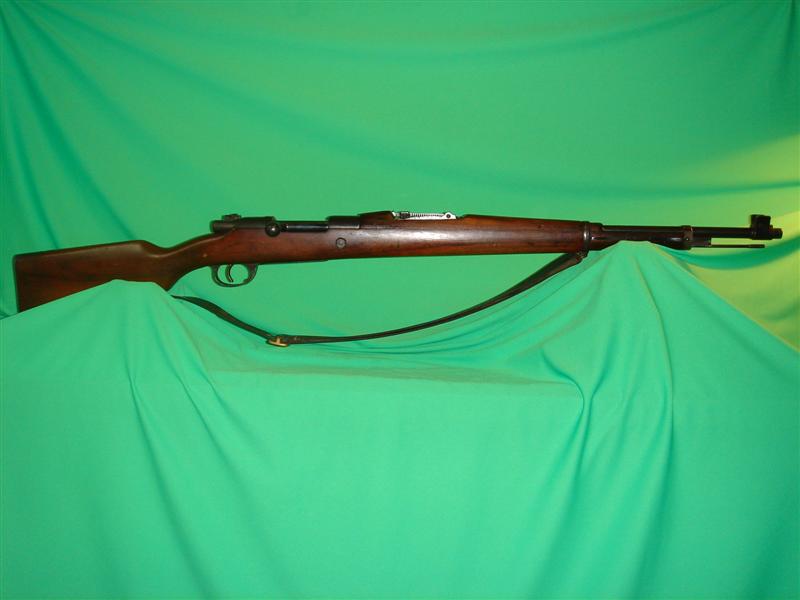
1904/39 Portuguese "Vergueiro" Model 937/M39 Mauser
(Mfg by Deutsche Waffen und Munitions Fabriken, Berlin)
Originally 6.5 x 58pmm in 1904 and converted to 7.92 x 57mm in 1937.
All matching except for bolt safety, c/w matching bayonet and original sling.
Why is the bolt safety the only part mismatched on this rifle ?
Here's a funny anecdotal story about possibly why..........
 (Click PIC to Enlarge)
 (Click PIC to Enlarge)
1904/39 Portuguese "Vergueiro" (lots more detailed pics ... click here)http://imageevent.com/badgerdog/germanservicerifles/190439portugueseg3853
So, the big question is, which one of you guys is going to volunteer to put this bolt back together, once I get it apart.....
I'll pay for the round trip shipping...
Regards,
Badger
I bought a beautiful new Mauser from a fellow CGN member, but I think I may need a volunteer to help me get the bolt apart at least once, so I can finish doing my standard photo montage of it stripped. After reading all the warnings on other gun boards about NOT taking this particular Mauser bolt apart, I haven't attempted it so far .....
1904/39 Portuguese "Vergueiro" Model 937/M39 Mauser
(Mfg by Deutsche Waffen und Munitions Fabriken, Berlin)
Originally 6.5 x 58pmm in 1904 and converted to 7.92 x 57mm in 1937.
All matching except for bolt safety, c/w matching bayonet and original sling.
Why is the bolt safety the only part mismatched on this rifle ?
Here's a funny anecdotal story about possibly why..........
http://www.saaaca.org.za/links/m1904_bolt.htm
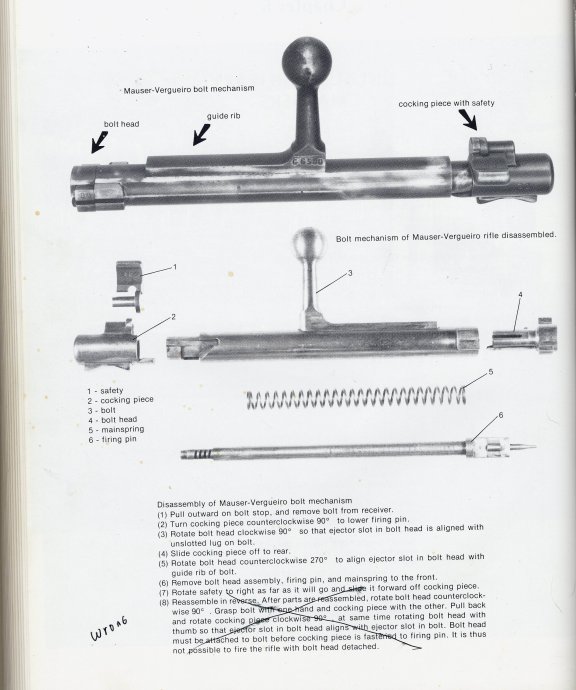
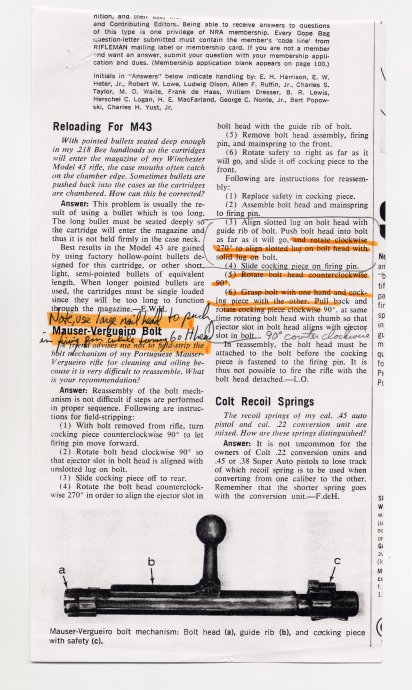
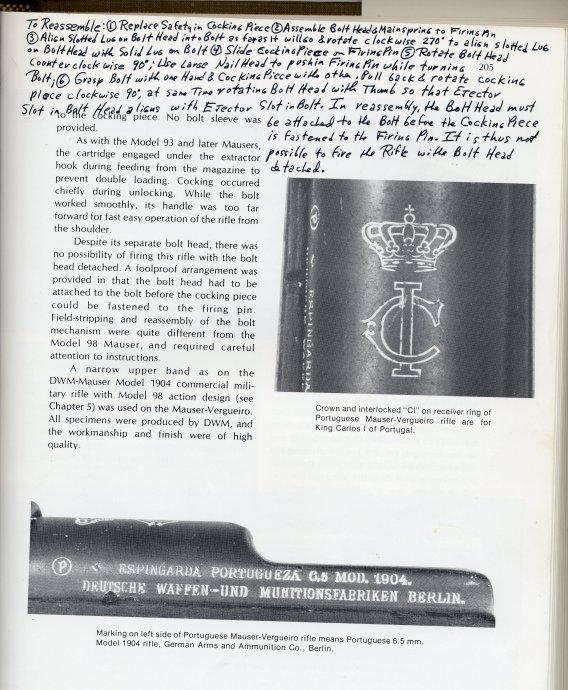
The complex nature of the M1904 Bolt and its difficult stripping and reassembly process conducive to the loss of parts, contributed significantly to the demise of this Rifle as a Service Arm with the Union of South Africa, Defence Force. UDF Troops are documented as arriving on Parade with disassembled Bolts and their parts tied in a handkerchief and many surviving Rifles today are found with replacement Bolts, or the Safety flag having been replaced, as was easily lost. Today, many M1904 owners rather do not strip the Bolt assembly, or, hand this job to a competent Gunsmith.
 (Click PIC to Enlarge)
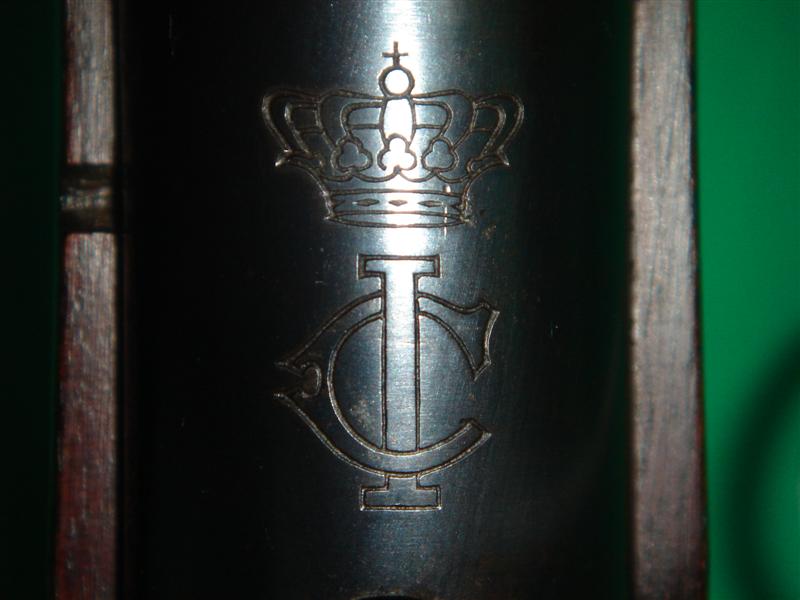 (Click PIC to Enlarge)
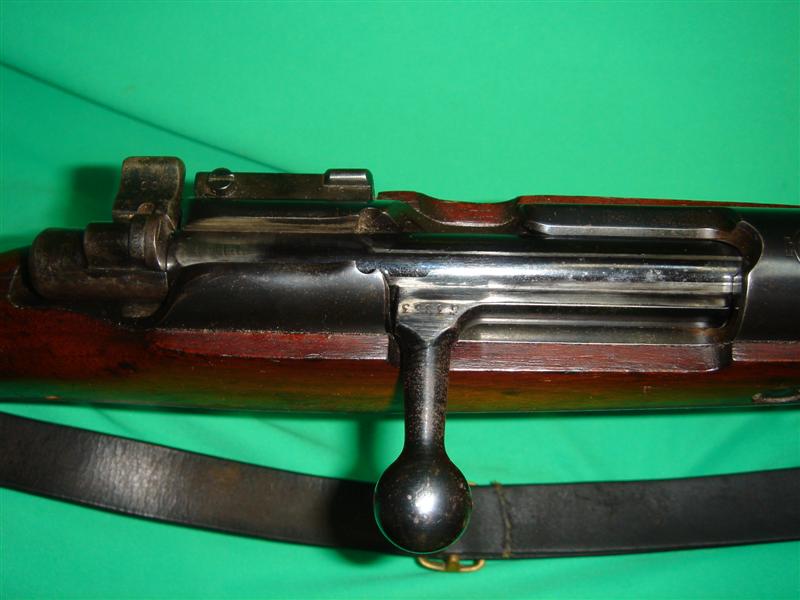
1904/39 Portuguese "Vergueiro" (lots more detailed pics ... click here)http://imageevent.com/badgerdog/germanservicerifles/190439portugueseg3853
So, the big question is, which one of you guys is going to volunteer to put this bolt back together, once I get it apart.....
I'll pay for the round trip shipping...
Regards,
Badger