


A fun project I completed, Isreali Mauser sniper clone.
A beauty Isreali Mauser came available from a fellow CGNer (Thanks Gord!). which was already drilled on the left rail.
I know, its not 8mm, but I want a shooter and 308 is plentiful.
(I decided to write this post in response to my frustration of the blatant lack of info on this subject on the internet.)
Donor Rifle, Israeli 7.62 on a Czech receiver.


After acquiring the rifle, I promptly bought the SSR mount.
Here it is with the Meopta.

Time to get to work!
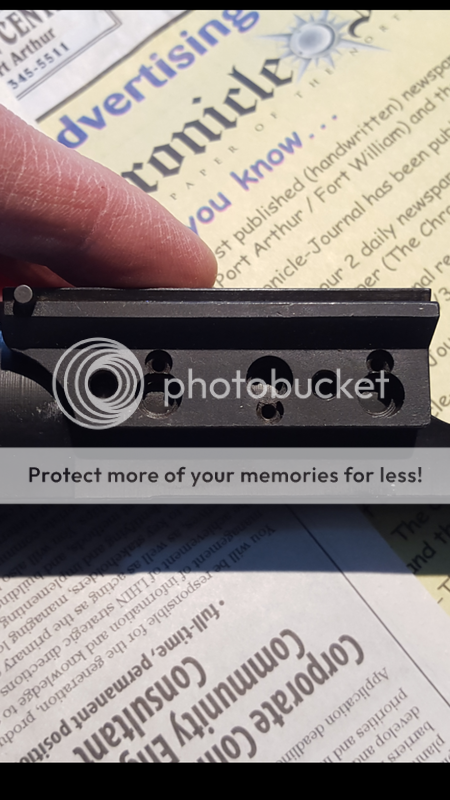
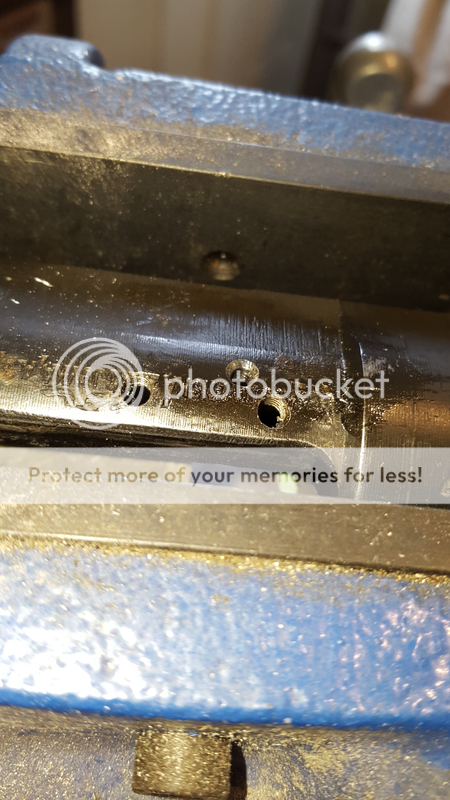
Except, the holes in the rail were no where near where I needed them, but that was ok because I could go ahead with the build without having to wait to get the holes filled.
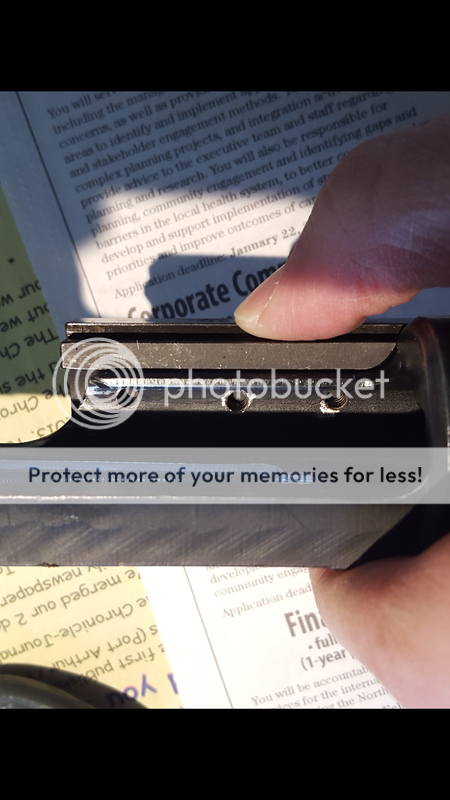
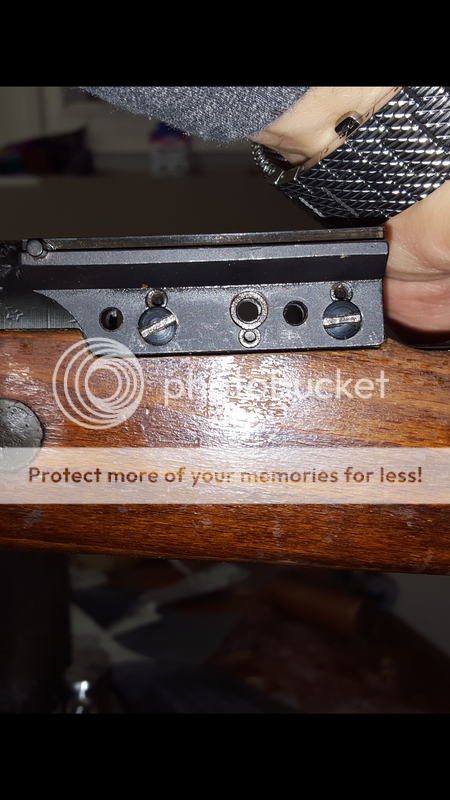
No overlap.
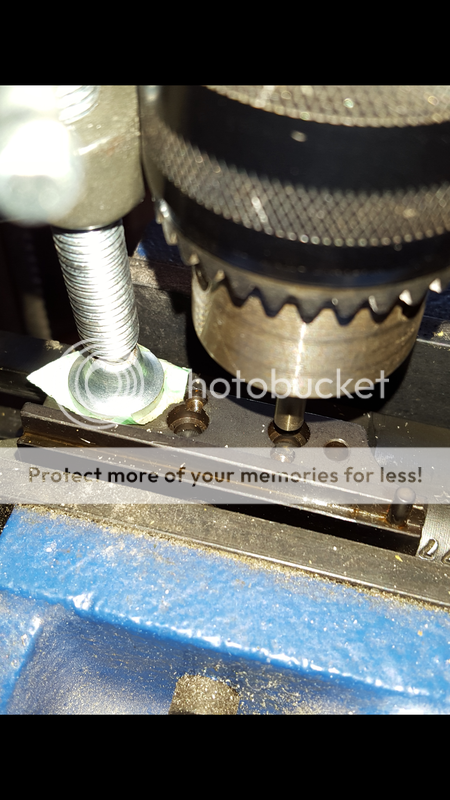
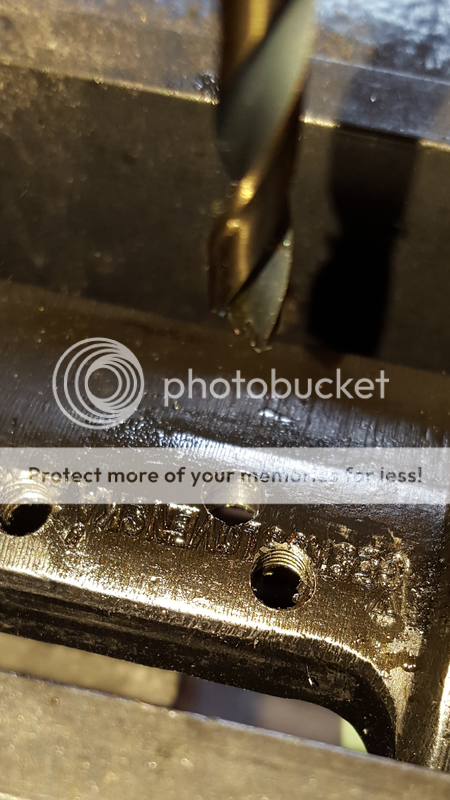
The setup in a task like this is very time consuming, getting everything level and locked in place to start the first hole took almost an hour.
Once locked in place, I centered the drill in the first hole.
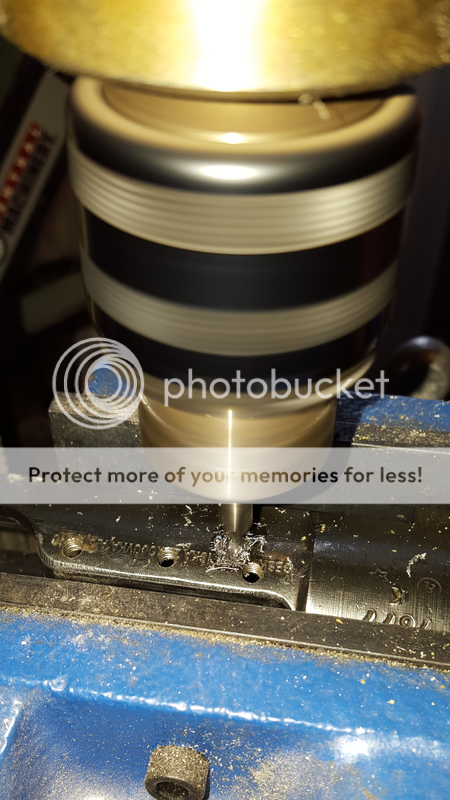
Once center, I then removed the mount and cut my first hole with a center drill to get through the case hardening.
Then drilled, nice & centered
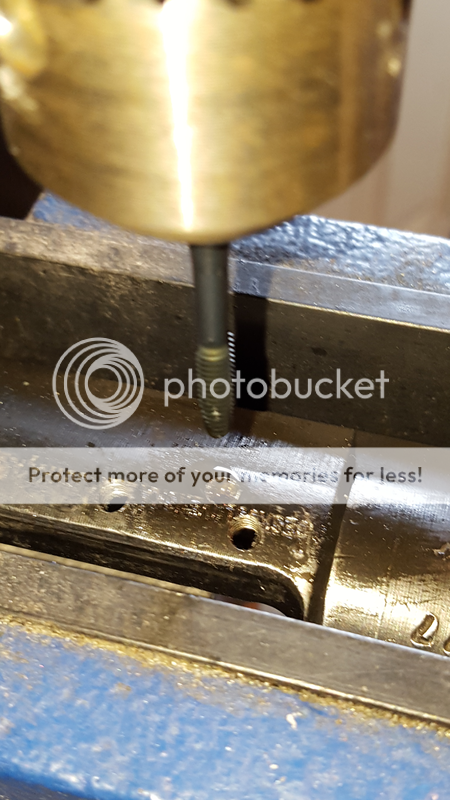
Tapping was done in the press to ensure a square thread
Start all over for second and third holes, after they were cut the locating pin holes were drilled.
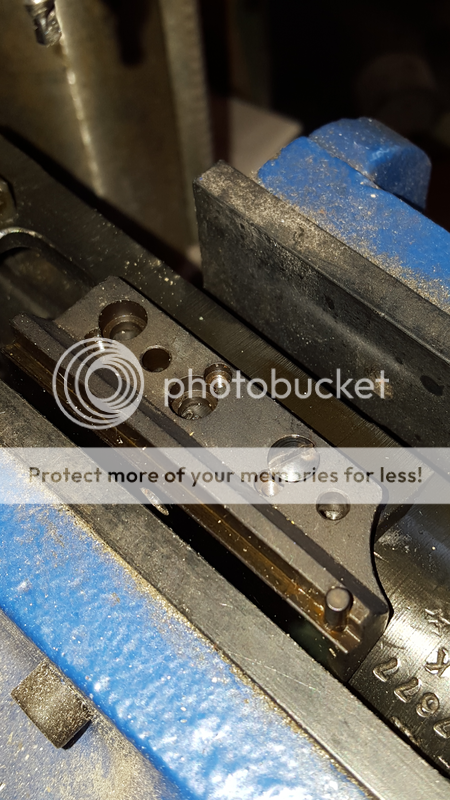
Once it was all set up, the screw heads need to be notched for the capture screws.

I know I'm going to get called out on it so I'll admit it! I did open up one of the screw slots a little (sigh), but I'll clean it up when I remove the mount again.

Being locked under the press, I had no room for a conventional driver and had to use a ratcheting wrench type, so rolling a slot is easy if not perfectly square.

Now to inlet the stock, note the spacing of the 2nd screw hole in relation to the original its close but not touching, I do still plan to fill the old holes.
(Picture makes the second hole look out of round, but it isn't.)

Rough line up

I started by cutting only half the distance to the line, then filed and sanded CAREFULLY the rest of the way.

I found this to be the most tedious and nerve racking part as you cant rebuild wood if a cut is too deep

Snug as a bug : )
The clearance is even all the way around, the picture makes it look tight at the front and back.

Half way through the build a legit 1920's Zeiss Jena Zielvier (Actual ZF39!!) came available from a great CGN'er! (Thanks again Corey!)
So, with the help from many fellow great CGNers and a VERY knowledgeable Bob, I have now added a beautiful SSR Sniper to the collection!!


That front screw slot....


Now that the sniper bug has bitten, next will be a low turret mauser sniper in 8mm, any help finding what i need on this one will be greatly appreciated as I will need both rifle and mounts.
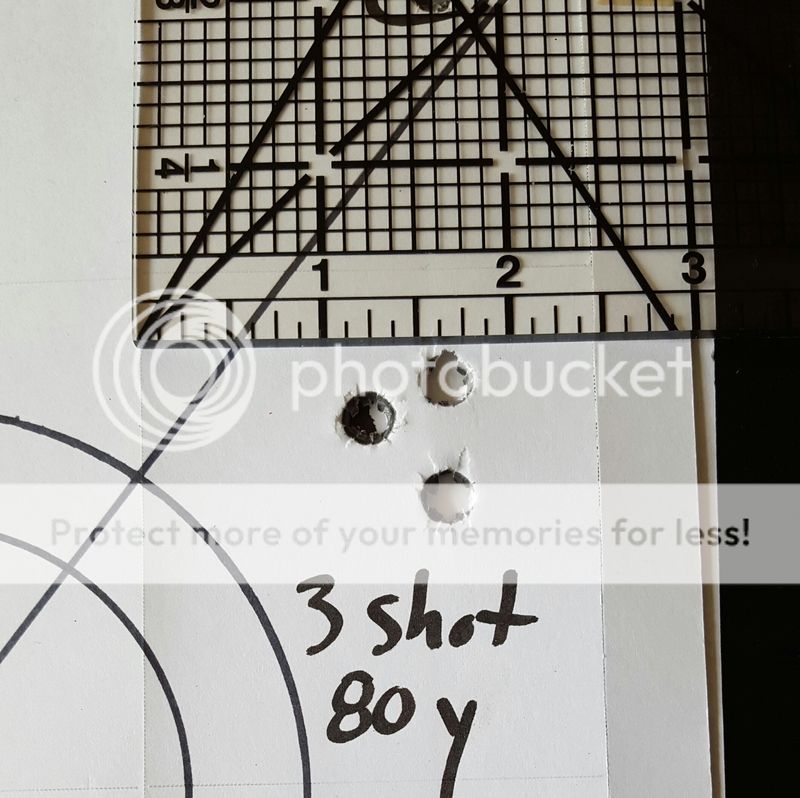
Range session!
I shot LC 13 stamped 7.62 ammo and was pleasantly surprised!


First 5 rounds, 2 sighters and scope adjustments on top then 3 for group.

This was the first and best group of the day.
A beauty Isreali Mauser came available from a fellow CGNer (Thanks Gord!). which was already drilled on the left rail.
I know, its not 8mm, but I want a shooter and 308 is plentiful.
(I decided to write this post in response to my frustration of the blatant lack of info on this subject on the internet.)
Donor Rifle, Israeli 7.62 on a Czech receiver.
After acquiring the rifle, I promptly bought the SSR mount.
Here it is with the Meopta.
Time to get to work!
Except, the holes in the rail were no where near where I needed them, but that was ok because I could go ahead with the build without having to wait to get the holes filled.
No overlap.
The setup in a task like this is very time consuming, getting everything level and locked in place to start the first hole took almost an hour.
Once locked in place, I centered the drill in the first hole.
Once center, I then removed the mount and cut my first hole with a center drill to get through the case hardening.
Then drilled, nice & centered
Tapping was done in the press to ensure a square thread
Start all over for second and third holes, after they were cut the locating pin holes were drilled.
Once it was all set up, the screw heads need to be notched for the capture screws.
I know I'm going to get called out on it so I'll admit it! I did open up one of the screw slots a little (sigh), but I'll clean it up when I remove the mount again.
Being locked under the press, I had no room for a conventional driver and had to use a ratcheting wrench type, so rolling a slot is easy if not perfectly square.
Now to inlet the stock, note the spacing of the 2nd screw hole in relation to the original its close but not touching, I do still plan to fill the old holes.
(Picture makes the second hole look out of round, but it isn't.)
Rough line up
I started by cutting only half the distance to the line, then filed and sanded CAREFULLY the rest of the way.
I found this to be the most tedious and nerve racking part as you cant rebuild wood if a cut is too deep
Snug as a bug : )
The clearance is even all the way around, the picture makes it look tight at the front and back.
Half way through the build a legit 1920's Zeiss Jena Zielvier (Actual ZF39!!) came available from a great CGN'er! (Thanks again Corey!)
So, with the help from many fellow great CGNers and a VERY knowledgeable Bob, I have now added a beautiful SSR Sniper to the collection!!
That front screw slot....
Now that the sniper bug has bitten, next will be a low turret mauser sniper in 8mm, any help finding what i need on this one will be greatly appreciated as I will need both rifle and mounts.
Range session!
I shot LC 13 stamped 7.62 ammo and was pleasantly surprised!


First 5 rounds, 2 sighters and scope adjustments on top then 3 for group.

This was the first and best group of the day.

Last edited:


