Pocket pistol trigger sear engagement

Vaterslote

Member
Rating - 100%
26   0   0
Location
Belleville, On
Hello help.

I have a TWIGG pocket pistol that the trigger appears to have had some work done shortening it enough to that it will not engage the #### and half ####. I suspect that this CANNOT we welded no to add metal. Any suggestions. I need about 1/16th added to the top of the trigger to engage onto the bottom of the hammer.

Also looking for someone that can make me a spring for this Muff Pistol. Appreciate any leads you can offer. Willing to ship or drive from Belleville On.0830A555-7385-464D-8BF8-F14ED1A891CF.jpg
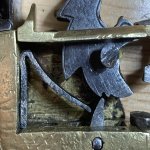
 

Attachments

  • 0830A555-7385-464D-8BF8-F14ED1A891CF.jpg
    0830A555-7385-464D-8BF8-F14ED1A891CF.jpg
    112.8 KB · Views: 135
you could weld it up use a tig and filler rod, slowly is the trick so it does not get too hot, the other option is drill a couple holes from the top, may have to make a jig to stop the drill drifting off the sides then press a steel pin in hole and file to fit
 
That is a very small part. It would take a really good TIG welder to build that up. Once built up and reshaped, the trigger could be re-casehardened.
I don't have TIG, only OA and arc. I would be inclined to file a seat and silver braze in a little piece of hacksaw blade to lengthen the trigger so that it engages the #### properly.
If it were mine, I would make a mainspring. You might call Jason at Gunco in Nepean. He doesn't specialize in antiques, but he is an outstanding gunsmith. I expect he could make a spring for you.
I suspect that the cost for a professional to make a spring might bring a tear to your eye.
 
You pretty sure someone didn't just slide in place whatever trigger they had in hand to make it look complete? To my eye, it just looks...wrong, as far as the geometry of what is left there, for it to ever have worked, even if it was longer.

Building it up or welding/silver soldering in an insert isn't a bunch of effort, but neither is cutting and filing out a complete new trigger from flat stock. KBC Tools sells Starrett flat stock in various alloys and thicknesses.

You need more than 1/16th of an inch added. To get the idea, at half ####, the sear should point straight in to the half #### notch, and the side of the trigger/sear closest to the hammer, should basically almost match the contour of the hammer to the RH side of the half #### notch. If you intended to place 1/16 inch of material on the end of the trigger, and have it engage in the position as per the current picture, it isn't going to work! At all!

To see where this should be happening, rotate the hammer until the RH face of the half #### notch is pointing at the pivot pin of the trigger. Then point the trigger sear at the notch.

Can you post a pic from a bit further out, including the trigger position?

Edit: Tried for a bit to find a decent picture that shows the relationship between the simple trigger and the two notches, without much success.
 
Last edited:
I have my doubts if that trigger spring is original.

With a flint in place, the #### should be held far enough back at half #### that the frizzen can close without contact with the flint.
The sliding safety would hold the #### back far enough that the sear tip will not be contacting the bottom of the half #### notch.
With these two conditions met, the configuration of the sear tip of the trigger should be apparent.
trevj is correct. Making a new trigger is a viable option.
 
You pretty sure someone didn't just slide in place whatever trigger they had in hand to make it look complete? To my eye, it just looks...wrong, as far as the geometry of what is left there, for it to ever have worked, even if it was longer.

Building it up or welding/silver soldering in an insert isn't a bunch of effort, but neither is cutting and filing out a complete new trigger from flat stock. KBC Tools sells Starrett flat stock in various alloys and thicknesses.

You need more than 1/16th of an inch added. To get the idea, at half ####, the sear should point straight in to the half #### notch, and the side of the trigger/sear closest to the hammer, should basically almost match the contour of the hammer to the RH side of the half #### notch. If you intended to place 1/16 inch of material on the end of the trigger, and have it engage in the position as per the current picture, it isn't going to work! At all!

To see where this should be happening, rotate the hammer until the RH face of the half #### notch is pointing at the pivot pin of the trigger. Then point the trigger sear at the notch.

Can you post a pic from a bit further out, including the trigger position?

agree I assume the spring is the trigger spring, if so the trigger should have compression on the spring to engage the notch, a larger view would be nice to see whats happening
 
I have my doubts if that trigger spring is original.

With a flint in place, the #### should be held far enough back at half #### that the frizzen can close without contact with the flint.
The sliding safety would hold the #### back far enough that the sear tip will not be contacting the bottom of the half #### notch.
With these two conditions met, the configuration of the sear tip of the trigger should be apparent.
trevj is correct. Making a new trigger is a viable option.

LOL! I've seen car accidents with a lot fewer scrapes and gouges! I'd bet it could be cleaned up pretty well though.

Yeah, the trigger should be far enough forward to bear on the spring, the sear should fit in the half #### notch securely, with the notch pointed almost directly at the trigger pivot. It's the only way that you can go to full ####, and have the sear clear the half #### notch, on firing.
 
Looks like maybe the hammer has been replace...spring is too short...trigger doesn't reach the spur...you could and can weld a new end on...yes tig would be best..but a couple hits with a mig will do the job too,or better yet make a new one..it's a small part.
An off set screw might help too..a screw with a small offset bushing to move the spur closer to the trigger..just an afterthought...
 
The OP has demonstrated an ability to post decent quality pictures.

I await pictures from further back, that will show more details!
 
Back
Top Bottom