


Friends son-in-law wanted to be able to use after-market duck-billed magazines on his SKS with the bolt closed.
Asked me if I could help - I said sure. Ended up on the internet looking at how everyone was doing this.
Surprised to find the tool of choice was a 4" angle grinder and Mark-IV eyeballs.
Given my trifocals have been giving me issues with this age thing - I figured there had to be a better way.
I have access to a Bridgeport type mill. However, the hardened SKS bolt precludes me from using any milling cutters.
I need a grinding tool of some sort - cheap.
Went to KMS tools and was able to find the following for $30.00 (Note - I just went to confirm price and they have it on sale for $19.99 (Go figure).

Assembled, it looks like this....
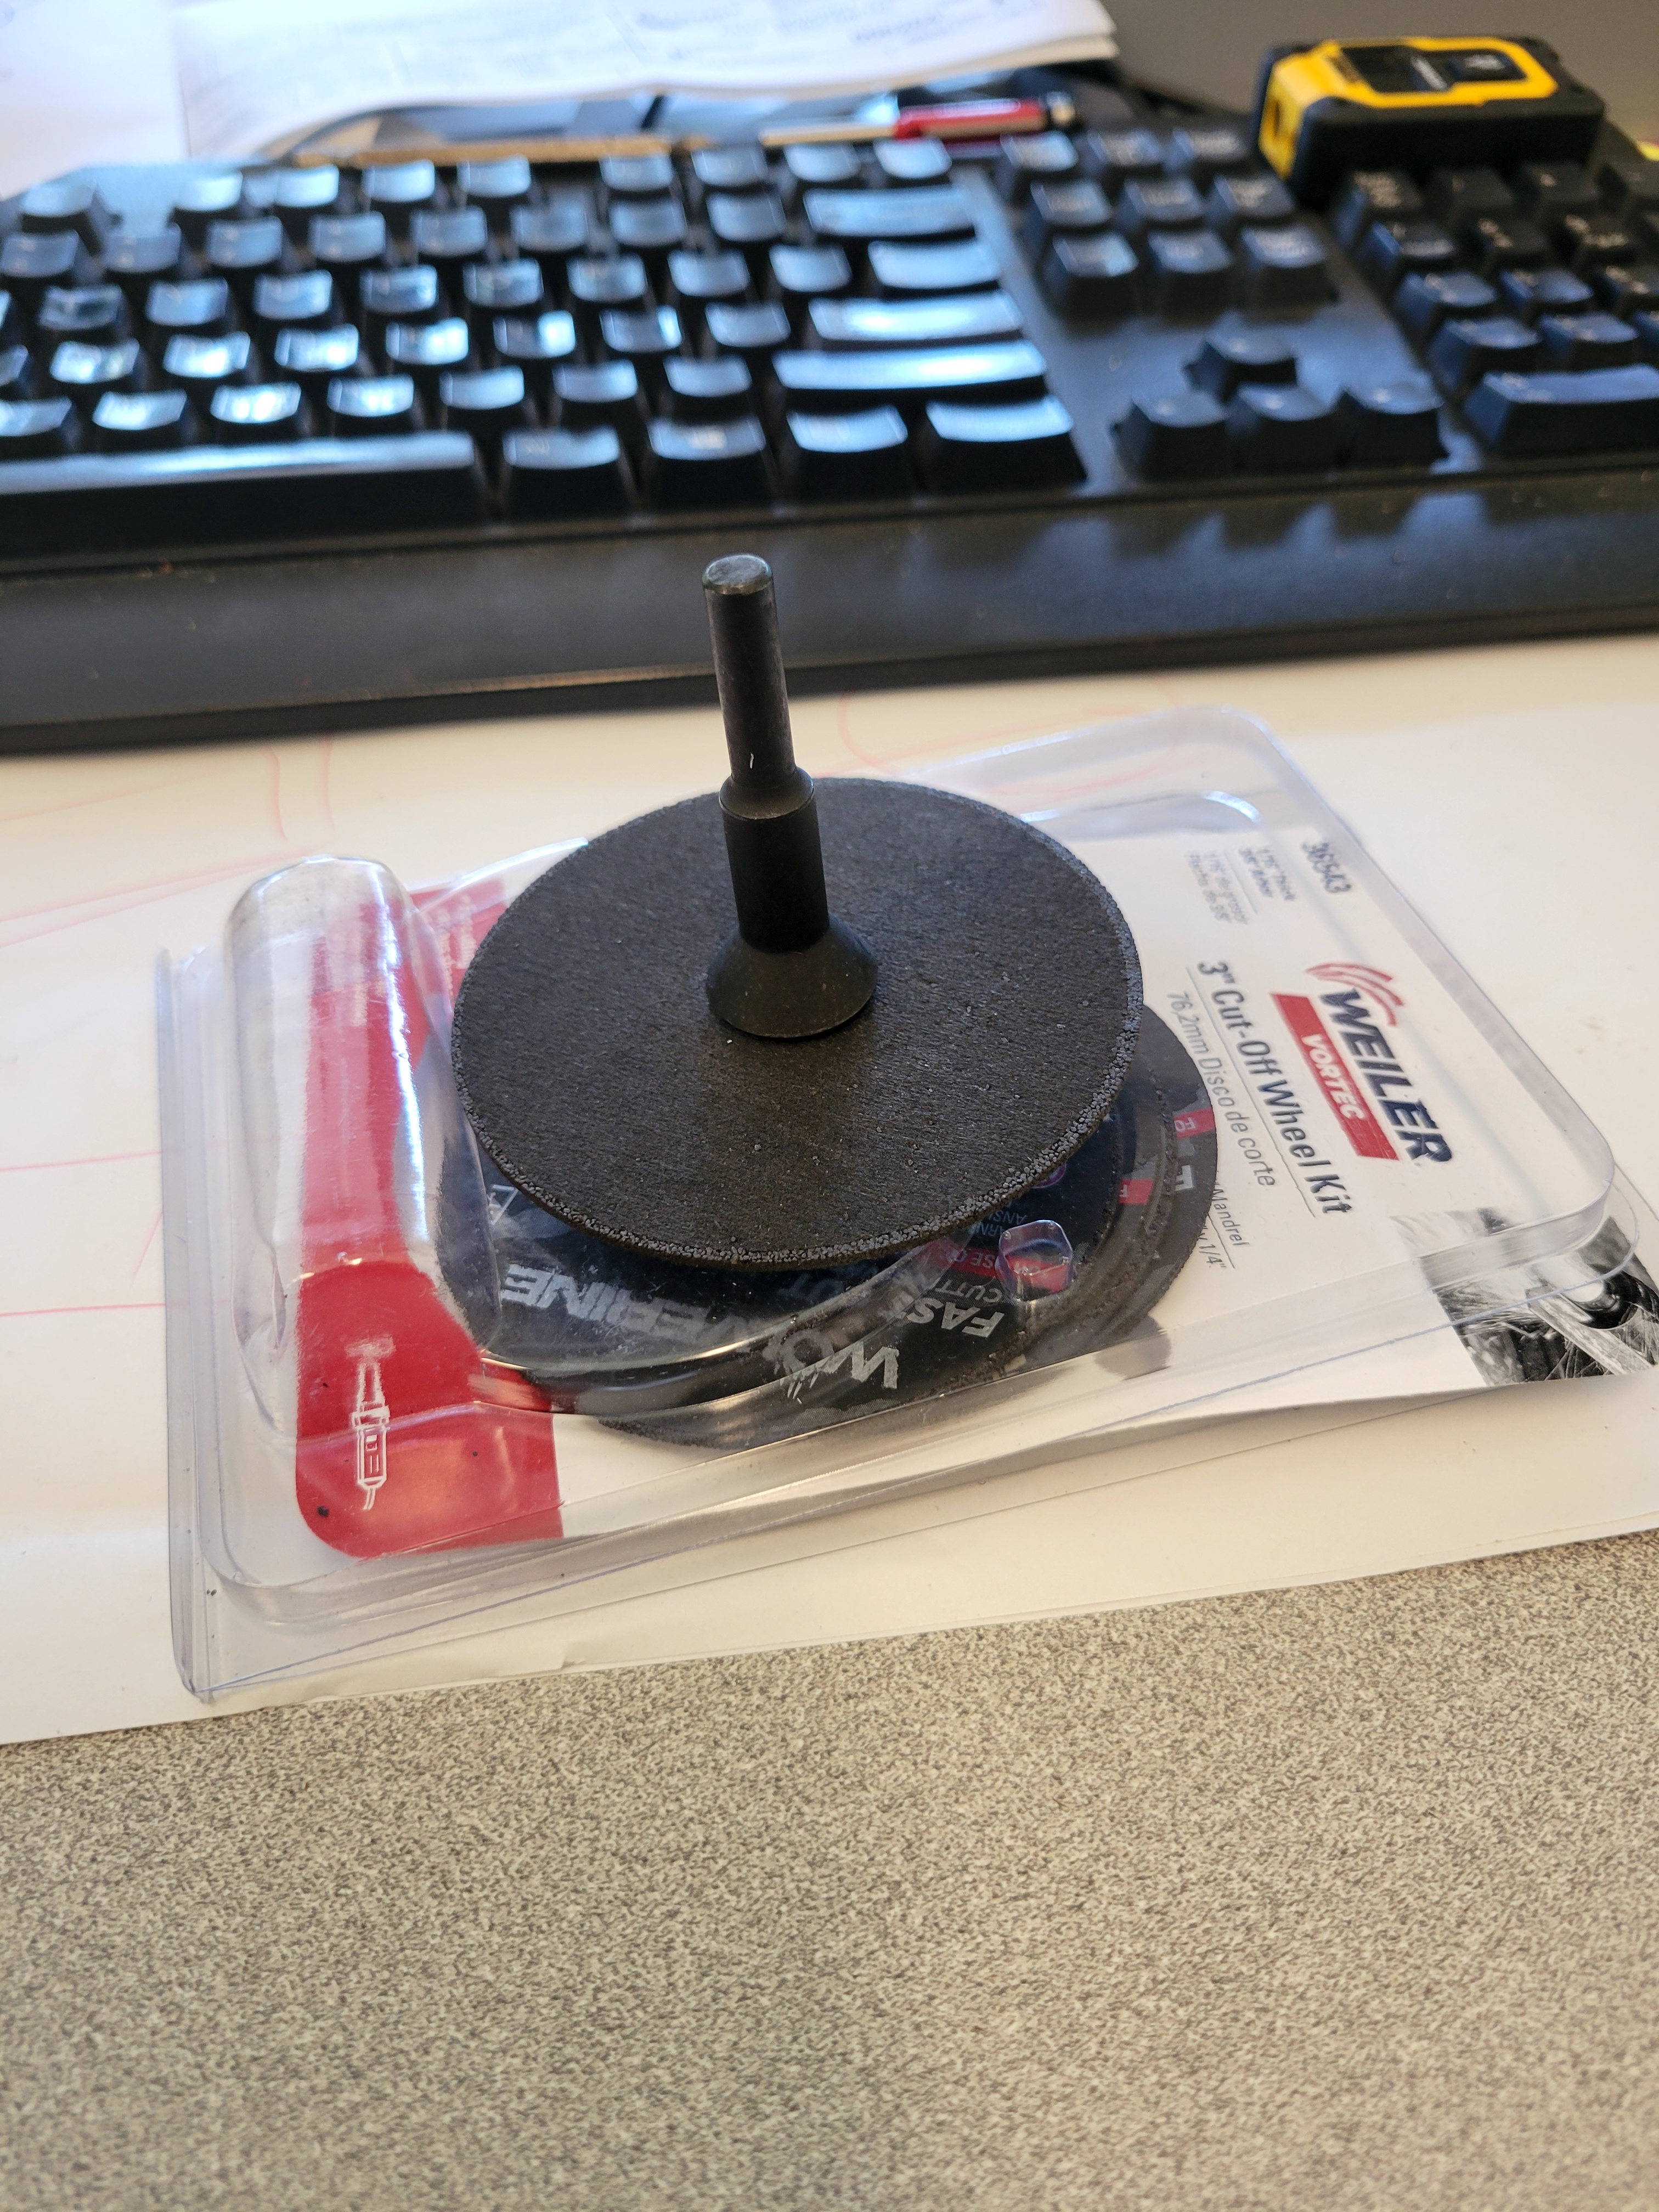
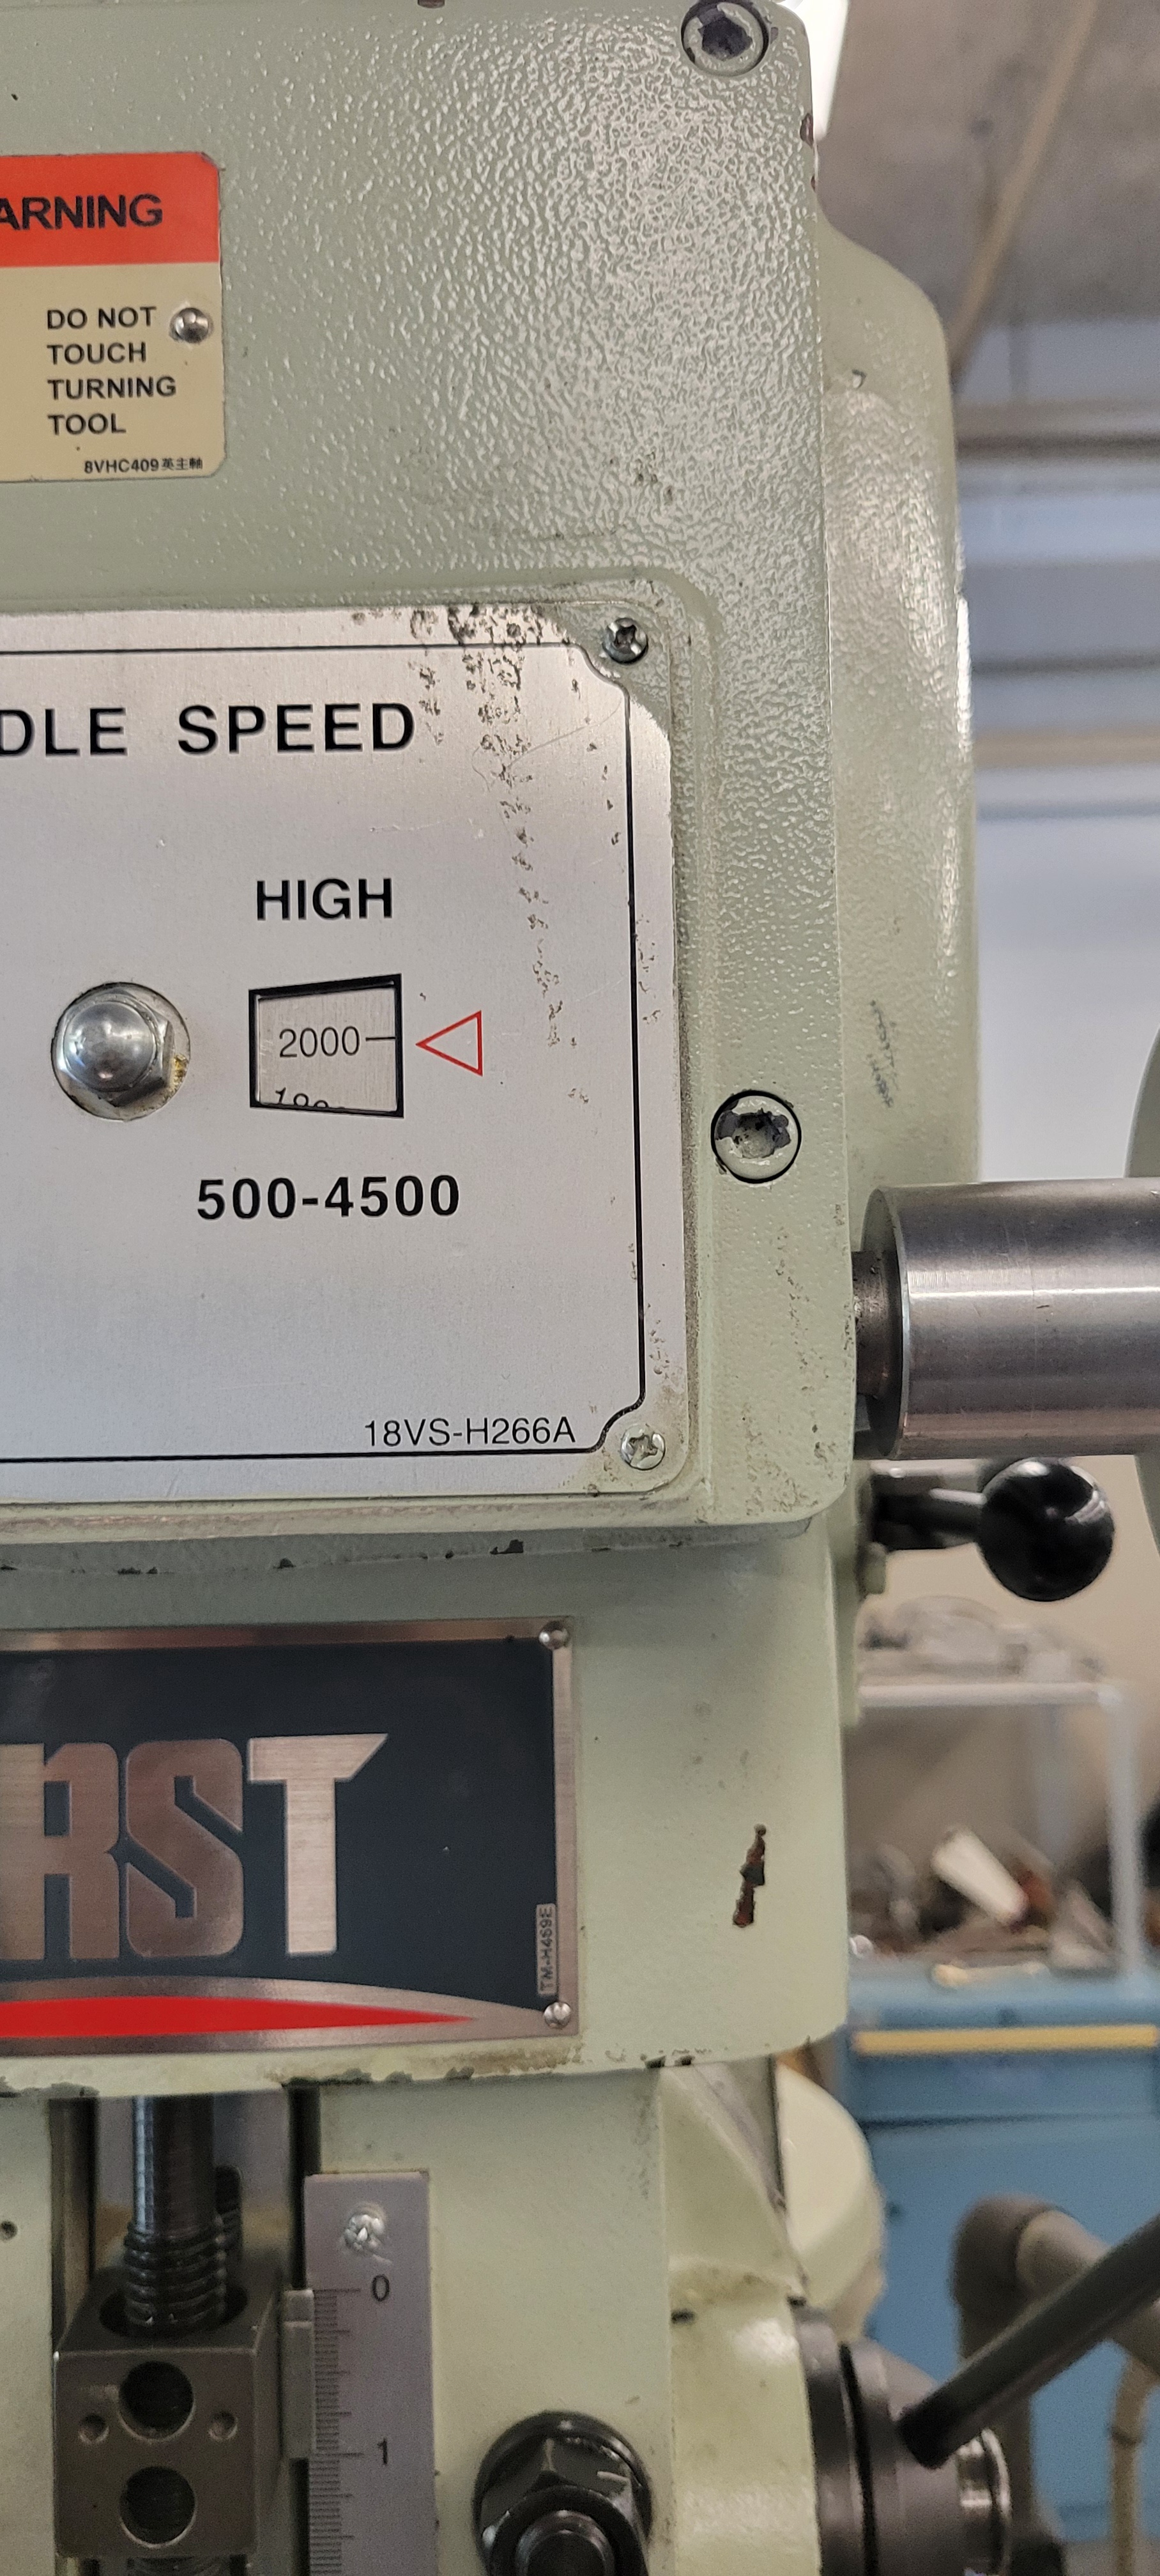
Chucked it into the mill and set the speed to 2000 rpm.
Blued the part and scribed lines at depth I need to remove.
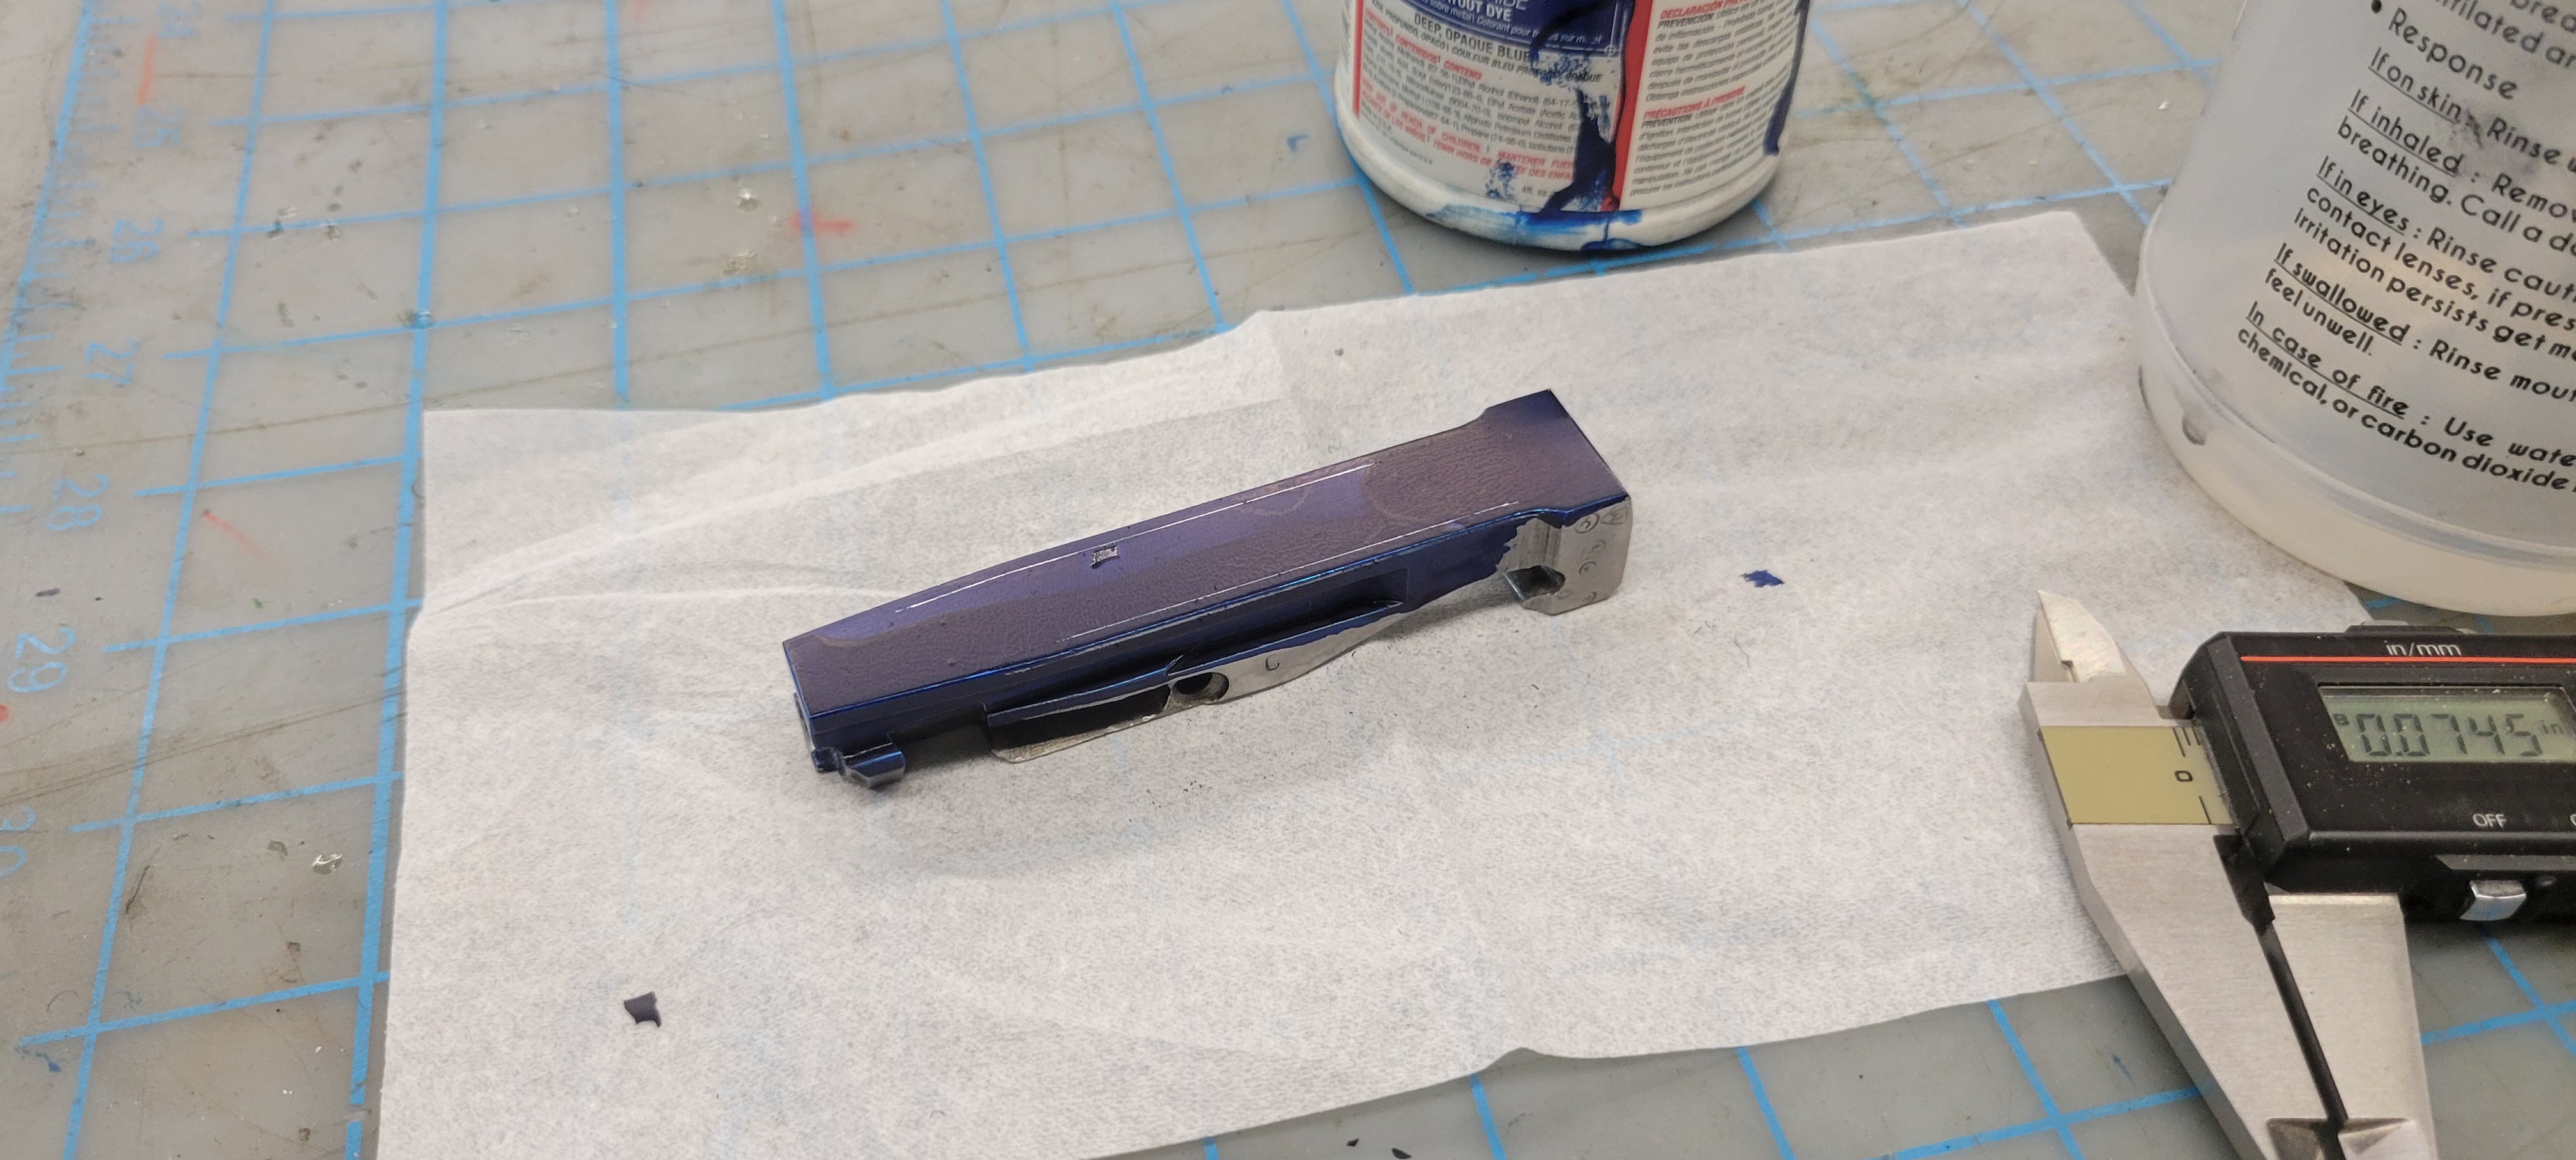
Note I needed .074 and the thicknesses of the grinding wheels is .0625 (1/16").
Due to the "wobble" of the grinding wheel - it flexes to 0.73.
THIS HAS BEEN CONFIRMED WITH THIS GRINDING DISK AND MILL RPM - Your mileage may vary.
Placed the bolt in the mill using parallels and measured runout to ensure bolt is parallel to grinding wheel.
Note - you can do this on one side but the other will need a runout gauge to get it parallel to grinding wheel.
Here is the important part - make sure the top of the grinding wheel is level with the top of the bolt.
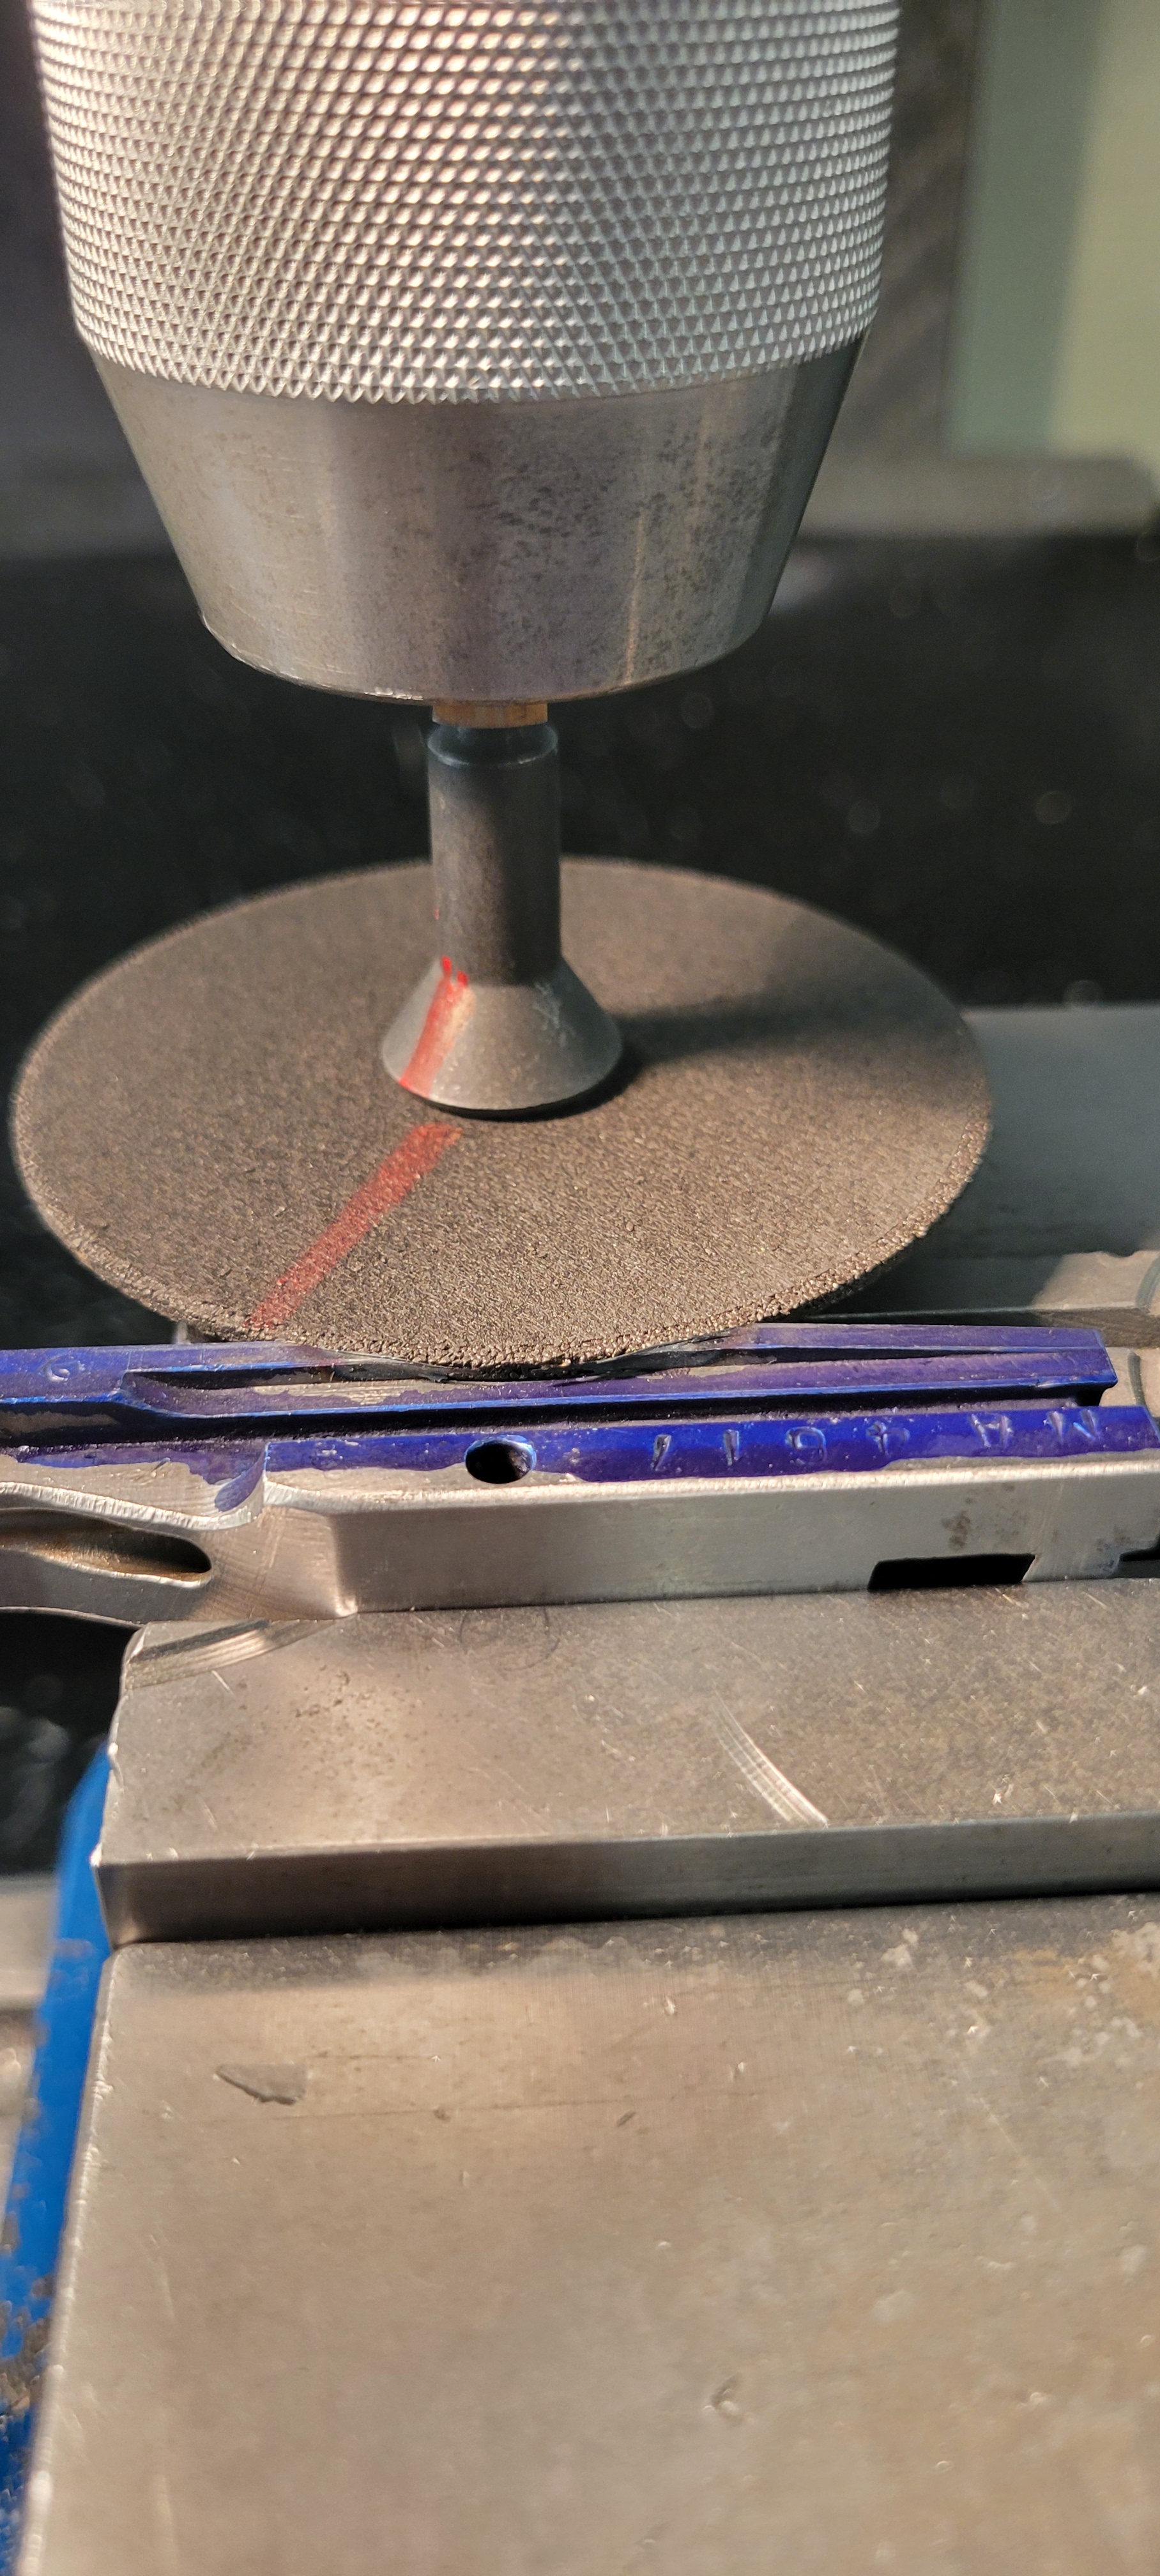
Turn on the mill and start slowly feeding the grinding wheel into the bolt right in the middle (Important). Sparks should fly out about 6" from the part.
Slow and steady. Feed the wheel into the bolt too fast and the thin grinding wheel will flex.
Go until the wheel just passes the width of the material of the bolt ledge (go slightly deeper as the width of the grinding wheel will wear down).
The idea is to remove the ledge in one pass at a known height.
Move towards the blind end of the ledge as shown. Stop just before the slot begins to curve back up.
Reverse direction and move to the opposite end SLOWLY.
The taper of the ledge at the bolt face does not support the flexible grinding wheel as well. Go super slow to prevent deflection of the grinding wheel (about 3" of sparks flying out). Take your time.

This doesn't look very clean until we perform the following.
Slightly lower the mill until sparks just start to fly and lock the height. You can now do another pass down the length of the removed bolt ledge to even out the grinding marks.
If done correctly, you will get the following results (Note - if you run your finger nail across the grinding marks - you cannot detect any edge.

I then take a Dremel tool and round out the triangular piece.
Note - smaller diameter wheels (Worn) work better as the geometry (diameter) is smaller and leaves less of the triangle. If the radius of the grinding cut is too big, then the lip of the magazine will hang up on it.
The solution was to remove the larger grinding wheel I used for the cut (larger diameter means cooler running ) and replaced it with a smaller one for final pass to clean up original marks.
Flip bolt over and repeat for the other side (check for level across the entire length of the part). I set up the mill for .001 runout and results were fine.
Remove bluing and admire your work.
Here is another angle. NOTE - I DID NOT GET A PICTURE OF THE LITTLE TRIANGULAR NUB GROUND DOWN WITH A DREMEL TOOL. Gun was back with owner before I realized a missed a picture.
Asked me if I could help - I said sure. Ended up on the internet looking at how everyone was doing this.
Surprised to find the tool of choice was a 4" angle grinder and Mark-IV eyeballs.
Given my trifocals have been giving me issues with this age thing - I figured there had to be a better way.
I have access to a Bridgeport type mill. However, the hardened SKS bolt precludes me from using any milling cutters.
I need a grinding tool of some sort - cheap.
Went to KMS tools and was able to find the following for $30.00 (Note - I just went to confirm price and they have it on sale for $19.99 (Go figure).
Assembled, it looks like this....
Chucked it into the mill and set the speed to 2000 rpm.
Blued the part and scribed lines at depth I need to remove.
Note I needed .074 and the thicknesses of the grinding wheels is .0625 (1/16").
Due to the "wobble" of the grinding wheel - it flexes to 0.73.
THIS HAS BEEN CONFIRMED WITH THIS GRINDING DISK AND MILL RPM - Your mileage may vary.
Placed the bolt in the mill using parallels and measured runout to ensure bolt is parallel to grinding wheel.
Note - you can do this on one side but the other will need a runout gauge to get it parallel to grinding wheel.
Here is the important part - make sure the top of the grinding wheel is level with the top of the bolt.
Turn on the mill and start slowly feeding the grinding wheel into the bolt right in the middle (Important). Sparks should fly out about 6" from the part.
Slow and steady. Feed the wheel into the bolt too fast and the thin grinding wheel will flex.
Go until the wheel just passes the width of the material of the bolt ledge (go slightly deeper as the width of the grinding wheel will wear down).
The idea is to remove the ledge in one pass at a known height.
Move towards the blind end of the ledge as shown. Stop just before the slot begins to curve back up.
Reverse direction and move to the opposite end SLOWLY.
The taper of the ledge at the bolt face does not support the flexible grinding wheel as well. Go super slow to prevent deflection of the grinding wheel (about 3" of sparks flying out). Take your time.
This doesn't look very clean until we perform the following.
Slightly lower the mill until sparks just start to fly and lock the height. You can now do another pass down the length of the removed bolt ledge to even out the grinding marks.
If done correctly, you will get the following results (Note - if you run your finger nail across the grinding marks - you cannot detect any edge.
I then take a Dremel tool and round out the triangular piece.
Note - smaller diameter wheels (Worn) work better as the geometry (diameter) is smaller and leaves less of the triangle. If the radius of the grinding cut is too big, then the lip of the magazine will hang up on it.
The solution was to remove the larger grinding wheel I used for the cut (larger diameter means cooler running ) and replaced it with a smaller one for final pass to clean up original marks.
Flip bolt over and repeat for the other side (check for level across the entire length of the part). I set up the mill for .001 runout and results were fine.
Remove bluing and admire your work.
Here is another angle. NOTE - I DID NOT GET A PICTURE OF THE LITTLE TRIANGULAR NUB GROUND DOWN WITH A DREMEL TOOL. Gun was back with owner before I realized a missed a picture.
Last edited:


