


Preamble:
My philosophy has always been "all things being equal - a gun that fits you will shoot better."
To this end, my poor man's trigger job resulted in a better than expected results.
However, now that I wasn't wrestling the trigger to make it go bang, I started to notice the trigger placement was less than optimal.
Problem Statement:
Wolverine's and Kodiac's modern interpretation of the design was to incorporate as many modern "off the shelf" components as possible to save on cost.
As such, the AR pistol grip, which was designed for a horizontal receiver - is being used on the angle receiver of the WK 180.
Combined with a factory "finger rest" AR pistol grip -- results in the plane of the finger being higher than the trigger curve. You have to reach "down" to activate the trigger instead of straight back.
In addition, the length of pull is reduced on the trigger which makes placing either the tip of the finger or first joint (depending on which you prefer) awkward for those with longish fingers.
A secondary issue with this high finger configuration is that it sits close to the safety when in the "bang" position. You may notice that it is shorter than the original 180 for this reason. Original length safety would make contact with the side of the trigger finger and opposite thumb (ambi).
The use of standard AR pistol grips is the root of the problem. The solution is to use a modified AR pistol grip.
Solution:
In order to
a) Change the trigger geometry,
b) Lengthen trigger pull
c) Move the hand away from the receiver
I ended up modifying a Magpul MOE K2+ grip.
I selected the K2 grip as it is designed for SBR or PDW applications where the short buttstocks result in the stock AR pistol grip being too angled.
Firstly, the K2 grip is more vertical than the stock AR grip.
Secondly, the recessed beavertail and web indentation force the hand to position itself lower.
Thirdly, they made the diameter slightly wider, which increases the trigger pull length.
Finally, the rubberized grip of the K2+ keeps your hand in place when things get sweaty or wet.
Modifications:
Purchase a Magpul grip.
https://www.magpul.com/products/moe-k2-plus-grip-ar15-m4
You either have to purchase a shorter screw or cut the supplied Magpul Pan Socket Head Screw (1/4-20 UNC -3A) by about a quarter of an inch (1/4").
I shortened mine by threading on a nut until it stopped at the factory supplied thread sealant. Then took a hacksaw to the treads using the side of the nut as a guide.
Removing the nut takes out any burrs created by the cut (Poor man's rethreading die) while a quick pass on the disk sander squares up the end. I turned off the disk sander and while it was almost stopped I beveled the cut end to facilitate easier threading into the receiver. Hint: if you insert the hex head key into the screw and then hold the head of the screw against the allan key - the combination will allow you to hold it pretty firmly while chamfering the cut end.
To modify the grip you will have to remove a portion of the beavergrip.
I didn't photograph the process (for which I apologise).
After the fact photo:

Take the grip and offer it up to the firearm. You will notice that the vertical surface of the grip will fit onto the receiver cut-out but the top horizontal edge will not as the beavertail makes contact with the receiver.
Making sure you firmly force the front of the grip into the receiver measure the horizontal gap between the grip and the receiver. This is the amount you will have to remove from the top of the beavergrip.
What you will need is a straight edge the thickness of the gap. It turns out that one of the allan keys in the set I had was close to the width I needed. (it was slightly smaller but this allowed for me to account for the pen offset).
While holding the grip in place I placed the straight edge (allan key) along the bottom edge of the receiver. This gave me the correct angle I needed to cut the grip.
I then had a helper use a pen to mark my cutting line. If there is only one of you I would suggest using painters tape and run it inside the trigger guard to hold the grip securly in place while you mark.
Using a disk sander I ended up removing the bulk of the material while maintaining a straight line.
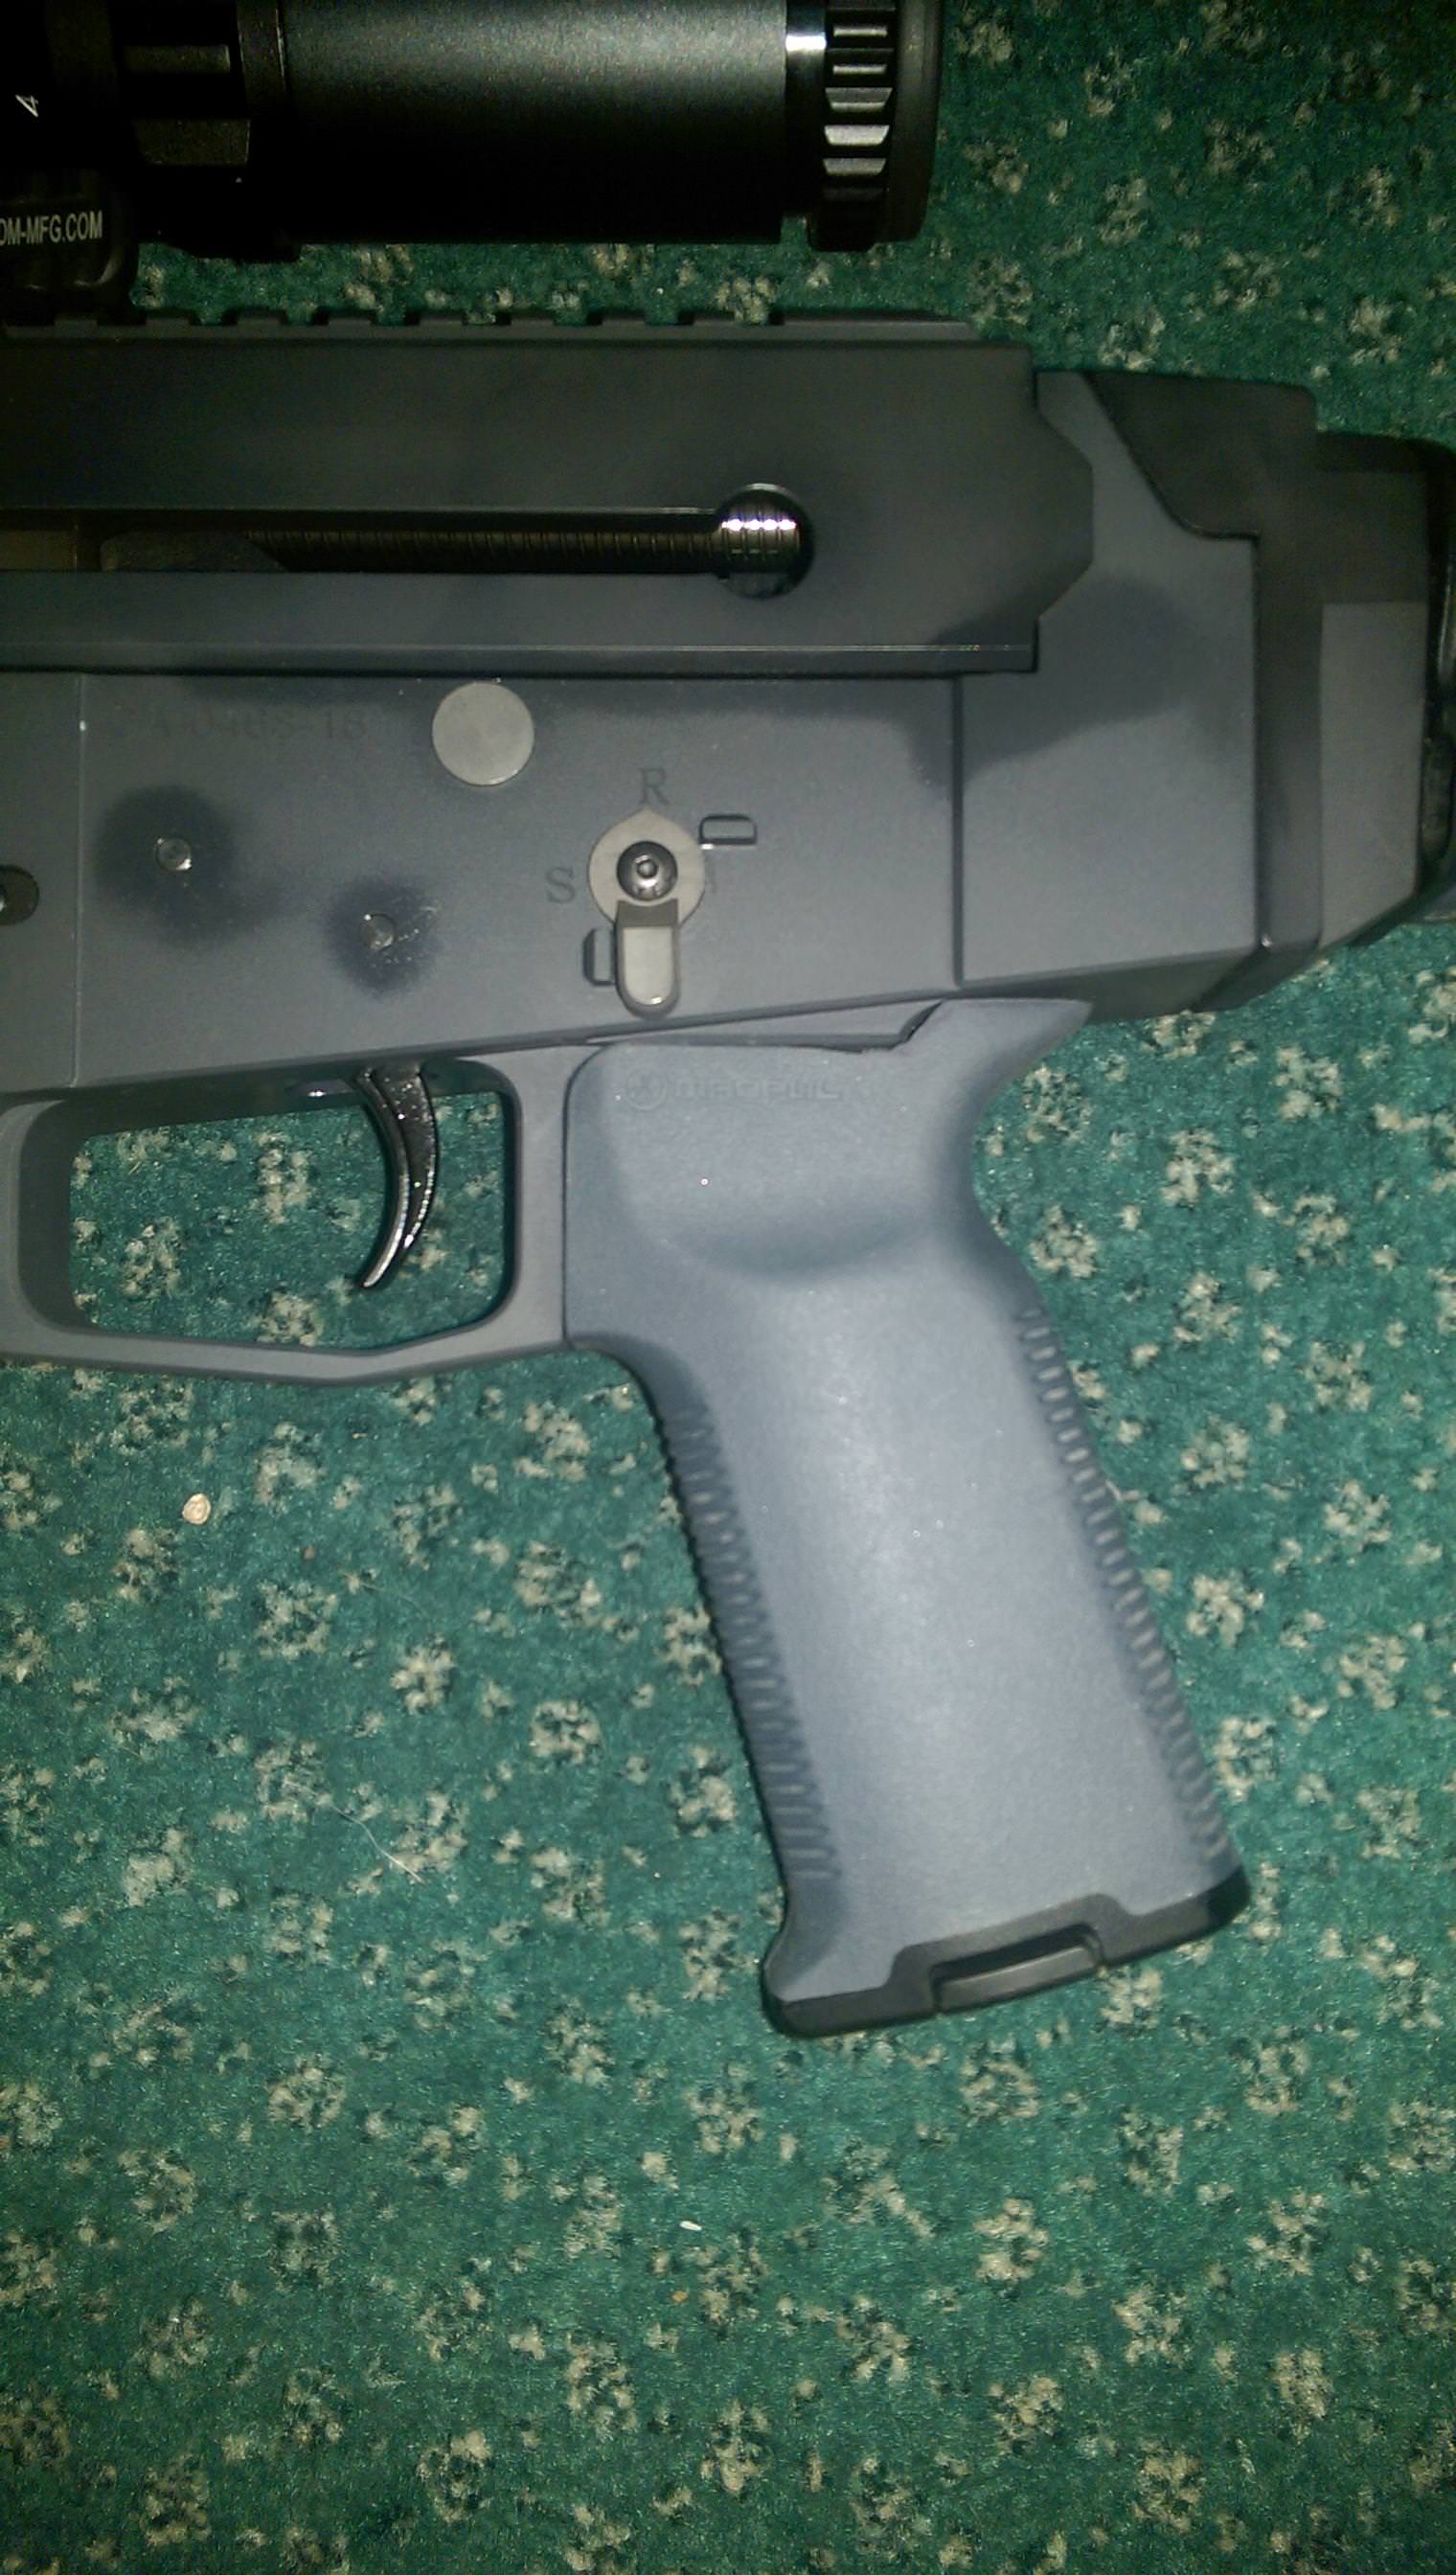
Note -due to the WK 180 curved fillet at the rear of the existing factory grip the Magpul top horizontal shelf will have to be extended and rounded with the judicial use of the Dremel.
My curve is slightly off which is why the back of the grip still has a slight gap.
The difference in feel between factory supplied and this grip is outstanding. Geometry has been corrected as well as the length of pull. As an added bonus the finger/thumb is no longer anwhere near the safety which would allow for a longer and thicker verson to be developed/used.
Sorry for the long winded explanation.
The final results (Note - I chose Magpul Gray for the Moe fixed stock, pistol grip, and Filler panels as I thought they matched the finish of the gun better than the black versions (See scope color for comparison)). The actual color of the pistol grip and stock closely match. The flash of the camera on the two different materials (grip - rubber / stock - hard plastic) makes them contrast in the picture.

L
Last edited:


