Method of punching a receiver Solved

tokguy

CGN Ultra frequent flyer
Rating - 100%
93   0   0
Location
Buffalo Republic
It's an older European method of using a punch to impart a matte type (term?)finish onto a rifle receiver.
Was out for a stroll with a sportered 1891 yesterday and was wondering about a way to clean up the receiver where the Argentine crest was ground off.
The rifle is a fine piece of the gunmakers art...but will never be worth anything sadly.
I saw an article on it in Rifle Magazine...but darned if I know which one.
Any direction I should follow?
 
Last edited:
I'm trying to recall more, but I think they used it on German remanufactured sporters after the 1st 'War to end all Wars'
Lots of unemployed machinists and scant work made for lots cheap 'midgrade' sporters based on Kar98 platform. Lots of scrubbed receivers to work on.
 
Perhaps a person could use a small nail set to create a circular pattern. You would need a good quality nail set with a hardened tip in good condition. One could also use a small 1/16" letter stamp such as an o or an x. I have also heard/read of folks using a fine rasp by laying the rasp on the surface and tapping it with a hammer, but can't imagine that method producing a pleasing result. Not the best way to treat for a good rasp either. Methinks it would be best to experiment on a piece of scrap round stock before having a go at the receiver.
 
Perhaps a person could use a small nail set to create a circular pattern. You would need a good quality nail set with a hardened tip in good condition. One could also use a small 1/16" letter stamp such as an o or an x. I have also heard/read of folks using a fine rasp by laying the rasp on the surface and tapping it with a hammer, but can't imagine that method producing a pleasing result. Not the best way to treat for a good rasp either. Methinks it would be best to experiment on a piece of scrap round stock before having a go at the receiver.

There is likely a video or article out there, I'll ponder it for a bit
I don't think the receivers should be that hard, they are scrubbed...remember, any Case hardening is gone at this point
 
Last edited:
circular patterns we used a wooden dowel faced square and put in drill press, use oil and grinding dust rotate slowly and contact the work, move over random about half the circle and repeat, it was called engine turned finish, see it on old watch movements
 
Get a concrete nail, carve your pattern with a dremel. If you make two or three points on the tool face, you can index your spacing. Mark the top so you know what your orientation is.
 
Practice guns I have, :)
I'm not thinking of a pattern so much as the entire receiver ring to start, going to have to use a 'Pretty Broad Brush' to make the grind marks go away.
 
Take a center punch, buff the point until it's round and smooth. May have to harden the tip again, then re-polish.

A light hammer, either a small ball peen hammer or if you can find one, an engravers hammer, with it's wide flat head.

Hold the punch lightly, and tap at the top end with one hand while moving the impact location around with the other. You are trying to be a heavier duty, version of the electric engraver pen, except with control, and accuracy of movement.
You want to hold the punch so the tip is above the point you wish it to hit, and lightly enough that when the hammer taps it, it strikes, then rebounds back to the same height. You have to be able to strike the punch without looking at it so much, you want to be looking at where the punch is striking, and be able to control that, both in position and depth of the mark, as you see what it is doing.

Practice on some steel.

That will give you a rounded dot pebbled surface. Play with different point shapes for different textures.

Worth casting an eye on some of the pictures that go up on the Auction sites, for the old school engravers that worked at the various gun makers, back when it was a bit more common to mail order a fancy gun when you wanted one. If you look at the patterns used as filler and background, you can usually work out what the shape of the punch they used was.
 
Get a concrete nail, carve your pattern with a dremel. If you make two or three points on the tool face, you can index your spacing. Mark the top so you know what your orientation is.

This is sort of the same method master checkering cutters use and we all know how precise they can be, the trouble here is how close together do you want your peen marks to be.

Getting rid of the "mill marks" is quite easy with an "ohh f##@k " tool (Dremmel) using those little emery paper disc's they make. Use two at a time on the holder for an added bit of rigidity to the paper, you'll need lots of them, but a shiny smooth starting point for your peening will be had.

The amount of time & effort will determine what sort of finished outcome you will get, some of the aforementioned methods would sure suffice for a "one-off" acceptable job....However....

If you want to go the extra mile for a "professional looking job that you will show every gun nut you know, making him aware that "you done this".

I am lucky enough to have a milling machine in my shop so am able to suggest that if you have access to one of your own or a hobby machinist friend that has one, read on.

I would build some sort of rudimentary hold-down jig to firmly attach the action to the mill table(wont have to be terribly hard to build even a wood one would suffice). Now I would build a punch holder attachment that can be held in the quill drill chuck and offset enough to allow a hammer stroke without hitting anything ( envision a simple piece of rod for the chuck side and a flat piece of steel welded right-angle to it that has a "form fitting guide hole for your punch of choice to slide snuggly but freely in, ten minutes to build) . Now, with the action orientated & firmly held to the table, lower the quill until the punch holder has clearance above the action ring, now lock the quill with it's "travel stop". Move the table to perfect your first punch stroke where you want it...now you can use the one table wheel marked in thousands of an inch to space every punch mark to follow. When one row is done, unlock the action and rotate the amount desired for the next row. It might sound like a drawn out affair but the reality is that once the action is mounted on the table it will have taken longer to type this than do the job .
 
And she calls me a hoarder!
May 2013 of Rifle Sporting Firearms Journal. Light Gunsmithing by Gil Sengel 'The Mystery of Matting'
I knew I had it yet, lol
That rotten Old Cooey 60 will be the first practice piece.
This is what I want.
KCNW9nsh.jpg


Another piece.
G59hcFrh.jpg
 
Last edited:
Google -metal stippling. I haven't figured out how to do links yet.

That isn't really ground breaking advice, friend. I tried that earlier today. Vagueness.
Finger's advice was quite welcome though. But this a good article... as I said midgrade Sporters at best. Which is kinda how I roll, lol. More bang for your buck that way
 
the mauser looks to be done with a 4 point punch. The pattern stands out if you look at it closely.
but like they say, that was done before the metal was hardened.
 
Brownells used to sell metal stippling punches but I see they only have ones for wood now, and internet searches didn't turn up much aside from various single-point tools.

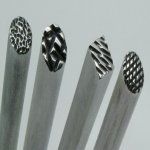
There is a set on eBay:

s-l1600.jpg
 

Attachments

  • s-l1600.jpg
    s-l1600.jpg
    26.8 KB · Views: 180
the mauser looks to be done with a 4 point punch. The pattern stands out if you look at it closely.
but like they say, that was done before the metal was hardened.

Well, before the case hardening is easily done...the receivers are scrubbed. No case hardening on the receiver ring.
 
Back
Top Bottom