


So as many of you know, every year or so I come out with some modified DIY project involving 3D printing for one of my cheaper guns.
Now I have a newer.... better... 3D printer. A Creality CR-10s PRO V2.
So I bought an old Squires & Bingham model 30 locally (in rough shape) and got to work on it.
The butt plate was broke, the barrel had been cut, and the "new" bead was off about 8 degrees to the right.... Needed some work.
I pulled a ATI heatshield with built in ghost ring sights off of a donor 870, and installed it onto the Model 30.. sights were acceptable again.
Then decided I wanted to replace the extremely fat pump handle (which was loose as could be... and slippery to boot) with a 3D printed one... How hard could it be? - as it turns out, took me three tries to trial and error the right placement and reference geometry for the pump to clear the barrel... but hey, the printer runs at night so waking up to new parts every day is kind-of like big kid Christmas.
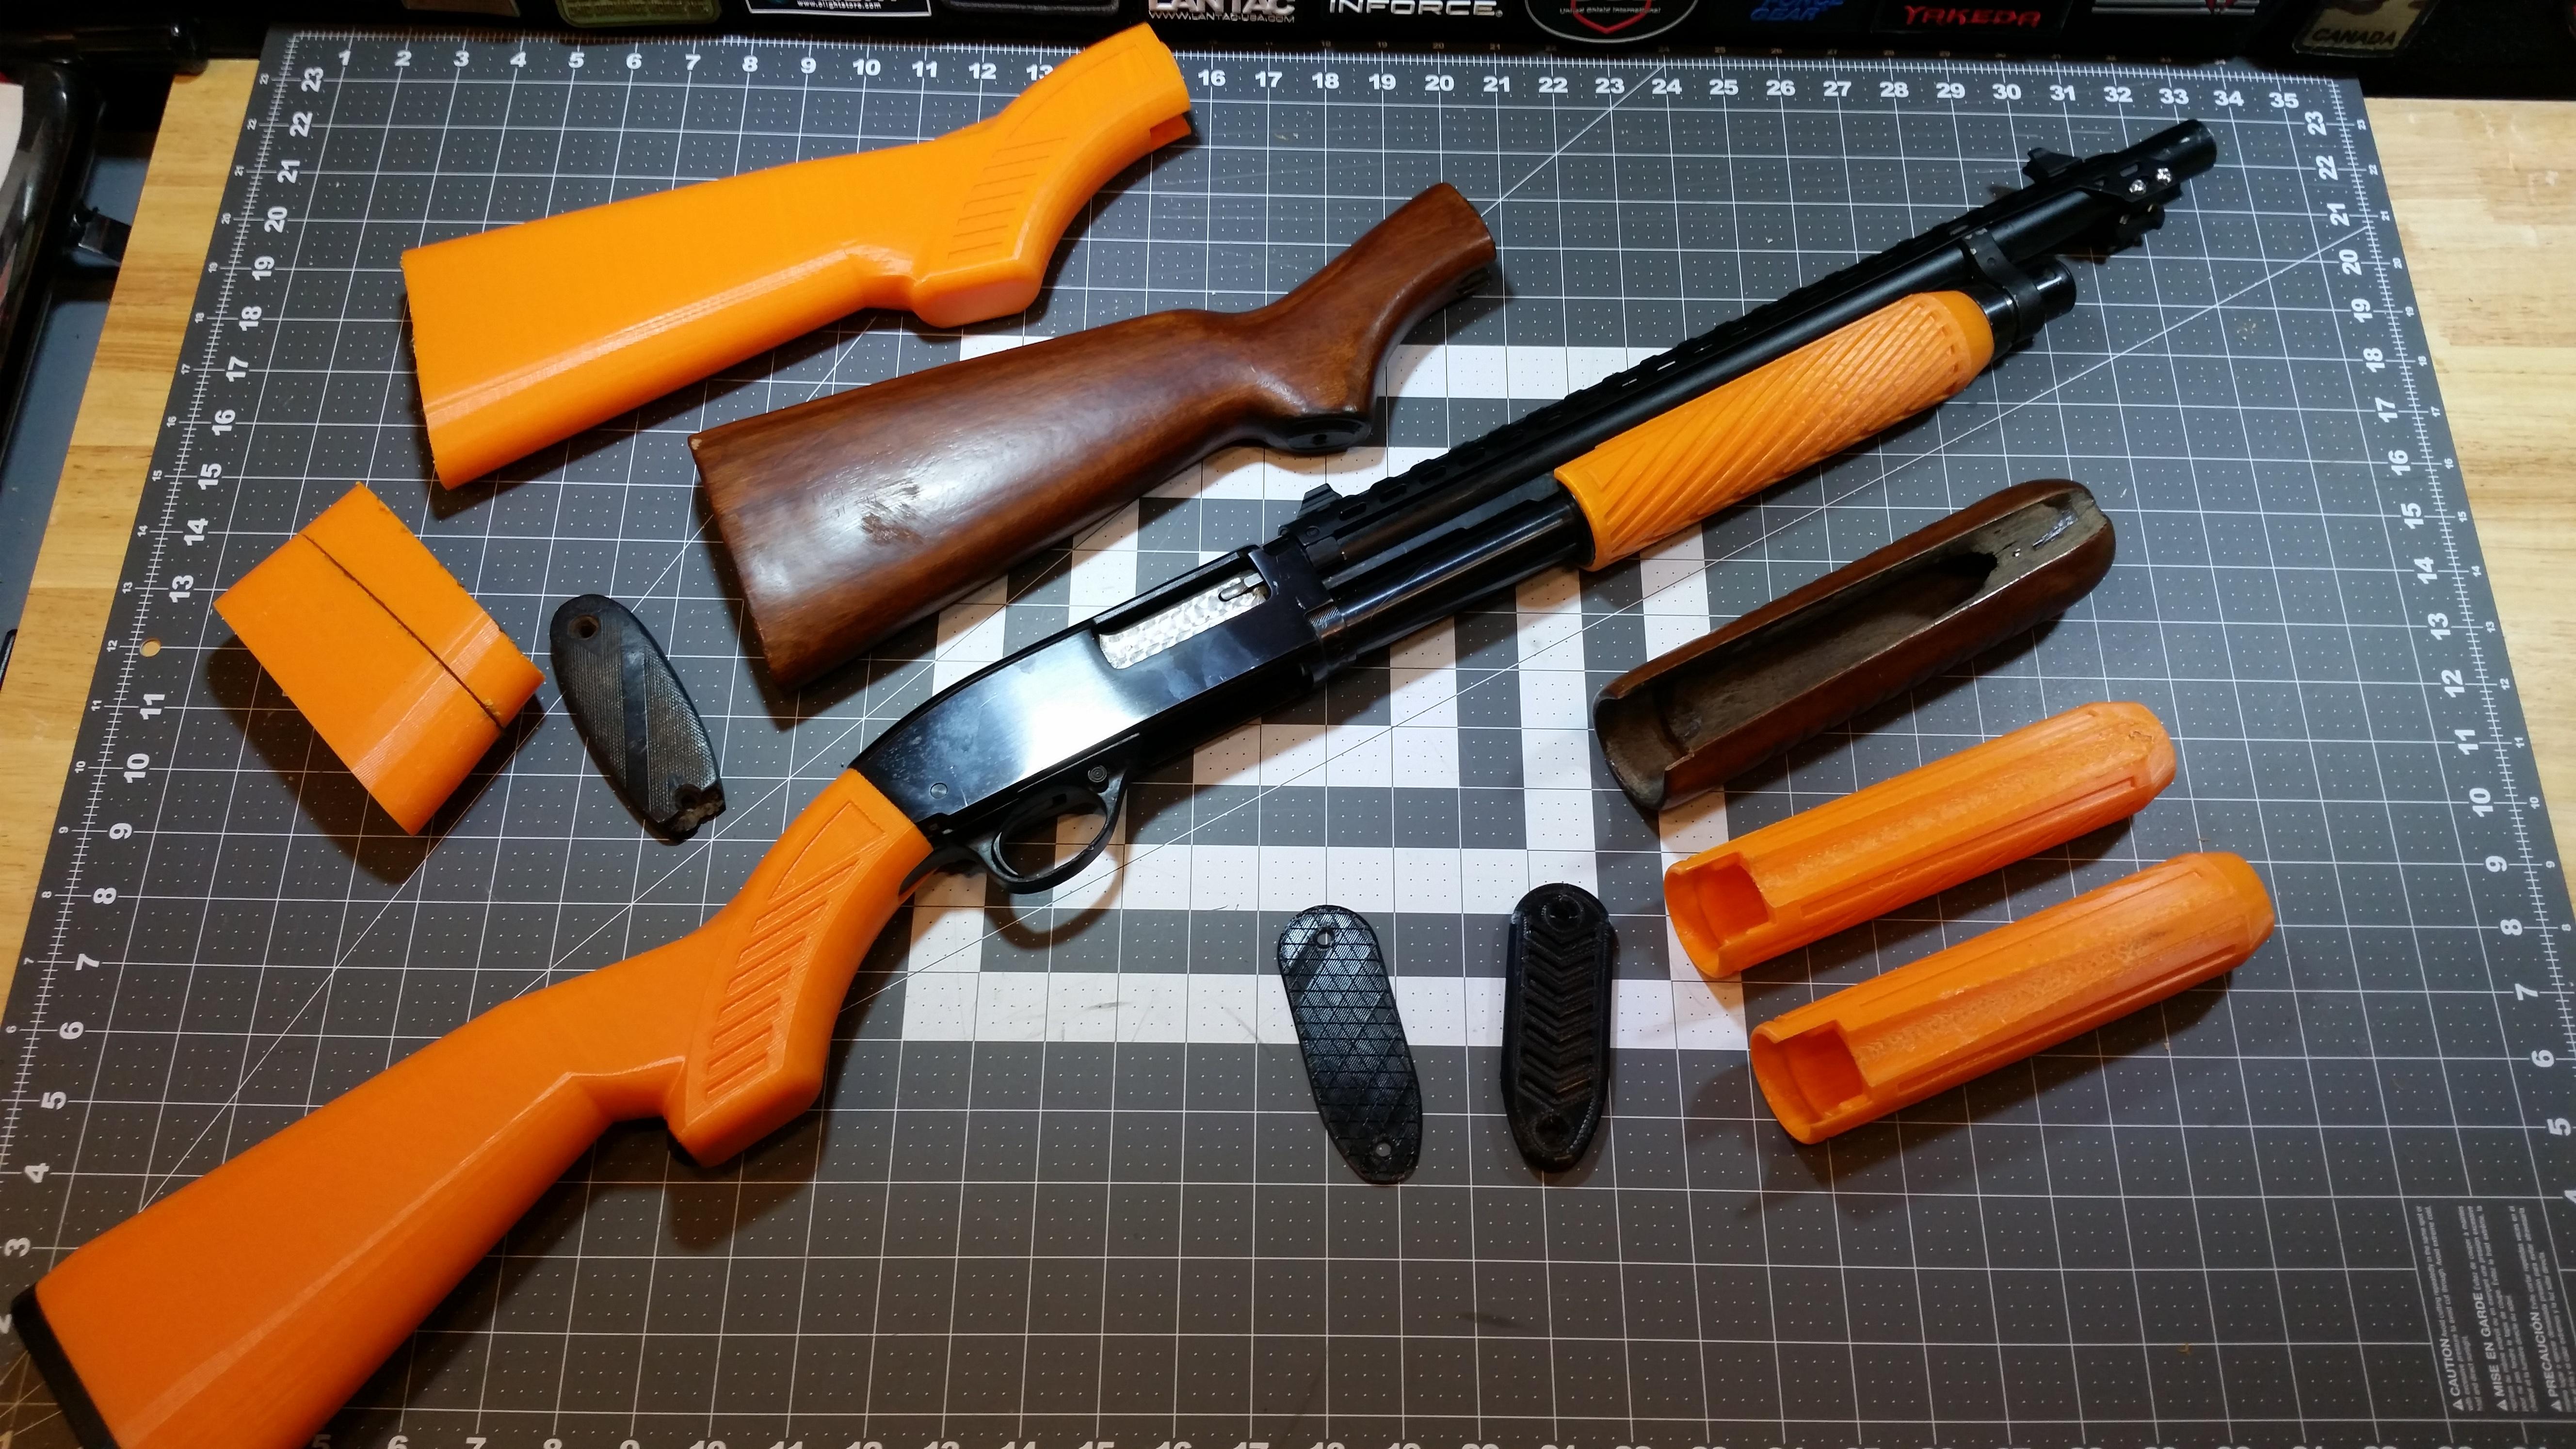
Next was the stock... some slight challenges here as my design experience does not usually include flowing rounded surfaces... and there are many ways to do them in CAD.... but like most things I do.. trial and error... I didn't pick the best way right off the bat. First prototype was a mess.... way too long...
Of course I let the printer finish, and learned a number of lessons for version 2.
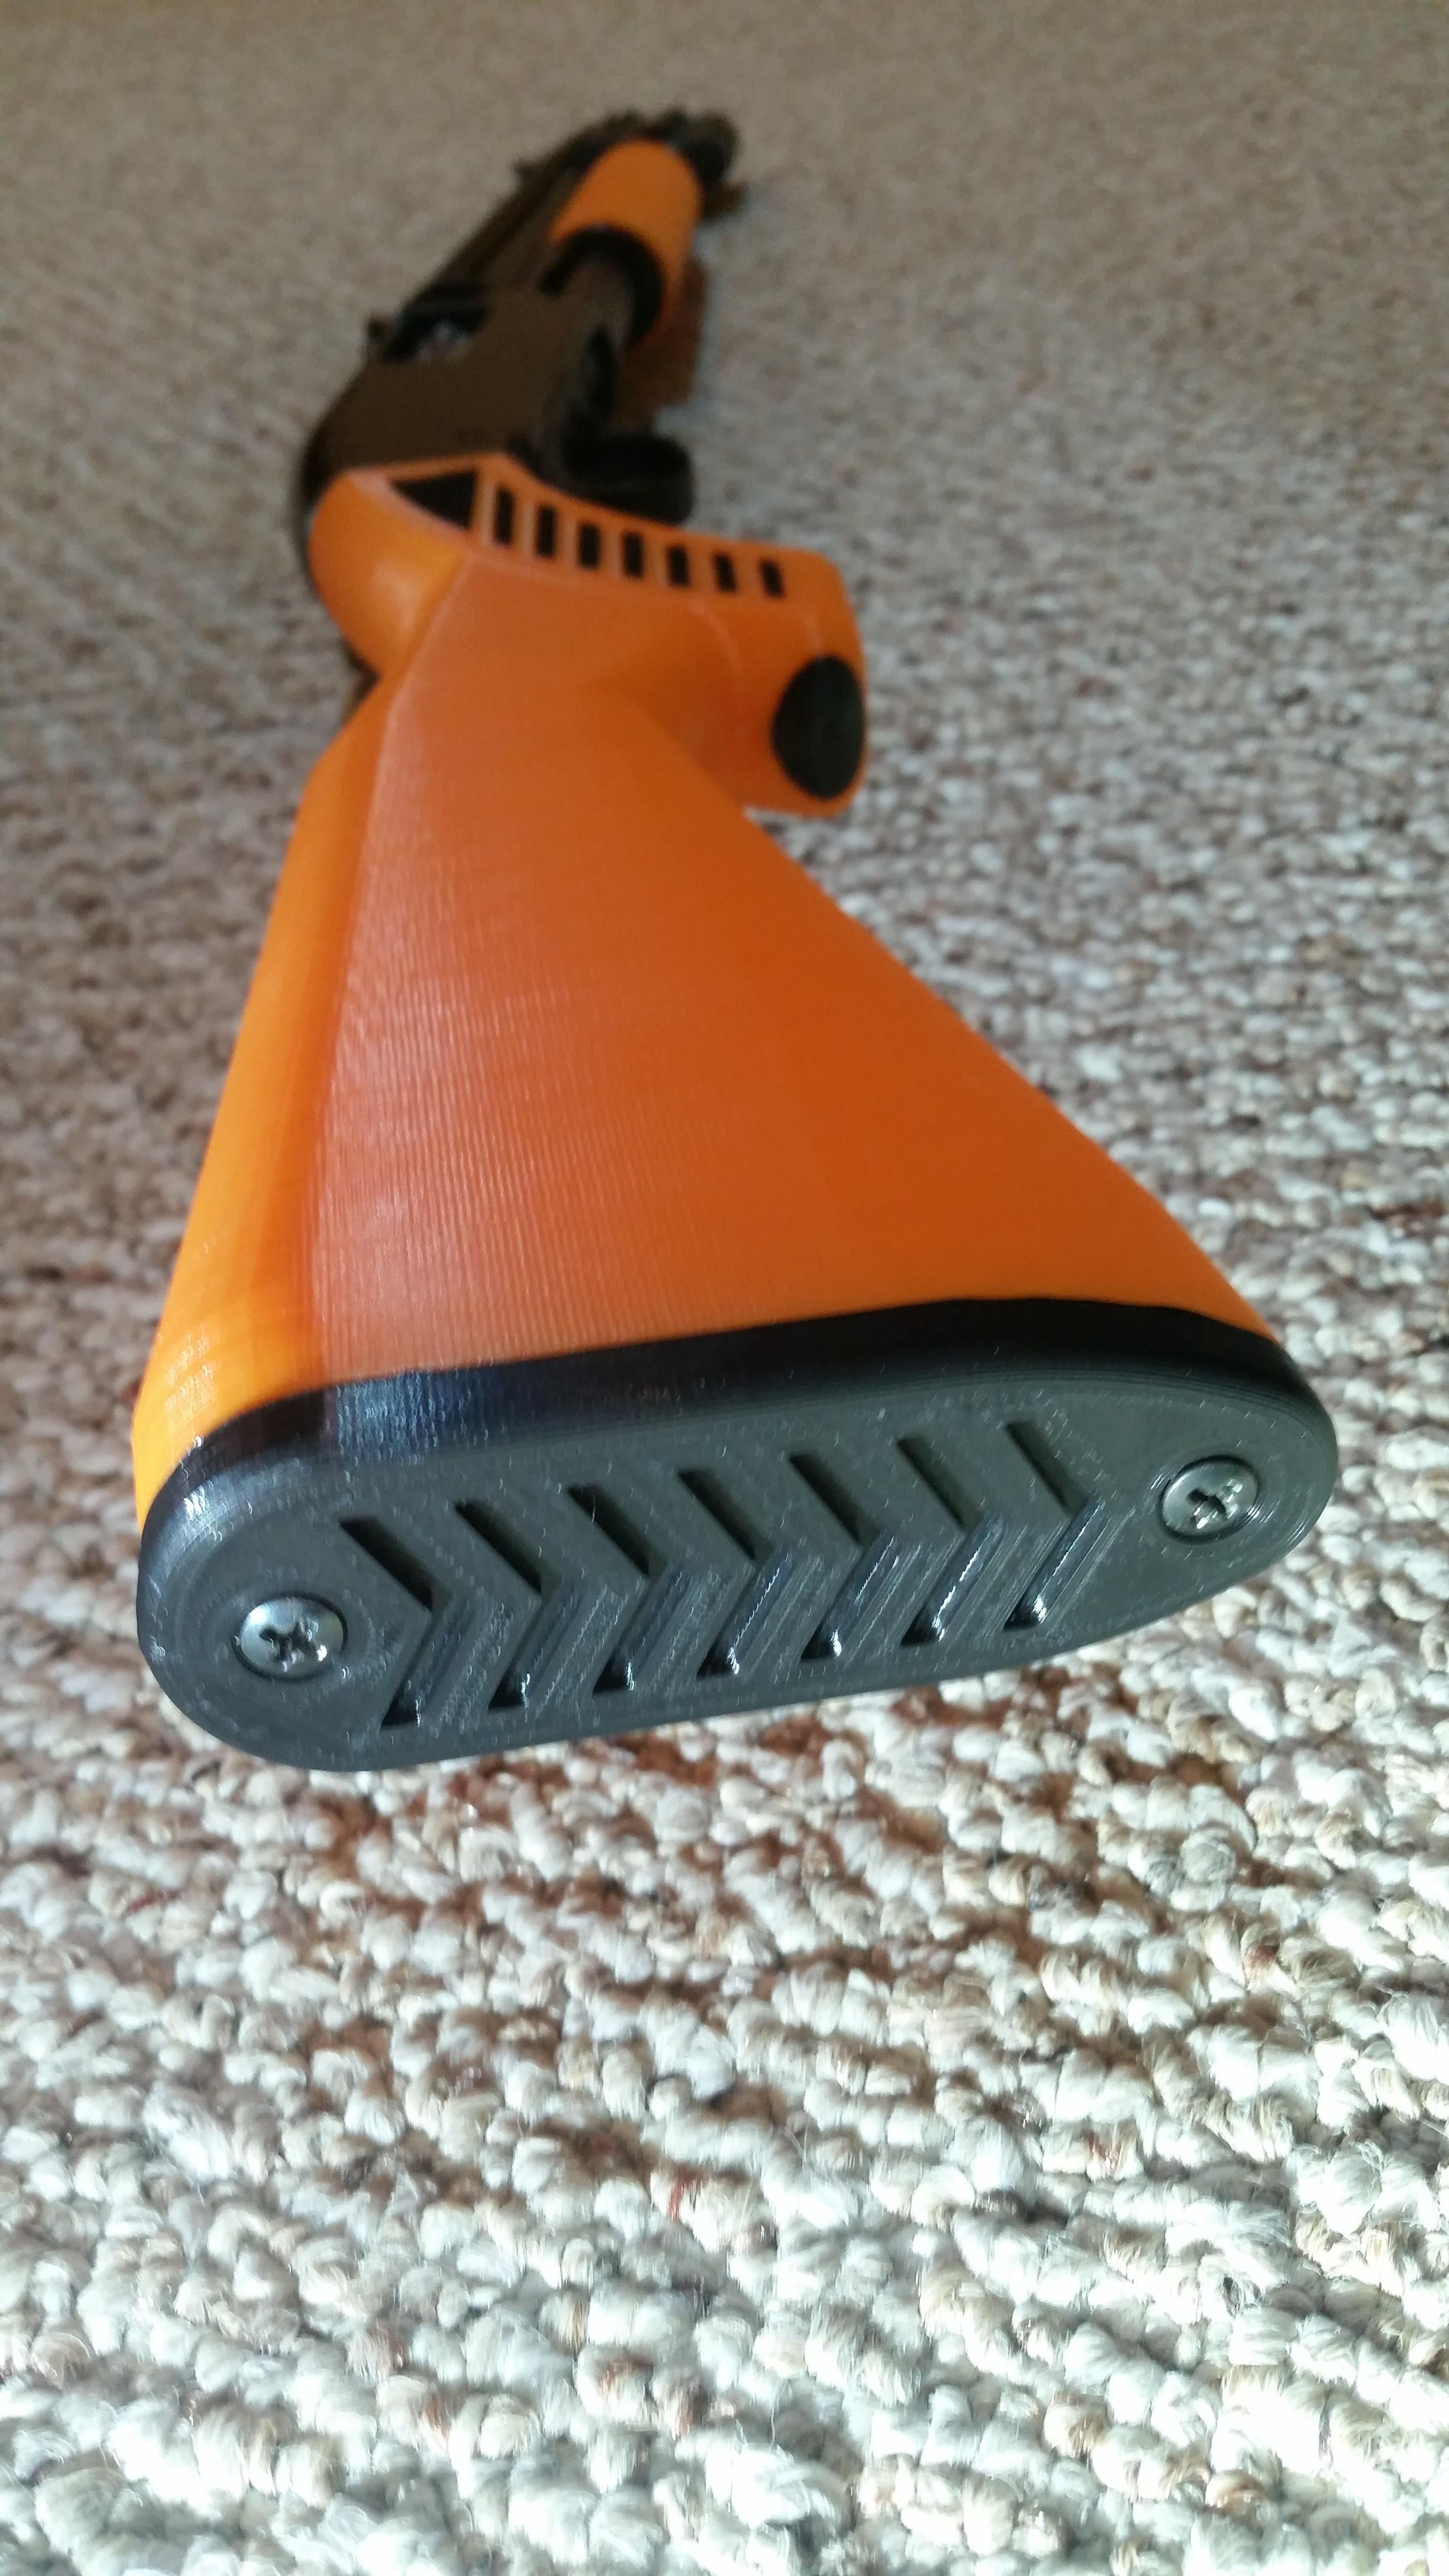
Version 2 of the stock didn't print perfectly (my fault in the support settings to support the heel of the pistol grip) but the print fixed itself pretty quick, and I capped the end. I then took sticky velcro and melted it with a torch to give it the texture of grip tape, and cut pieces to fit into the cutouts on the stock.
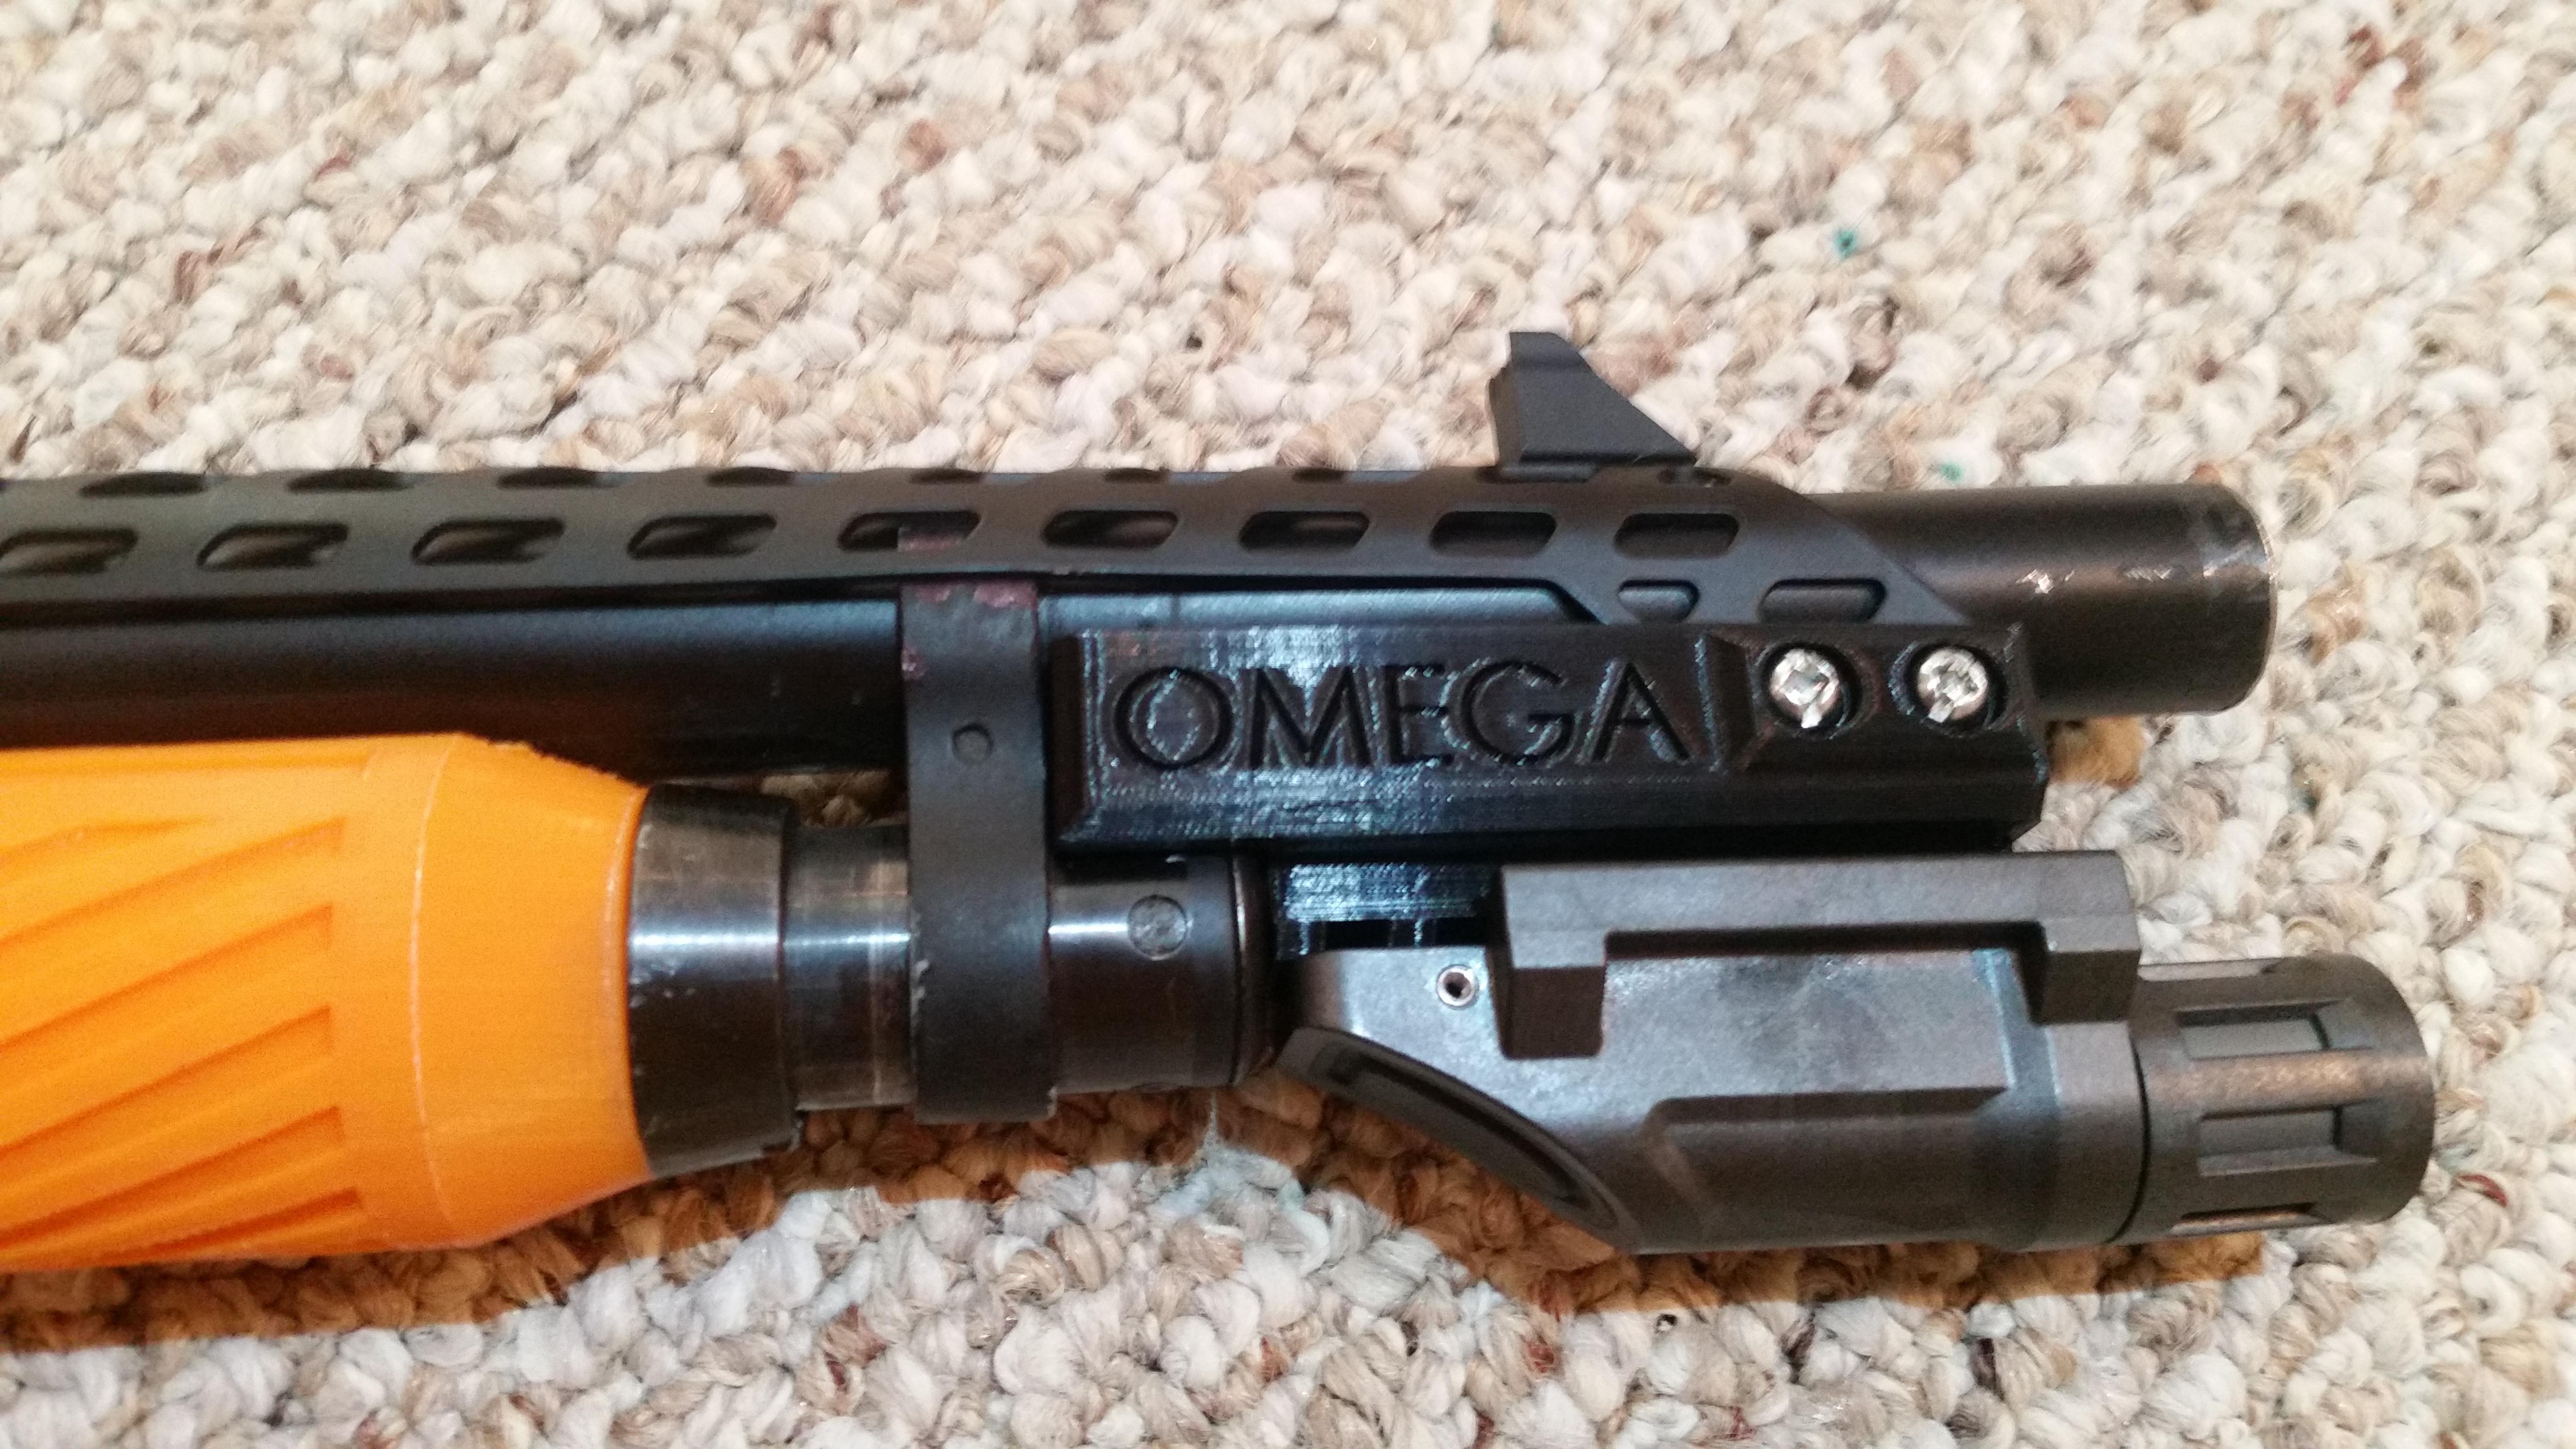
Then the flashlight mount... not hard, and I like how it turned out.... fits very tight, and noes not wiggle at all.
Final part of the puzzle was a shell holder (velcro on the side of the receiver) which i made slightly too tight, but version 2 is printing now... so its all good.
I just made version 1 fit by hacksawing lines to allow for some expansion.
The barrel wall is thick enough to thread it for chokes, so that is something I am planning to do as well... just need the right tools to do it. But I think a modified choke would compliment the gun well for practicality.
My Idea was a truck gun/survival gun and picked SUNLU orange PLA+ for the material as it is less menacing, and I think it looks fun.. Plus it works with my survival gun theme.
I will likely print a black, or dark grey version 3 one day to address any issues that come up.
Now... for testing... that will be tomorrow.... Ill let you know how PLA stands up to 12ga....
Wall thickness is 1.2mm, infill is 20% cubic, and the layer orientation is in line with the recoil, so I am pretty confident. Probably got about $30 in material into this.... and thats only cause I made so many prototypes.... but I learned a lot along the way.
Thanks for sticking with me so far, here are the pics!

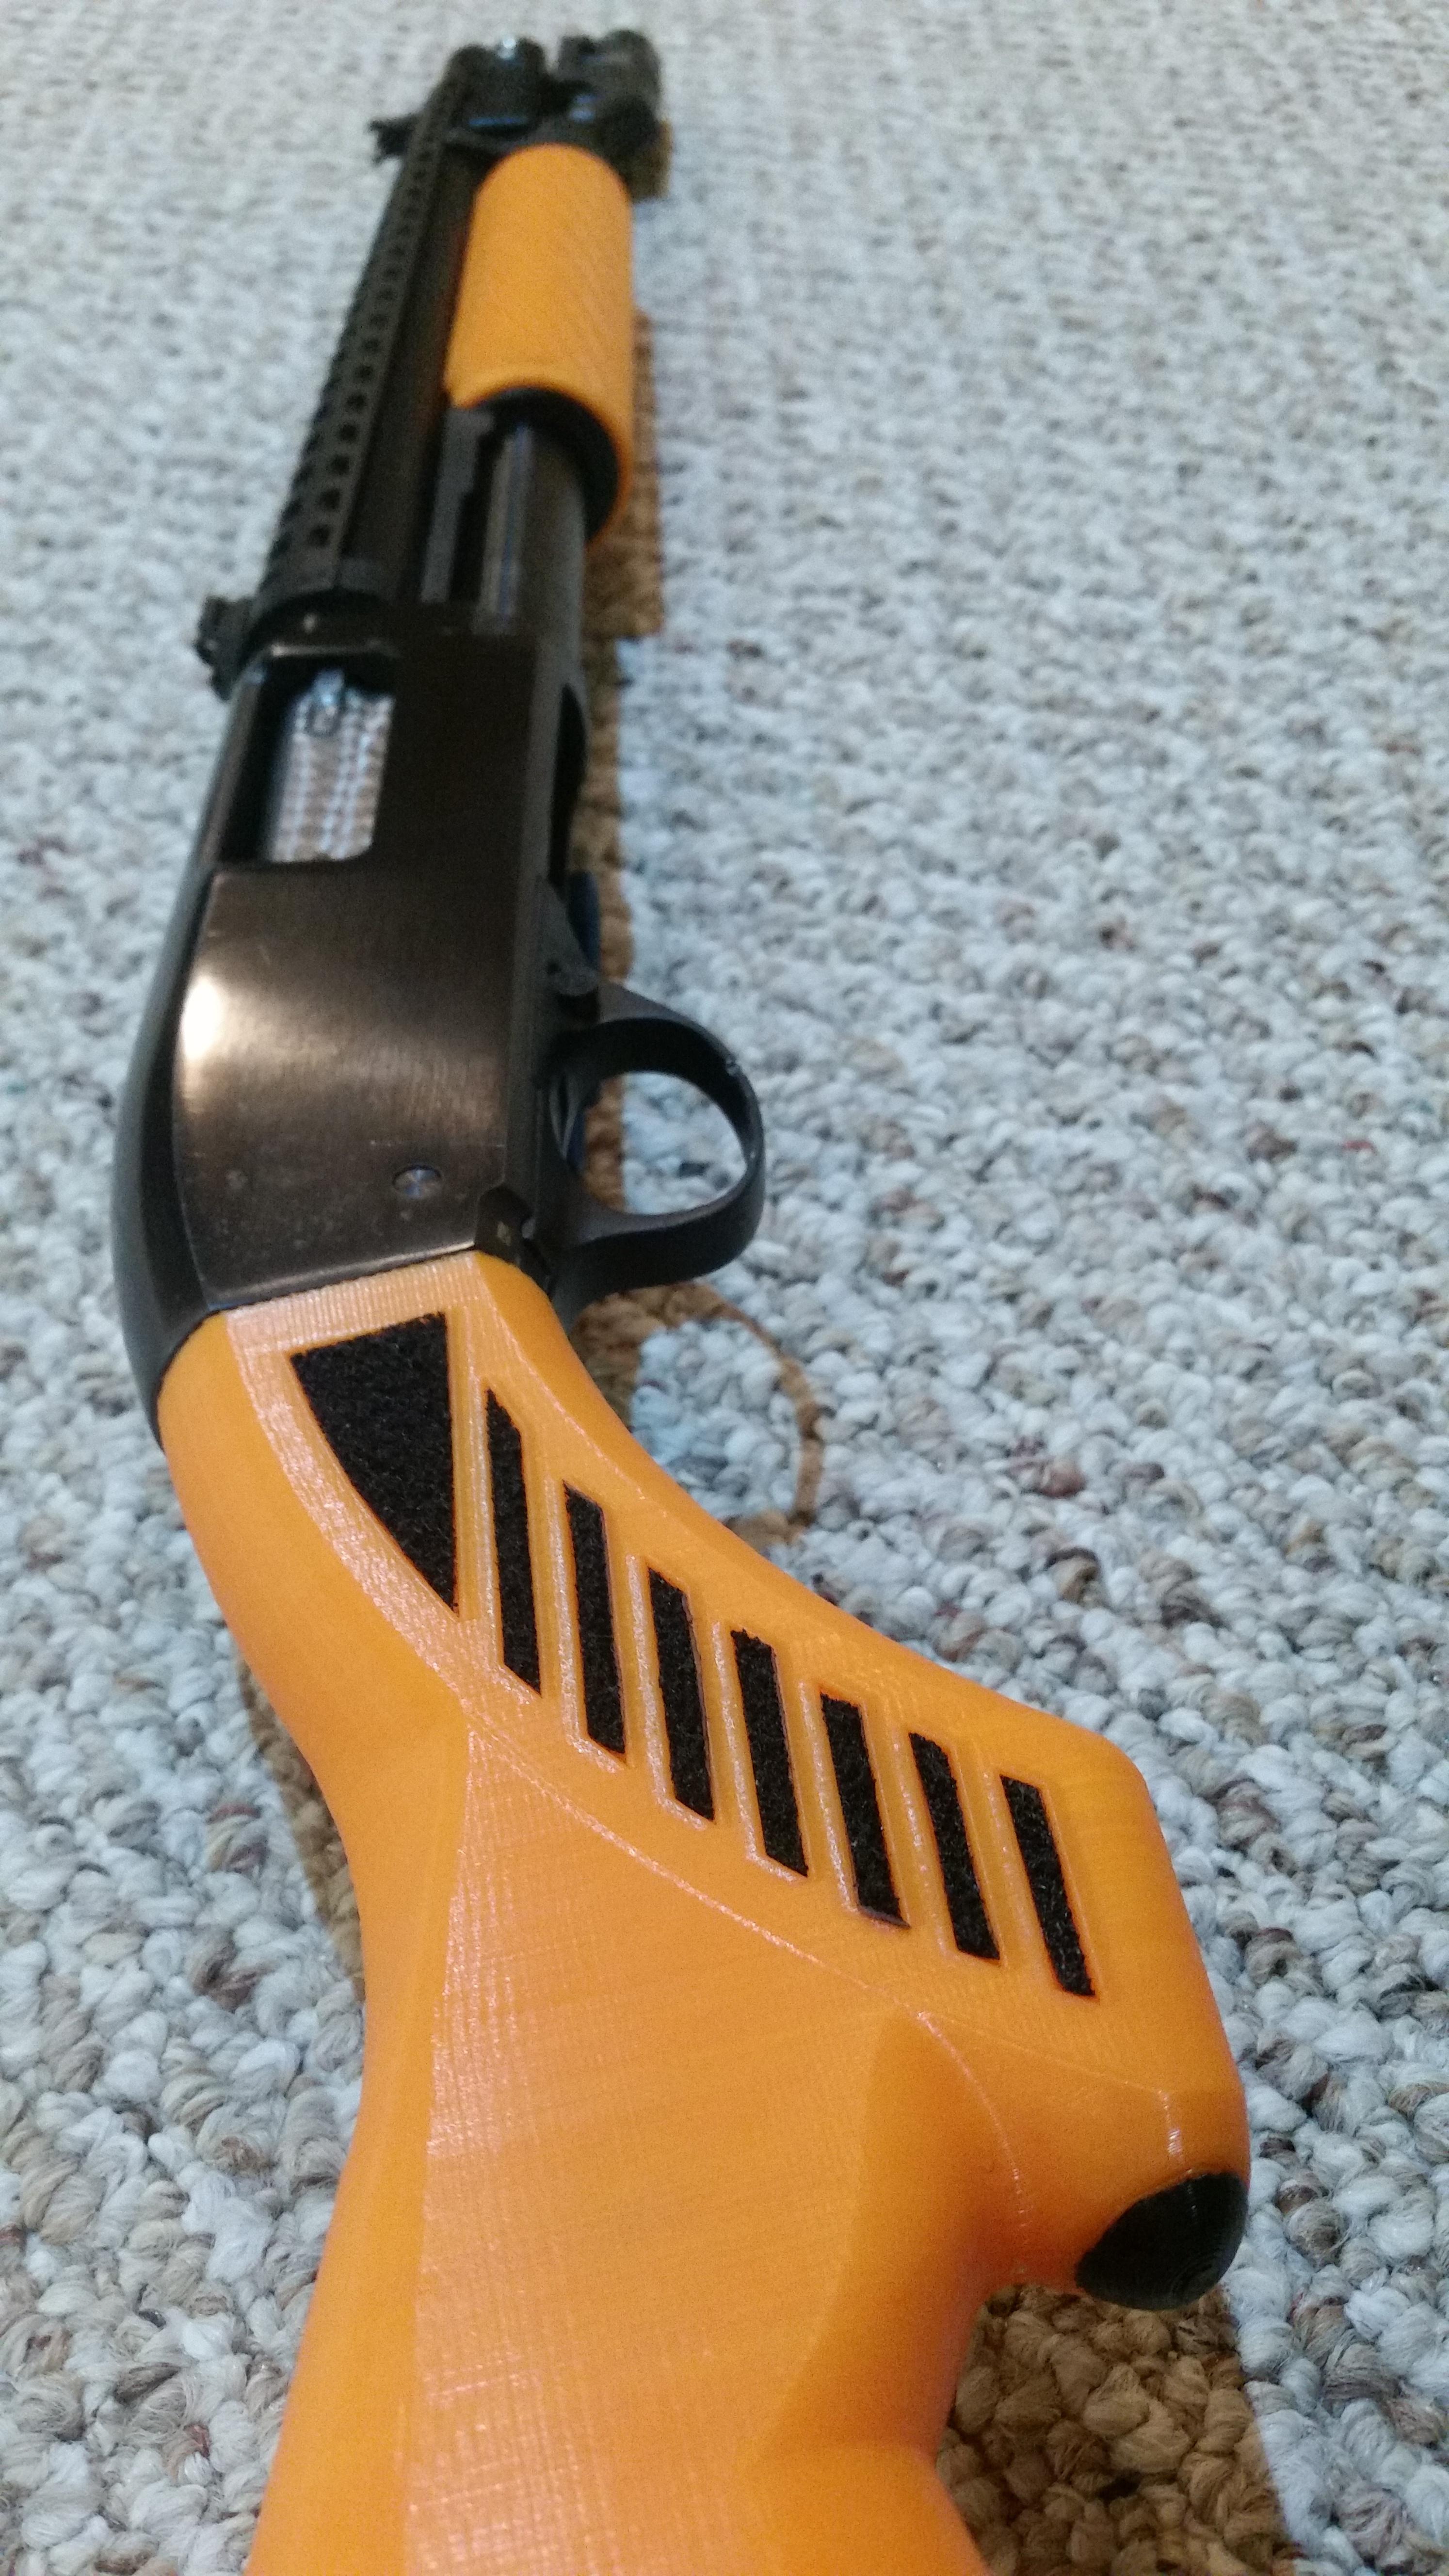
Here you can see the velcro melted into pretty agressive grip tape:
My flashlight mount (very low profile) with inforce WML 200 lumen light
And the couple prototypes, and failures along the way:
If anyone has questions about 3d printing, or had constructive input I would be happy to discuss.
Thanks for checking out my post.
Daver_II
Now I have a newer.... better... 3D printer. A Creality CR-10s PRO V2.
So I bought an old Squires & Bingham model 30 locally (in rough shape) and got to work on it.
The butt plate was broke, the barrel had been cut, and the "new" bead was off about 8 degrees to the right.... Needed some work.
I pulled a ATI heatshield with built in ghost ring sights off of a donor 870, and installed it onto the Model 30.. sights were acceptable again.
Then decided I wanted to replace the extremely fat pump handle (which was loose as could be... and slippery to boot) with a 3D printed one... How hard could it be? - as it turns out, took me three tries to trial and error the right placement and reference geometry for the pump to clear the barrel... but hey, the printer runs at night so waking up to new parts every day is kind-of like big kid Christmas.
Next was the stock... some slight challenges here as my design experience does not usually include flowing rounded surfaces... and there are many ways to do them in CAD.... but like most things I do.. trial and error... I didn't pick the best way right off the bat. First prototype was a mess.... way too long...
Of course I let the printer finish, and learned a number of lessons for version 2.
Version 2 of the stock didn't print perfectly (my fault in the support settings to support the heel of the pistol grip) but the print fixed itself pretty quick, and I capped the end. I then took sticky velcro and melted it with a torch to give it the texture of grip tape, and cut pieces to fit into the cutouts on the stock.
Then the flashlight mount... not hard, and I like how it turned out.... fits very tight, and noes not wiggle at all.
Final part of the puzzle was a shell holder (velcro on the side of the receiver) which i made slightly too tight, but version 2 is printing now... so its all good.
I just made version 1 fit by hacksawing lines to allow for some expansion.
The barrel wall is thick enough to thread it for chokes, so that is something I am planning to do as well... just need the right tools to do it. But I think a modified choke would compliment the gun well for practicality.
My Idea was a truck gun/survival gun and picked SUNLU orange PLA+ for the material as it is less menacing, and I think it looks fun.. Plus it works with my survival gun theme.
I will likely print a black, or dark grey version 3 one day to address any issues that come up.
Now... for testing... that will be tomorrow.... Ill let you know how PLA stands up to 12ga....
Wall thickness is 1.2mm, infill is 20% cubic, and the layer orientation is in line with the recoil, so I am pretty confident. Probably got about $30 in material into this.... and thats only cause I made so many prototypes.... but I learned a lot along the way.
Thanks for sticking with me so far, here are the pics!
Here you can see the velcro melted into pretty agressive grip tape:
My flashlight mount (very low profile) with inforce WML 200 lumen light
And the couple prototypes, and failures along the way:
If anyone has questions about 3d printing, or had constructive input I would be happy to discuss.
Thanks for checking out my post.
Daver_II
Last edited:


