


- Location
- Delta B.C.
Check out ButterBeans Barstool on u toobe. Interesting points from a redneck who really does know. He is honest about himself.
If your doing it for neck tension, you need to be really really consistent. Otherwise invest in a neck tension mandrel set. that's the key IMO
I anneal for case life not neck tension. I anneal every case before sizing/loading regardless if it's a new case. Any tension benefits are lost when using a seating and crimp type die. I use a separate crimp die for uniform process. Just my opinion. Cheers
 RJ
RJ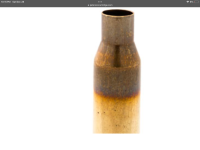


 lol RJ


 .
. 


