DIY brass annealing setup?

bigHUN

Regular
Rating - 100%
2   0   0
Location
Aurora/ON
I was asking around who is doing these annealing services in my area, and I got an impression that for my own convenience me better just get one setup for myself. My needs are not really some high volume, a couple hundreds of brass a year maybe.
A propane torch is not a safe way working with it in my garage, too many things can go wrong with that.
The induction heaters on the other side, according to my research, these are around for a quiet long time, and some people "fabricated" some pretty impressive brass annealing setups from aliexpress parts.
I am not an electrician but looking at the online pictures doesn't seem to me terribly hard to make it, also doesn't need to cost arms and legs.

Anybody with experience and ideas?

Browsing now the aliexpress, plenty of variations.
 
I looked at building one so may accumulate parts eventually
For now my Blue Flame model works good, guess I'm not much help
Can't imagine a problem arising, its pretty innocuous
 
About two years ago I started to look at building my own and looked at the automation/time factor with the DIY inductive set ups. then crunched some basic numbers. For my needs and time available compared to my max budget I chose to go with a torch type drop and roll pre built. I run MAP gas with mine and had a conversation with the U.S. retailer for the product about going that route.
I don't think we can compare the difference for the cost. And you can't make a DIY induction product that can compare with an AMP setup due to it's ability to analyze the type of brass. Great product but way more cost and it exceeds my needs to just extend my case life. On the other hand, the DIY induction doesn't provide the case to case consistency that a purpose built drop and roll does.
So for those reasons I purchased this product from the U.S. retailer/factory (not U.S. made)
This vid will give lot's of info that explains more specific info. Cheers
 
Last edited:
Ken Light Manufacturing annealer. I only anneal every second firing and usually anneal 1000-1500 cases at a time. Pretty simple to set up and you can anneal a case about every 3 seconds.
 
Went with the diy induction annealer idea. Bought the annealer and the timer on Amazon.ca. Put it together and works like a charm.
There is a second video by the same guy on YouTube that goes into greater detail about construction of the annealer. It is a must watch.

I’m no electrician. I followed the video and created a first rate annealer. The bonus is, if I have a stuck bolt, I have the tool to remove it.
 
As for the coils, I went to Home Depot and bought a length of 10 gauge wire, stripped off the plastic coating and made my own.
For making the diameter of the coil, I wrapped the wire around a correct diameter socket.
 
Ok, back again. I have since, used my annealer for several different case calibres and I find after annealing, the neck is both, more ductile and seems to grip the projectile better or, tighter.

And on a side note, the timer relays are cheap. Buy two, just in case the first one starts acting funny.
 
good follow up jae, tfs
wondering why the vid guy has so many coils that seem to span the shoulder and more body
instead of just a couple higher in the neck area
but it seems to work for him but he gets enough heat to the head to melt the tray plastic
Will have to try the set-up and see
 
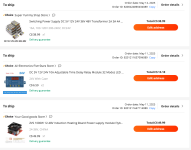
Last night I ordered my induction heater parts from aliexpress, my total is $103.5 for the - heating board + two timers + power supply.

View attachment 952341

ETA is about end of May.
I made one of these ZVS board induction annealers. You're going to need a liquid cooling setup and absolutely going to need a solid state relay to control the ZVS circuit. The timer circuit you purchased (basically any of these timer circuits) won't be able to handle the amperage the ZVS boards pull directly and will catch on fire. The coils get hot so rapidly if they are on with nothing inside the coil that they will become cherry red hot and start melting in a couple seconds, liquid cooling will keep the coil room temperature even after heating 200+ cases.

If you have any questions let me know, I should be able to help you out.
 
I made one of these ZVS board induction annealers....If you have any questions let me know, I should be able to help you out.
I was thinking about that timer relay how can handle heavier amp loads, but, I didn't know how to search for it, what is your suggestion?
I could go higher Voltage on ZSV also the power block let say 36V or 48V, but have not seen a timer higher then 24V and didn't wanted to complicate adding one extra power source to the set.
Yes, this ZVS board is liquid cooled also have a fan as well.

What I am building is really for low volume, maybe 20-30 brass at a time. I am retired I have plenty of time on my table to do it - annealing every day a little bit.

Edit:
I just checked the timer again, the description says : "Solid State Relay Technology"
 
Last edited:
This is the system I went with


I went this way about 2 years ago now. Have annealed plenty of brass, and have no problem doing 300-400 in one sitting, but I have 2 computer fans set up with it.

One that I have on the brass, and one on the back of the hand unit blowing more air.

He has a no 2 video showing his improvements and some extra items.

Cost me abou $200 for the parts.
 
OK my friends, here is a tricky question:

- instead of a timer relay, where can I find or how that one is called " temperature control relay" ? Like in incubators only higher Temp.
I have two IR Temp readers for my PCP compressor also for my 3d printer, can read well and probably can check the Temp on the brass as well.
One would be nice set it at 400C or 750F and let it do the job as much time it need ???
Timers are fine, I just wouldn't wire the ZVS directly to them. The only other issue I see with the parts you posted is your PSU may be too weak to anneal brass (at least in an acceptable amount of time), but I would still try with that PSU and upgrade it if you have to. The ZVS board that you ordered comes with the plastic tubing to be liquid cooled, but it's unclear to me how it is going to circulate water or dissipate the heat (I see no pump or rad). I'd wait for it to arrive, but I'd also expect to be picking up a separate setup for liquid cooling.

My setup is as follows:
DC 48V 20.8A 1000W PSU​
14 AWG Ground to ZVS board​
14 AWG Positive to SSR60DD 60A 3-32VDC to 5-60VDC SSR​
14 AWG Positive from the SSR to the ZVS Board​
48v to 12v Step Down​
"Input" Leads connected to the PSU​
Output leads connected to a "DIY Breaker Bar" (So to speak, it's literally 2 washers, 1 nut, and 1 bolt per terminal)​
PC Fan controller​
Controls 3x 120mm fans, and 1x Water Pump to cool the coil​
2 x timers​
1 Timer Controls the ZVS Board via the SSR​
1 Timer Controls a Drop Solenoid (DC 12V 25N 10mm Stroke Pull Type)​
1 Hot lead from the Step down goes to a momentary button that controls both timers​
You'll want to bend your own coil to achieve the highest efficiency. I can't read the specs on the caps or see how many caps there are to help you calculate the height, coil count, and diameter yet. Once it arrives I can help you calculate it though. Going off memory mine was 14 turns 1.5" tall and .5" diameter.

If you have any questions let me know. I'll take some pictures and a video of my setup later this week.
 
I have some leftover PC water cooling radiator in my garage from my younger son's PC upgrade, also my older son hobby is in aquariums and he has some leftover small pumps. Only need to wait for parts to arrive and start improvising from there.
For now researching a contactless Temp control relay if I can get one for cheap :).
 
Back
Top Bottom