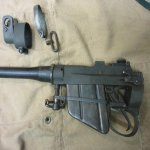
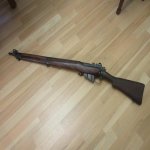
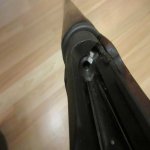
.22 Lee Enfield Barrel

The liner drill is 5/16". .3125". Once again, there are traces of rifling left in the barrel. This bore was dark and rough, so corrosion had probably deepened the grooves a bit, but this indicates that .303 barrels may well have groove diameters greater than the .311" standard.

I had a Lithgow with a .317 bore. I had to shoot .318 J bullets through it before it would even shoot a four inch group at 100yds.

Several LEE ENFIELDS of all makes and types, with bores ranging from .309(Indian No4 MkII) to the Lithgow mentioned above. Most were around .312.
 
Installed the liner this morning. The epoxy is curing now. When I wiped out the bore with solvent to degrease it, the rifling could be seen pretty much end to end after having the 5/16" drill passed through.

Degreased the receiver yesterday, assembled today. Some of the parts are going to need to be refinished.

IMG_0573.jpg
 

Attachments

  • IMG_0573.jpg
    IMG_0573.jpg
    90 KB · Views: 140
Fired up the blast cabinet yesterday, and blasted and cold blued the middle band, swivel, screw, handguard band, and safety spring.
Muzzle has been turned to remove the bayonet lugs. Still have to refinish that area.
Blasting and cold bluing is a really easy way to refinish parts with a matte finish. Looks not unlike a park, but without having to heat up the tank for small bits. When parts come out of the blast cabinet, they are really clean, and the blue really bites. Blasting and parking is an excellent way of refinishing guns - far more convenient than hot caustic bluing.
 
If your not interested in firing up the tank, buy a used stainless pot at value village or, other thrift store. pop it on the Coleman stove or barbeque burner. works great for small parts.
 
I like Brownells Oxpho-Blue Cream for touching up previously parkerized surfaces.

I've always blasted parts for parkerizing, but I recall visiting the industrial scale Parkerizing operation at 202 Wksp in Montreal where parts weren't blasted before going into the tank. They were given a thorough de-greasing before immersion and blasted and re-parked if the first try didn't take properly.

Funnily enough, "Sunray", who is long gone, used to talk about no need for blasting before Parkerizing. He was told he was FOS on many things, but maybe he was half-right on this.;)
 
Many years ago, I worked at Prestolite. Among many products we made were automobile alternators and starting motors. One of the many jobs I did there was phosphating the shafts. These were run through a vapour phase degreaser, hung on hooks, and immersed in the heated solution. Being new steel, they took a uniform finish. When I am cleaning up used parts, particularly salvaged parts from basket case guns, I like to blast before finishing, because it produces a uniform surface, which contributes to a uniform finish.
In the plating shop where the phosphating took place, we also blued spark plug shells. The shells were placed in perforated square steel buckets. These buckets were immersed four at a time in a hot Oakite solution to degrease the shells, rinsed in water, and then immersed in molten sodium nitrate. The buckets were manouvered using a steel pole with a couple of pegs on the end, and a sort of oar lock yoke. You really wanted to be sure you had shaken all the water out of the buckets before lowering them into the molten nitrate.
In the same factory there was also a line where we made 2.75" rocket warheads. Did most of the operations making those. This was during Vietnam. Our warheads went to Redstone Arsenal to be filled, then the Port of San Francisco for shipment to Vietnam.
 
When re-parking Garand parts, those made of softer steel (barrel, op rod, trigger housing) seem to take up the parkerizing more quickly, while the harder steels in the bolt, receiver, and rear sight base are a bit more resistant. I agree that blasting everything is desirable and people need to be super careful to degrease everything to avoid contaminating the parkerizing solution and preventing an uneven take-up on the steel.

I once re-parked a Breda receiver that refused to take the parkerizing well in a couple of places. I boiled the pi$$ out of it in a lye solution, then re-blasted and voila.
 
Well, the only external part remaining, which is en route, is the rear handguard.
Once a rimfire bolthead is installed, I can face off the barrel breech, chamber, cut the extractor notch and install the barrel.
I plan on using my match reamer. Minimum tolerances, and the bullet is lightly engraved by the rifling when the bolt is closed.
 
Faced the barrel breech to match the rimfire bolthead. Reamed chamber, test fired.
Extractor cut to be made, then final assembly can take place.
 
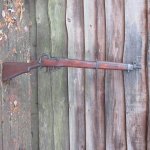
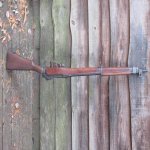
Made the extractor cut, test fired, it extracts. Assembled to see how it looks. Once the rear handguard arrives, I'll tear it down, and do some final fitting and finishing. The forend is a Savage low sidewall in birch. Best forend I had on hand; obviously a walnut LB would be preferred. Doesn't look bad for a bitser.
IMG_0590.jpg
IMG_0591.jpg
 

Attachments

  • IMG_0590.jpg
    IMG_0590.jpg
    114.3 KB · Views: 110
  • IMG_0591.jpg
    IMG_0591.jpg
    111.9 KB · Views: 109
Tore it down today, did some final adjustments. Handguard arrived. Will do final assembly tomorrow and take some daylight photographs.
 
Well, indoor photos will have to do. Wet, dreary day.
IMG_0597.jpg
IMG_0598.jpg
IMG_0603.jpg
IMG_0605.jpg

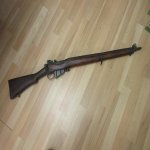
Real mix of odds 'n' ends of parts. Some new, or as new, others used, some salvaged and refinished. Turned the lugs off the .303 barrel. Note that a No. 7 barrel does not have lugs for the front sight base. The barrel is cylindrical, and the front sight base is pinned in place.
Some members here really helped with specific parts. Thank you!
The rifle is now ready for zeroing.
 

Attachments

  • IMG_0597.jpg
    IMG_0597.jpg
    56.5 KB · Views: 61
  • IMG_0598.jpg
    IMG_0598.jpg
    57.2 KB · Views: 60
  • IMG_0603.jpg
    IMG_0603.jpg
    40.3 KB · Views: 60
  • IMG_0605.jpg
    IMG_0605.jpg
    42.4 KB · Views: 60
Thanks!
Keep in mind that essentially all the original metal parts are interchangeable, even though literally no two parts came from the same rifle. Wood bits can require fitting.
The conversion to .22 rimfire took the most work.
For example, I had to make a striker rod by altering a firing in. Didn't want to cut the end off a good firing pin. Had a ratty one, but it was for a SMLE. So, I cut off the tip and retrofitted the shaft to the No. 4 cocking piece. Still have a bit of work to do - the keeper screw needs fitting.
I described the barrel lining process above. I do have a well equipped shop.
The barrel breech has to be cut for the extractor. File work. That is mostly try and fit until the bolt closes and cartridge cases are extracted.
The extractor is a No. 7 unit I robbed from the SMLE conversion pictured in this thread. Have to make a replacement for that one.
Over time, parts are getting harder to find, and much more expensive. You'll see forend/handguard/metalwork sets in the EE priced higher than a complete rifle used to cost.
 
There was one of the US barrel makers doing No. 4 .303 barrels. Krieger? If they were prepared to do .303 barrels, they could do .22 as well. Easier to do a No. 7 barrel - no lugs at the front end.
JC in Bouctouche NB has a lathe he has rigged up as a tracer to profile barrels, but I don't know if he does rimfire barrels. A custom barrel is going to be north of $400; that's a good reason why lining a .303 makes sense. If a long enough .22 barrel could be found, it could be profiled to work. The barrel can only be seen at the muzzle, so the contour under the wood doesn't reall matter.
In my stock of barrel odds and ends, there is a cut 2 groove with a ho-hum bore. It could be shot as is, but it isn't great. It would be good for a .22 No. 5 clone, having already been shortened.
 
Back
Top Bottom