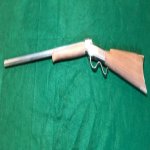
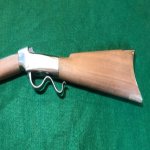
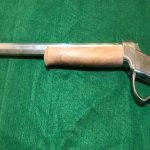
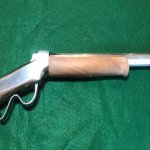
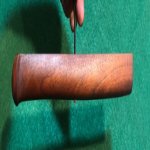
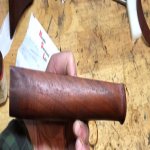
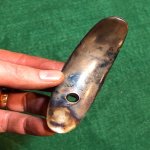
Christmas Ballard 22 Project

rwnblack

Regular
Uber Super GunNutz
Rating - 100%
124   0   0
Location
Saskatoon
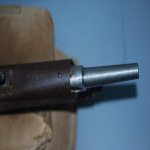
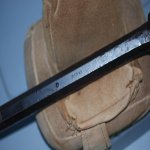
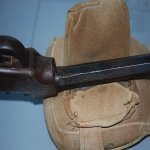
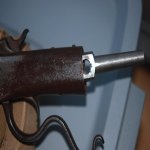
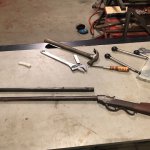
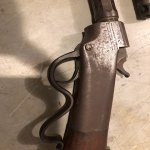
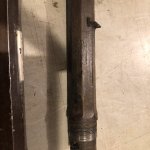
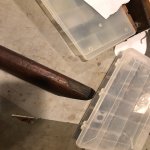
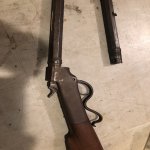
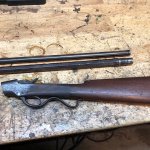
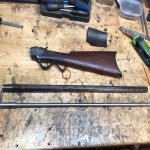
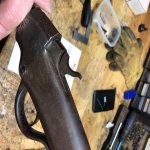
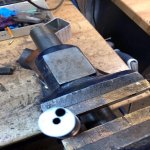
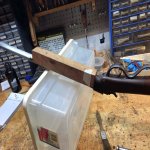
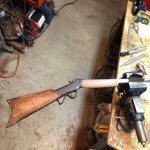
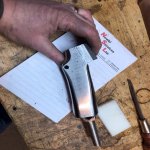
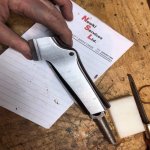
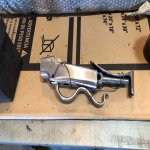
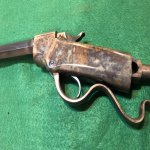
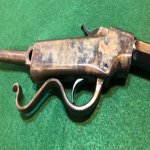
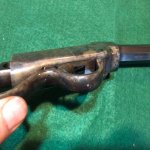
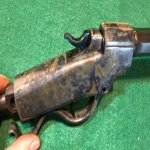
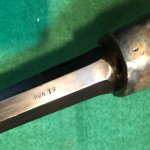
I bought a Ballard project on this forum a few months ago. It was in pretty rough shape but we agreed on a price that I thought I could take a chance on it. I have a affinity to Ballards, some people bring home stray cats, I bring home ballards. The rifle is a Ballard #3 gallery rifle and it has had a pretty hard life. The screw which hold the action together was completely buggered and someone tried to drill it out but missed. The barrel and the front of the action have been beat on very hard with a hammer. The barrel is pretty buggered all around. I decided to treat my self during the Christmas hollidays and try to turn this into a nice 22 but knowing that it will still have some of the heavy marks from the past.

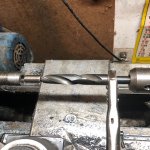
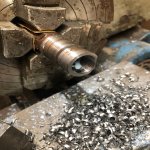
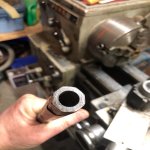
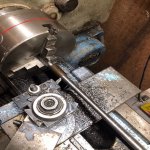
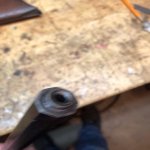
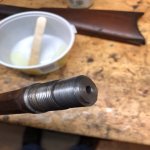
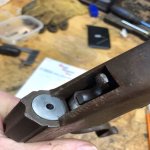
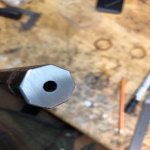
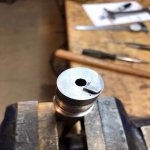
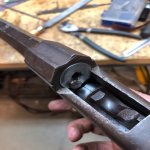
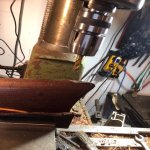
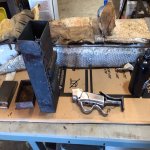
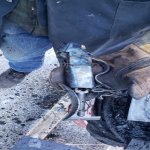
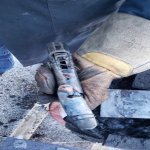
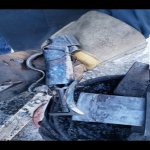
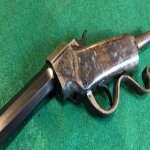
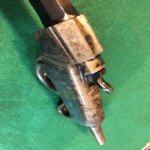
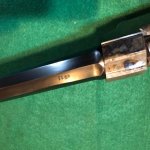
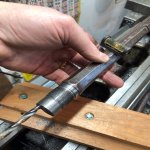
I drilled out the action cross screw and removed the breach block. I had to get the two piece extractor apart and get the barrel off the action. Little bit of persuasion with a Oxy acetelyn torch helped. I decided to abandon the barrel and use a 32 rimfire barrel that I picked up with other Ballard parts. I welded up the extractor slot, drilled the barrel out to accept a donor barrel ( Model 75 Cooey that I bought at auction which was missing the bolt). I made a larger shank on this “liner” to make sure I have lots of meat to drill the 2 piece extractor into. I epoxied in the liner and cut the it for the extractors. I installed the barrel, draw filled it and chambered it with a match reamer. I decided to use the existing butt stock but it needed a piece added in the toe. I made a for-end with a basic piece of walnut. I cleaned up the action as best as I could and case hardened it, rust blued the barrel, fireblued the small bits, and now am in the process of putting an oil finish on the stocks. Can’t wait to take this to the range and try it out. Here are pics of the process and the results.

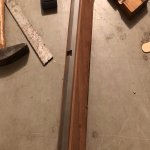
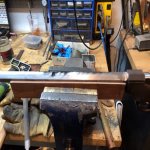
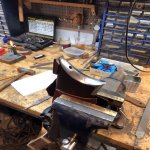
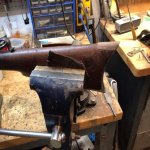
The starting place, pretty much looks like scrap iron...
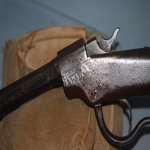
C18CD0F2-D241-4913-A851-F26D3F4CC33F.jpg23BADBA0-61C7-4557-A7E3-7E76264BA844.jpg2FC67E5A-5401-4AFA-983E-817098D01FBF.jpg327C0238-299E-41E8-B9C3-0CF694B8C4CB.jpgE423F793-71D0-4B59-9363-97FE5378932D.jpg
 

Attachments

  • C18CD0F2-D241-4913-A851-F26D3F4CC33F.jpg
    C18CD0F2-D241-4913-A851-F26D3F4CC33F.jpg
    80.1 KB · Views: 560
  • 23BADBA0-61C7-4557-A7E3-7E76264BA844.jpg
    23BADBA0-61C7-4557-A7E3-7E76264BA844.jpg
    27.2 KB · Views: 561
  • 2FC67E5A-5401-4AFA-983E-817098D01FBF.jpg
    2FC67E5A-5401-4AFA-983E-817098D01FBF.jpg
    44.2 KB · Views: 564
  • 327C0238-299E-41E8-B9C3-0CF694B8C4CB.jpg
    327C0238-299E-41E8-B9C3-0CF694B8C4CB.jpg
    81.5 KB · Views: 567
  • E423F793-71D0-4B59-9363-97FE5378932D.jpg
    E423F793-71D0-4B59-9363-97FE5378932D.jpg
    43.6 KB · Views: 561
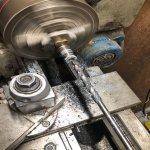
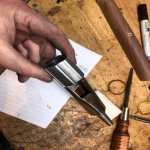
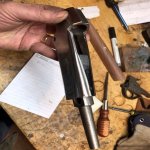
Here I took the action apart but had to drill out the cross screw to 1/4” X 40 and ream the action, leaver and extactor to accept the screw. There is little evidence that the hole was drilled off centre. I would have just tig welded the hole and re tapped it but this is a cast iron action and that is problematic to weld. The action works now.

FF0E410B-BC64-45F6-8169-1C5B262B832C.jpegA4AC0E06-7542-42FC-A2BA-ED5660782983.jpegC476DA5E-9316-45C4-BA79-022B00B8F3E5.jpegD32B450C-A195-4DD8-B56E-2C517836EF75.jpeg3A159017-B0AF-42FB-BA6C-0474346EEB25.jpeg6413B025-F77F-4AF9-BE1A-6689F7D4BA83.jpeg
 

Attachments

  • FF0E410B-BC64-45F6-8169-1C5B262B832C.jpeg
    FF0E410B-BC64-45F6-8169-1C5B262B832C.jpeg
    88.3 KB · Views: 555
  • A4AC0E06-7542-42FC-A2BA-ED5660782983.jpeg
    A4AC0E06-7542-42FC-A2BA-ED5660782983.jpeg
    86.8 KB · Views: 554
  • C476DA5E-9316-45C4-BA79-022B00B8F3E5.jpeg
    C476DA5E-9316-45C4-BA79-022B00B8F3E5.jpeg
    84.1 KB · Views: 554
  • D32B450C-A195-4DD8-B56E-2C517836EF75.jpeg
    D32B450C-A195-4DD8-B56E-2C517836EF75.jpeg
    70.8 KB · Views: 553
  • 3A159017-B0AF-42FB-BA6C-0474346EEB25.jpeg
    3A159017-B0AF-42FB-BA6C-0474346EEB25.jpeg
    84 KB · Views: 552
  • 6413B025-F77F-4AF9-BE1A-6689F7D4BA83.jpeg
    6413B025-F77F-4AF9-BE1A-6689F7D4BA83.jpeg
    146.3 KB · Views: 556
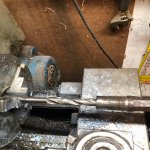
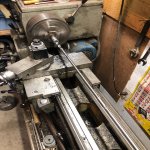
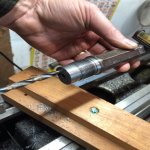
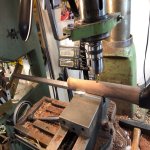
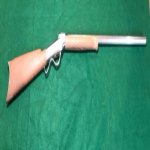
02618C01-631F-4F09-BD2E-0FBCC7F7FD21.jpegNext up was to drill the 32 cal 26” barrel for a “liner”.

81CEE5B6-2DF7-479E-A9FE-8D66D3BBF0D5.jpegD4445338-5D05-4D9F-AF08-AACB9470465C.jpegC7E87BC8-0F4E-4B8E-9D0B-38EF7E74463E.jpegA9B97417-B223-4833-8B10-AC7494050A38.jpegD589A746-AD5B-4048-9792-ADC862463262.jpeg
 

Attachments

  • 02618C01-631F-4F09-BD2E-0FBCC7F7FD21.jpeg
    02618C01-631F-4F09-BD2E-0FBCC7F7FD21.jpeg
    123.8 KB · Views: 546
  • 81CEE5B6-2DF7-479E-A9FE-8D66D3BBF0D5.jpeg
    81CEE5B6-2DF7-479E-A9FE-8D66D3BBF0D5.jpeg
    130.2 KB · Views: 550
  • D4445338-5D05-4D9F-AF08-AACB9470465C.jpeg
    D4445338-5D05-4D9F-AF08-AACB9470465C.jpeg
    141 KB · Views: 558
  • C7E87BC8-0F4E-4B8E-9D0B-38EF7E74463E.jpeg
    C7E87BC8-0F4E-4B8E-9D0B-38EF7E74463E.jpeg
    113.3 KB · Views: 551
  • A9B97417-B223-4833-8B10-AC7494050A38.jpeg
    A9B97417-B223-4833-8B10-AC7494050A38.jpeg
    123 KB · Views: 552
  • D589A746-AD5B-4048-9792-ADC862463262.jpeg
    D589A746-AD5B-4048-9792-ADC862463262.jpeg
    68.7 KB · Views: 548
Then I turned the Cooey barrel down to create my liner and glued it into place.

2916E4A4-0141-4440-AB15-FBB15E8EF67F.jpeg89B8FF6B-3D29-4441-929E-C8F9604B4BA2.jpeg8D147C72-7526-41DF-896D-9494935238D9.jpegF9EE78E7-AEA6-4FDA-867B-DECC957E5683.jpegC34768C2-C71B-495A-BB54-EACE3CB5F0DB.jpeg5E0F2594-4DAF-468A-846D-6697C88FB322.jpeg19F8B875-3245-4651-A70B-62A7E3C95F84.jpeg
 

Attachments

  • 2916E4A4-0141-4440-AB15-FBB15E8EF67F.jpeg
    2916E4A4-0141-4440-AB15-FBB15E8EF67F.jpeg
    135.3 KB · Views: 552
  • 89B8FF6B-3D29-4441-929E-C8F9604B4BA2.jpeg
    89B8FF6B-3D29-4441-929E-C8F9604B4BA2.jpeg
    134.6 KB · Views: 544
  • 8D147C72-7526-41DF-896D-9494935238D9.jpeg
    8D147C72-7526-41DF-896D-9494935238D9.jpeg
    57.3 KB · Views: 541
  • F9EE78E7-AEA6-4FDA-867B-DECC957E5683.jpeg
    F9EE78E7-AEA6-4FDA-867B-DECC957E5683.jpeg
    67.2 KB · Views: 548
  • C34768C2-C71B-495A-BB54-EACE3CB5F0DB.jpeg
    C34768C2-C71B-495A-BB54-EACE3CB5F0DB.jpeg
    78 KB · Views: 544
  • 5E0F2594-4DAF-468A-846D-6697C88FB322.jpeg
    5E0F2594-4DAF-468A-846D-6697C88FB322.jpeg
    97.5 KB · Views: 545
  • 19F8B875-3245-4651-A70B-62A7E3C95F84.jpeg
    19F8B875-3245-4651-A70B-62A7E3C95F84.jpeg
    58.1 KB · Views: 543
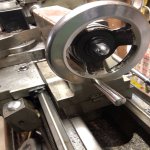
Next up was to drill the barrel for the 2 piece extrator. This is a hair raising thought as you drill parralel to the bore with a very thin wall between the chamber and the extractor. To do this I drilled this in my lathe between centres and I off set the tail stock 0.190”. I had to cut the side of the barrel shank for the other part of the extractor and then spend time getting the extractor fitting and working. I cut the chamber and now it works well.

D0063593-44C3-42DE-8D55-37CA108F7D60.jpegDBA20D8F-1923-4C0A-BA03-8ED4B7F1258B.jpegE029D849-410C-4C13-BDED-AE0FA3C8078F.jpegC8A897BA-BD50-4520-80AF-21879F219030.jpeg9A5454B1-B081-4B16-9019-9A0E99C99282.jpeg9BE09C95-755D-45C3-ABA6-674D1BA34D37.jpeg
 

Attachments

  • D0063593-44C3-42DE-8D55-37CA108F7D60.jpeg
    D0063593-44C3-42DE-8D55-37CA108F7D60.jpeg
    102.3 KB · Views: 534
  • DBA20D8F-1923-4C0A-BA03-8ED4B7F1258B.jpeg
    DBA20D8F-1923-4C0A-BA03-8ED4B7F1258B.jpeg
    100.5 KB · Views: 538
  • E029D849-410C-4C13-BDED-AE0FA3C8078F.jpeg
    E029D849-410C-4C13-BDED-AE0FA3C8078F.jpeg
    99.4 KB · Views: 532
  • C8A897BA-BD50-4520-80AF-21879F219030.jpeg
    C8A897BA-BD50-4520-80AF-21879F219030.jpeg
    108.7 KB · Views: 530
  • 9A5454B1-B081-4B16-9019-9A0E99C99282.jpeg
    9A5454B1-B081-4B16-9019-9A0E99C99282.jpeg
    67.5 KB · Views: 530
  • 9BE09C95-755D-45C3-ABA6-674D1BA34D37.jpeg
    9BE09C95-755D-45C3-ABA6-674D1BA34D37.jpeg
    83 KB · Views: 525
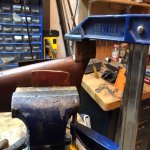
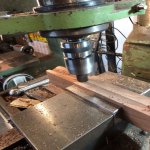
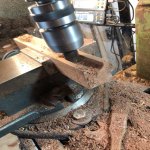
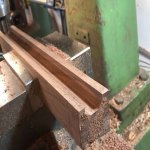
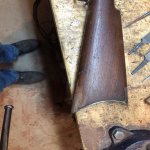
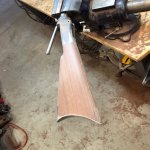
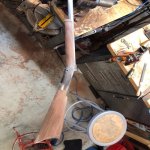
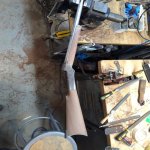
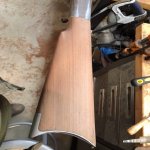
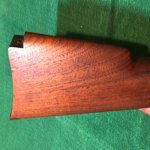
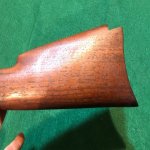
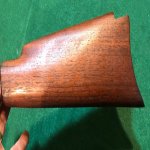
Next up was to stock this up. I was debating building new stocks for it but I was hoping to keep some of the oringinal parts if I could so I used the buttstock and milled a piece off where the toe was chipped and glued a piece of walnut on. I had to bend the buttplate back to the original curve and fit it to the stock. The forend was missing so I had to create one.

CC816355-6737-48F8-B763-D62B22DA6DBF.jpeg6BB6B50F-EAB7-46B4-8968-7BE86A0FA350.jpeg6BB6B50F-EAB7-46B4-8968-7BE86A0FA350.jpeg3250DD64-0D7F-41C6-9DC6-2D86BCB886A9.jpegE38D979A-7EBD-422D-B264-9C1DC18E0341.jpeg94C50EB7-A98F-46B1-862A-B984C3C500C2.jpegDB024BBF-70F5-4482-A2DB-F131C1331359.jpeg
 

Attachments

  • CC816355-6737-48F8-B763-D62B22DA6DBF.jpeg
    CC816355-6737-48F8-B763-D62B22DA6DBF.jpeg
    106.8 KB · Views: 525
  • 6BB6B50F-EAB7-46B4-8968-7BE86A0FA350.jpeg
    6BB6B50F-EAB7-46B4-8968-7BE86A0FA350.jpeg
    112.2 KB · Views: 512
  • 3250DD64-0D7F-41C6-9DC6-2D86BCB886A9.jpeg
    3250DD64-0D7F-41C6-9DC6-2D86BCB886A9.jpeg
    118.7 KB · Views: 526
  • E38D979A-7EBD-422D-B264-9C1DC18E0341.jpeg
    E38D979A-7EBD-422D-B264-9C1DC18E0341.jpeg
    141.7 KB · Views: 518
  • 94C50EB7-A98F-46B1-862A-B984C3C500C2.jpeg
    94C50EB7-A98F-46B1-862A-B984C3C500C2.jpeg
    94.7 KB · Views: 518
  • DB024BBF-70F5-4482-A2DB-F131C1331359.jpeg
    DB024BBF-70F5-4482-A2DB-F131C1331359.jpeg
    76.3 KB · Views: 514
Final fitting and shaping of the forend and the buttstock. I used a file on the buttstock to keep the lines straight and remove as little wood as possible.

3F158D20-1BA5-44AD-92AA-CE1EAA1AC5B9.jpeg43E8C59C-71D7-44B6-A62A-25306769703F.jpegC2C2D8F0-33CC-4506-ABC3-701DDF4F2E3E.jpeg59D8B0DA-BBEA-43A9-BAB4-A7C3C1390D87.jpegEA531B0E-3B57-4712-934C-9E2AB9578372.jpegAFA9C26C-5909-4FD5-A82D-E15AF1E3CE24.jpegAFA9C26C-5909-4FD5-A82D-E15AF1E3CE24.jpeg
 

Attachments

  • 3F158D20-1BA5-44AD-92AA-CE1EAA1AC5B9.jpeg
    3F158D20-1BA5-44AD-92AA-CE1EAA1AC5B9.jpeg
    112.3 KB · Views: 510
  • 43E8C59C-71D7-44B6-A62A-25306769703F.jpeg
    43E8C59C-71D7-44B6-A62A-25306769703F.jpeg
    127.5 KB · Views: 509
  • C2C2D8F0-33CC-4506-ABC3-701DDF4F2E3E.jpeg
    C2C2D8F0-33CC-4506-ABC3-701DDF4F2E3E.jpeg
    111.2 KB · Views: 505
  • 59D8B0DA-BBEA-43A9-BAB4-A7C3C1390D87.jpeg
    59D8B0DA-BBEA-43A9-BAB4-A7C3C1390D87.jpeg
    116.6 KB · Views: 507
  • EA531B0E-3B57-4712-934C-9E2AB9578372.jpeg
    EA531B0E-3B57-4712-934C-9E2AB9578372.jpeg
    118.1 KB · Views: 501
  • AFA9C26C-5909-4FD5-A82D-E15AF1E3CE24.jpeg
    AFA9C26C-5909-4FD5-A82D-E15AF1E3CE24.jpeg
    109.2 KB · Views: 504
More stock work.

C65461AE-FB00-4B3F-ADCE-3FAAE9D25433.jpeg08E011A0-B7C7-4386-878C-B5B8F6B3B30F.jpegFA4E8DF9-29C5-4BE2-AC72-70E279E8DD95.jpegDE2AF8D8-E2AF-44D4-8177-3131ED5AD23A.jpegE1F4CA8D-3708-42A4-AD79-F1D36DF75FBA.jpeg
 

Attachments

  • C65461AE-FB00-4B3F-ADCE-3FAAE9D25433.jpeg
    C65461AE-FB00-4B3F-ADCE-3FAAE9D25433.jpeg
    123.3 KB · Views: 503
  • 08E011A0-B7C7-4386-878C-B5B8F6B3B30F.jpeg
    08E011A0-B7C7-4386-878C-B5B8F6B3B30F.jpeg
    102.2 KB · Views: 495
  • FA4E8DF9-29C5-4BE2-AC72-70E279E8DD95.jpeg
    FA4E8DF9-29C5-4BE2-AC72-70E279E8DD95.jpeg
    115.2 KB · Views: 497
  • DE2AF8D8-E2AF-44D4-8177-3131ED5AD23A.jpeg
    DE2AF8D8-E2AF-44D4-8177-3131ED5AD23A.jpeg
    118.7 KB · Views: 501
  • E1F4CA8D-3708-42A4-AD79-F1D36DF75FBA.jpeg
    E1F4CA8D-3708-42A4-AD79-F1D36DF75FBA.jpeg
    87.2 KB · Views: 493
Next to clean up the action by drawfilling but I had to go lite on the area with the roll stamp so I don’t loose to many markings. The rest of the action cleaned up pretty well.

6B7639F6-FF7F-42B4-86D6-5F224B0B86F8.jpeg3C22BCB7-B3E5-489F-BADE-1003BBC7813F.jpeg3F690B62-3BC6-4D28-919C-46C412FF789D.jpeg4EFA6198-BFC1-4732-A60E-954C04BE56E5.jpeg7D61E804-F1C3-498D-82E6-802C5B14269A.jpeg8862836B-935C-43DF-9327-ECDE6F6282F4.jpeg
 

Attachments

  • 6B7639F6-FF7F-42B4-86D6-5F224B0B86F8.jpeg
    6B7639F6-FF7F-42B4-86D6-5F224B0B86F8.jpeg
    117.9 KB · Views: 489
  • 3C22BCB7-B3E5-489F-BADE-1003BBC7813F.jpeg
    3C22BCB7-B3E5-489F-BADE-1003BBC7813F.jpeg
    116.3 KB · Views: 494
  • 3F690B62-3BC6-4D28-919C-46C412FF789D.jpeg
    3F690B62-3BC6-4D28-919C-46C412FF789D.jpeg
    110.7 KB · Views: 486
  • 4EFA6198-BFC1-4732-A60E-954C04BE56E5.jpeg
    4EFA6198-BFC1-4732-A60E-954C04BE56E5.jpeg
    102.5 KB · Views: 489
  • 7D61E804-F1C3-498D-82E6-802C5B14269A.jpeg
    7D61E804-F1C3-498D-82E6-802C5B14269A.jpeg
    46 KB · Views: 490
  • 8862836B-935C-43DF-9327-ECDE6F6282F4.jpeg
    8862836B-935C-43DF-9327-ECDE6F6282F4.jpeg
    76.1 KB · Views: 486
More finishing work

3B9C8B15-0FAC-4E81-8478-2ED1BC20441E.jpeg83A8EC4B-B340-491D-A5BB-19657F95A1A0.jpeg3B9C8B15-0FAC-4E81-8478-2ED1BC20441E.jpegEC1B8B05-E3D9-43EC-BD3A-3E59700F533F.jpegF1B5E4E1-FDAE-477A-B7DB-218F3C96FDAF.jpegD9E8ED7F-5D45-40E9-AE00-78C2E9E5163E.jpeg
 

Attachments

  • 3B9C8B15-0FAC-4E81-8478-2ED1BC20441E.jpeg
    3B9C8B15-0FAC-4E81-8478-2ED1BC20441E.jpeg
    80.4 KB · Views: 280
  • 83A8EC4B-B340-491D-A5BB-19657F95A1A0.jpeg
    83A8EC4B-B340-491D-A5BB-19657F95A1A0.jpeg
    37.2 KB · Views: 279
  • EC1B8B05-E3D9-43EC-BD3A-3E59700F533F.jpeg
    EC1B8B05-E3D9-43EC-BD3A-3E59700F533F.jpeg
    79.8 KB · Views: 277
  • F1B5E4E1-FDAE-477A-B7DB-218F3C96FDAF.jpeg
    F1B5E4E1-FDAE-477A-B7DB-218F3C96FDAF.jpeg
    105.6 KB · Views: 277
  • D9E8ED7F-5D45-40E9-AE00-78C2E9E5163E.jpeg
    D9E8ED7F-5D45-40E9-AE00-78C2E9E5163E.jpeg
    120.3 KB · Views: 279
Then I casehardened it and rust blued the barrel.
F68112EE-6265-4CAA-AF73-70D332C709BE.jpeg2FA6F62E-E84A-409B-B752-95467750C511.jpeg953E4BEE-9B05-4976-B952-9F32E666596C.jpeg5413B23A-90F9-45E3-B098-D89E7387AA20.jpegD01FA97C-787E-4F75-93F5-E065C0CB569E.jpeg460382C8-7B17-40CF-914D-43F1DAB19D64.jpegA16C31F5-EE9E-4933-80EF-D7F92539B8E8.jpeg
 

Attachments

  • F68112EE-6265-4CAA-AF73-70D332C709BE.jpeg
    F68112EE-6265-4CAA-AF73-70D332C709BE.jpeg
    89.6 KB · Views: 270
  • 2FA6F62E-E84A-409B-B752-95467750C511.jpeg
    2FA6F62E-E84A-409B-B752-95467750C511.jpeg
    81.2 KB · Views: 277
  • 953E4BEE-9B05-4976-B952-9F32E666596C.jpeg
    953E4BEE-9B05-4976-B952-9F32E666596C.jpeg
    71.6 KB · Views: 280
  • 5413B23A-90F9-45E3-B098-D89E7387AA20.jpeg
    5413B23A-90F9-45E3-B098-D89E7387AA20.jpeg
    134.1 KB · Views: 273
  • D01FA97C-787E-4F75-93F5-E065C0CB569E.jpeg
    D01FA97C-787E-4F75-93F5-E065C0CB569E.jpeg
    95.3 KB · Views: 272
  • 460382C8-7B17-40CF-914D-43F1DAB19D64.jpeg
    460382C8-7B17-40CF-914D-43F1DAB19D64.jpeg
    82.3 KB · Views: 279
  • A16C31F5-EE9E-4933-80EF-D7F92539B8E8.jpeg
    A16C31F5-EE9E-4933-80EF-D7F92539B8E8.jpeg
    97.4 KB · Views: 275
AD46CFF4-3EA6-4139-AFF2-C6310606ACA5.jpegI marked the caliber on the barrel, my initials and the year under the forend and put an MVA front sight.

2FCD155C-E22B-419E-9801-07691753E2C9.jpeg29841BFA-4A88-47DC-B8A1-FC559B238427.jpegF85B8CE2-1355-4760-860A-A0C1F3C1C5CE.jpeg
 

Attachments

  • AD46CFF4-3EA6-4139-AFF2-C6310606ACA5.jpeg
    AD46CFF4-3EA6-4139-AFF2-C6310606ACA5.jpeg
    89.5 KB · Views: 274
  • 2FCD155C-E22B-419E-9801-07691753E2C9.jpeg
    2FCD155C-E22B-419E-9801-07691753E2C9.jpeg
    101.9 KB · Views: 266
  • 29841BFA-4A88-47DC-B8A1-FC559B238427.jpeg
    29841BFA-4A88-47DC-B8A1-FC559B238427.jpeg
    81.7 KB · Views: 272
  • F85B8CE2-1355-4760-860A-A0C1F3C1C5CE.jpeg
    F85B8CE2-1355-4760-860A-A0C1F3C1C5CE.jpeg
    70.1 KB · Views: 270
I stained the stock and snapped a pic while the first coat of oil was still wet.

768290C5-33A1-46B1-BD01-C5A94D3CABC0.jpegD292E5F2-4272-4B6C-B2E8-6AE95207827B.jpeg75742553-183D-498B-9EE0-1E9AA9F4C319.jpeg0754A749-58DB-471A-9ED8-E45AF3C17C9D.jpeg1406DD7A-931D-4616-8678-40606A59EE49.jpeg58DDD5C1-A31E-428F-9BB0-D4C42EC0F44A.jpeg
 

Attachments

  • 768290C5-33A1-46B1-BD01-C5A94D3CABC0.jpeg
    768290C5-33A1-46B1-BD01-C5A94D3CABC0.jpeg
    69.5 KB · Views: 266
  • D292E5F2-4272-4B6C-B2E8-6AE95207827B.jpeg
    D292E5F2-4272-4B6C-B2E8-6AE95207827B.jpeg
    72.8 KB · Views: 273
  • 75742553-183D-498B-9EE0-1E9AA9F4C319.jpeg
    75742553-183D-498B-9EE0-1E9AA9F4C319.jpeg
    66.6 KB · Views: 276
  • 0754A749-58DB-471A-9ED8-E45AF3C17C9D.jpeg
    0754A749-58DB-471A-9ED8-E45AF3C17C9D.jpeg
    43.3 KB · Views: 269
  • 1406DD7A-931D-4616-8678-40606A59EE49.jpeg
    1406DD7A-931D-4616-8678-40606A59EE49.jpeg
    50.6 KB · Views: 273
  • 58DDD5C1-A31E-428F-9BB0-D4C42EC0F44A.jpeg
    58DDD5C1-A31E-428F-9BB0-D4C42EC0F44A.jpeg
    83.7 KB · Views: 267
Last edited:
Back
Top Bottom