


Now that I have a minute, for the people that have asked and for others general interest, here are the pictures for how I un-thumb holed my SL8 stock.
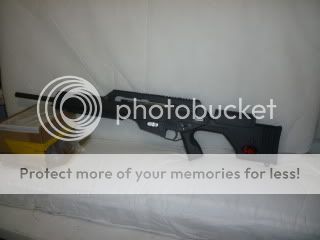
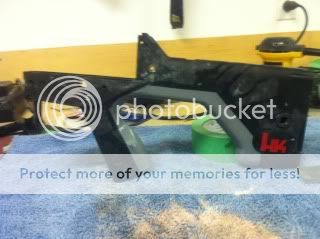
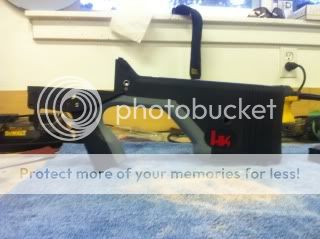
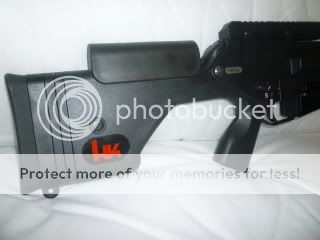
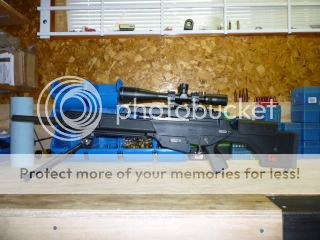
As previously posted my SL8 now looks like this;
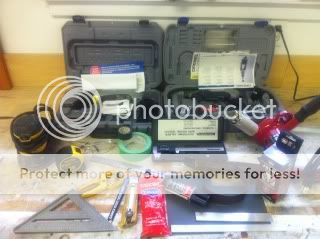
I bought the following off the EE;
I already had all of the tools. I was only required to replace a broken heat gun and purchase some expendables like 1000/1500 grit wet sand paper, spray bomb and some aluminum bars 1"x1/8"x12".
Using a carpenters square, pencil and metal ruler I established some lines. The lines were a guide for the removal of material and the beginning of the arc when heating and bending the polymer. The polymer must be left long enough to allow for the sides to meet up at the center of the 2 bends. I chose the rear of the stock, a square edge, and the upper lip of the lower where the SL8 upper is fixed.
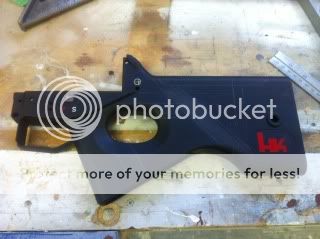
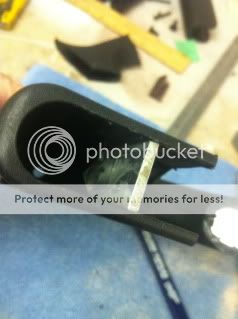
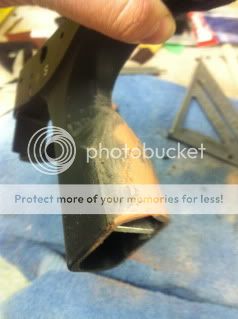
The Stock was cut using a Dremal Multimax with a fine tooth, half moon blade. It cut very well and resulted in very little melting of the polymer.
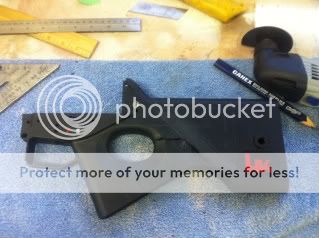
With the stock now open it’s apparent that there is no internal structure for support, this is where the aluminum comes in to play. I cut down the 1”x1/8”x12” to fit the desired dimensions, there was a bit of cut/sand/file/repeat until it fit. The aluminum was held in place with metal/plastic epoxy. It acted more as brace and gap filler for the JB Weld. JB Weld is an automotive product that a great filler/bonder. If you just want to glue plastic and metal without the filling I would suggest Gorilla glue.


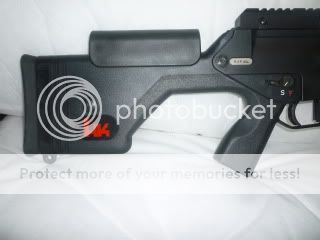
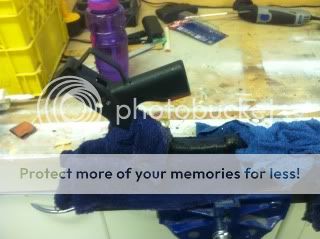
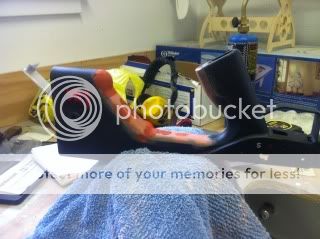
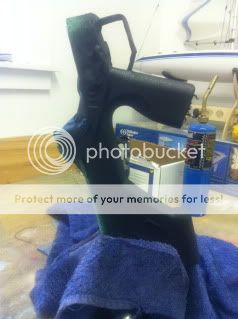
Its at this point that I used the heat gun to soften the polymer and bend the polymer using the wide edge of the aluminum bars. The aluminum was kept cool in some water to attempt a cold rolled affect. I didn’t take pictures of the step-by-step bending process due to the urgency of having to work warm polymer but I did take a picture of the set up I used. Rags were dripping wet and wrapped around the stock, leaving exposed the radius bend pencil lines. The whole mess was then placed in the bench vise with the pencil lines at the top of the vise clamping edge. The hope was that the heat would not transfer past the wet rags and affect the unbent stock and the all-important HK fan-boy sticker. The rag required constant wetting but it worked.
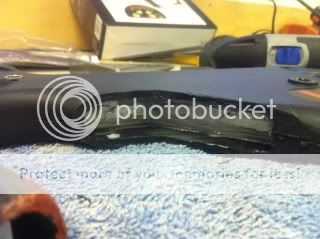
The bent areas required some sanding and filing before the application of body filler. I used a palm sander, Dremel corner sander on the Multimax and a wood rasp. The rasp worked surprisingly well. Once the bends were to the best they were going to be all the bent areas were filled with some automotive filler.
I actually filled the grip before bending the shoulder part.

Bend and fill…..my favorite pastime!!


This like drywall filler, fill/sand/repeat until you have what you want. Although it looks thick most of it was sanded off.
Wrapped in green tape and ready for primer, did a couple of thick coats. Make sure the paints are all compatible.

Wet sand with 1000 grit.
Cleaned up with a tac-rag.
Re-taped, sprayed with a black gloss automotive plastic type paint and sanded with 1500 grit.

Re-taped and sprayed with cheep-o truck liner spray bomb. Now I was unsure how this would work as I suspected that if it was applied too close to the surface the rubber material would blend together and not form a rough surface. I believe the cans instructions said to spray from 10 centimeters away; I chose to spray from 12” away in very fast passes. It worked for the first coat but for the next 2 I sprayed from 24 to 30” away, giving me a nice rough texture. The tape was left on with 10 minutes standing time between coats. I pulled the tape off right away after the final coat. The liner didn’t pull off but it did move around, it was possible to smudge it and un-smudge it…. really odd.
I ended up waiting 24 hours before swapping over the trigger groups as I wanted to make sure the liner had set up. The stock and the spray liner weren’t a perfect match at first but when I rubbed the polymer down with G96 to clean it up, it brightened right up and matched perfectly!
If I had to guess at a solid time line to repeat the process I would say it would take 6 hours. Thats excluding the 24 hour dry times for JB Weld and spray liner.
Thanks for stopping by.
**************UPDATE***************
June 4th, 2012
So I left this project off at the point that required the inner locking portion of the butt pad to be shortened. In effect, I could not shorten the stocks length by removing a spacer ring. This was caused by the aluminum bar stock on the interior that was added for support behind the all-important “Fanboy” HK logo.
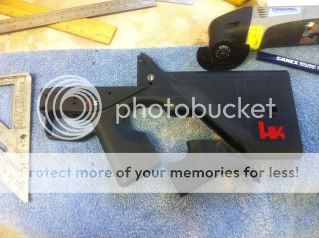
Here you can see all the parts involved laid out. The extra spacer ring has been removed and placed at the pistol grip. For the trimming process, as before, a ruler, Dremel, pencil and knife were used.
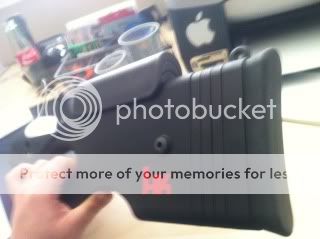
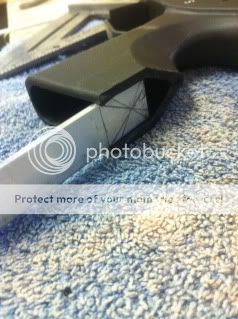
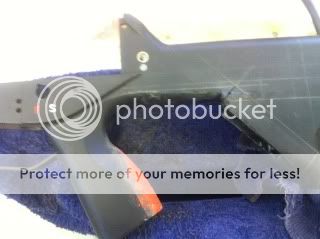
Here is a close up of the nibbled section….hint: look at the “arrow”.")
And what kind of self promoting bastard would I be if I didn’t post the assembled unit with some of my spare parts: Burris Tactical 3200 with AR-PEPR mount and tilt and wobble Atlas Bipod.
Again, Thanks for stopping by.
As previously posted my SL8 now looks like this;
I bought the following off the EE;
I already had all of the tools. I was only required to replace a broken heat gun and purchase some expendables like 1000/1500 grit wet sand paper, spray bomb and some aluminum bars 1"x1/8"x12".
Using a carpenters square, pencil and metal ruler I established some lines. The lines were a guide for the removal of material and the beginning of the arc when heating and bending the polymer. The polymer must be left long enough to allow for the sides to meet up at the center of the 2 bends. I chose the rear of the stock, a square edge, and the upper lip of the lower where the SL8 upper is fixed.
The Stock was cut using a Dremal Multimax with a fine tooth, half moon blade. It cut very well and resulted in very little melting of the polymer.
With the stock now open it’s apparent that there is no internal structure for support, this is where the aluminum comes in to play. I cut down the 1”x1/8”x12” to fit the desired dimensions, there was a bit of cut/sand/file/repeat until it fit. The aluminum was held in place with metal/plastic epoxy. It acted more as brace and gap filler for the JB Weld. JB Weld is an automotive product that a great filler/bonder. If you just want to glue plastic and metal without the filling I would suggest Gorilla glue.
Its at this point that I used the heat gun to soften the polymer and bend the polymer using the wide edge of the aluminum bars. The aluminum was kept cool in some water to attempt a cold rolled affect. I didn’t take pictures of the step-by-step bending process due to the urgency of having to work warm polymer but I did take a picture of the set up I used. Rags were dripping wet and wrapped around the stock, leaving exposed the radius bend pencil lines. The whole mess was then placed in the bench vise with the pencil lines at the top of the vise clamping edge. The hope was that the heat would not transfer past the wet rags and affect the unbent stock and the all-important HK fan-boy sticker. The rag required constant wetting but it worked.
The bent areas required some sanding and filing before the application of body filler. I used a palm sander, Dremel corner sander on the Multimax and a wood rasp. The rasp worked surprisingly well. Once the bends were to the best they were going to be all the bent areas were filled with some automotive filler.
I actually filled the grip before bending the shoulder part.
Bend and fill…..my favorite pastime!!
This like drywall filler, fill/sand/repeat until you have what you want. Although it looks thick most of it was sanded off.
Wrapped in green tape and ready for primer, did a couple of thick coats. Make sure the paints are all compatible.
Wet sand with 1000 grit.
Cleaned up with a tac-rag.
Re-taped, sprayed with a black gloss automotive plastic type paint and sanded with 1500 grit.
Re-taped and sprayed with cheep-o truck liner spray bomb. Now I was unsure how this would work as I suspected that if it was applied too close to the surface the rubber material would blend together and not form a rough surface. I believe the cans instructions said to spray from 10 centimeters away; I chose to spray from 12” away in very fast passes. It worked for the first coat but for the next 2 I sprayed from 24 to 30” away, giving me a nice rough texture. The tape was left on with 10 minutes standing time between coats. I pulled the tape off right away after the final coat. The liner didn’t pull off but it did move around, it was possible to smudge it and un-smudge it…. really odd.
I ended up waiting 24 hours before swapping over the trigger groups as I wanted to make sure the liner had set up. The stock and the spray liner weren’t a perfect match at first but when I rubbed the polymer down with G96 to clean it up, it brightened right up and matched perfectly!
If I had to guess at a solid time line to repeat the process I would say it would take 6 hours. Thats excluding the 24 hour dry times for JB Weld and spray liner.
Thanks for stopping by.
**************UPDATE***************
June 4th, 2012
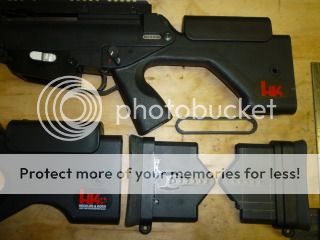
So I left this project off at the point that required the inner locking portion of the butt pad to be shortened. In effect, I could not shorten the stocks length by removing a spacer ring. This was caused by the aluminum bar stock on the interior that was added for support behind the all-important “Fanboy” HK logo.
Here you can see all the parts involved laid out. The extra spacer ring has been removed and placed at the pistol grip. For the trimming process, as before, a ruler, Dremel, pencil and knife were used.
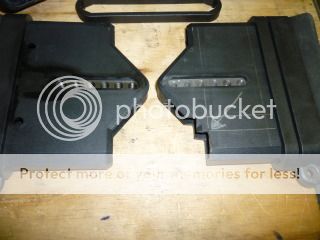
Here is a close up of the nibbled section….hint: look at the “arrow”.
And what kind of self promoting bastard would I be if I didn’t post the assembled unit with some of my spare parts: Burris Tactical 3200 with AR-PEPR mount and tilt and wobble Atlas Bipod.
Again, Thanks for stopping by.
Last edited:


