Long Branch 1945 Rifle Project

Joel

CGN Ultra frequent flyer
GunNutz
Rating - 99.8%
450   1   0
Hi all,

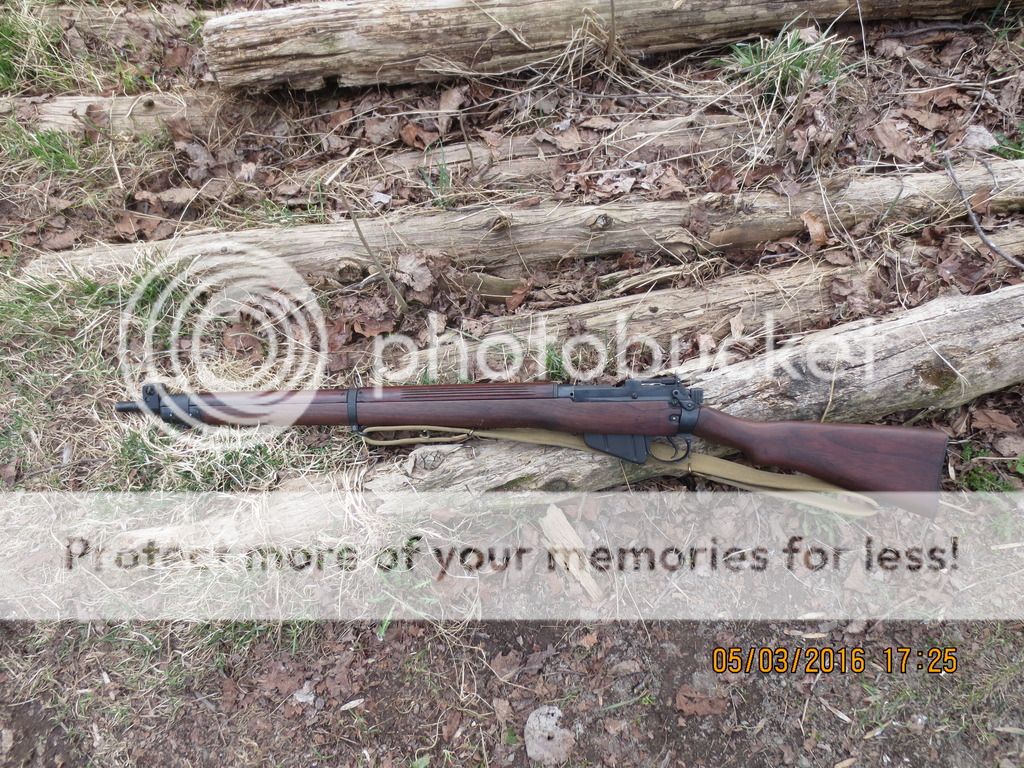
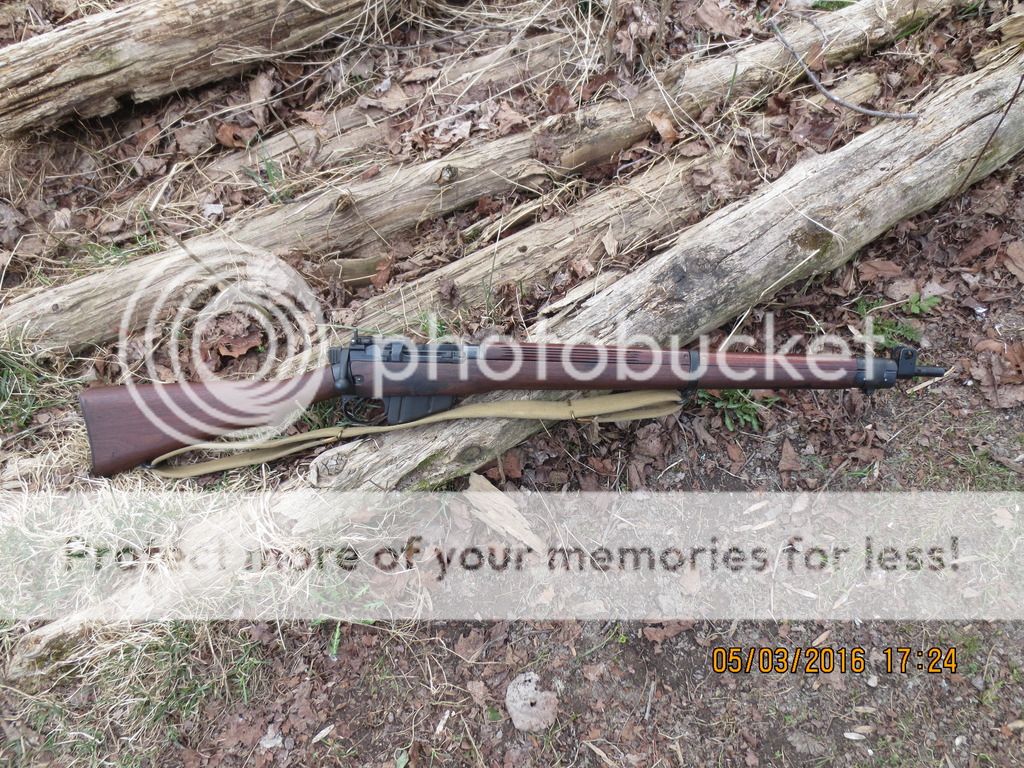
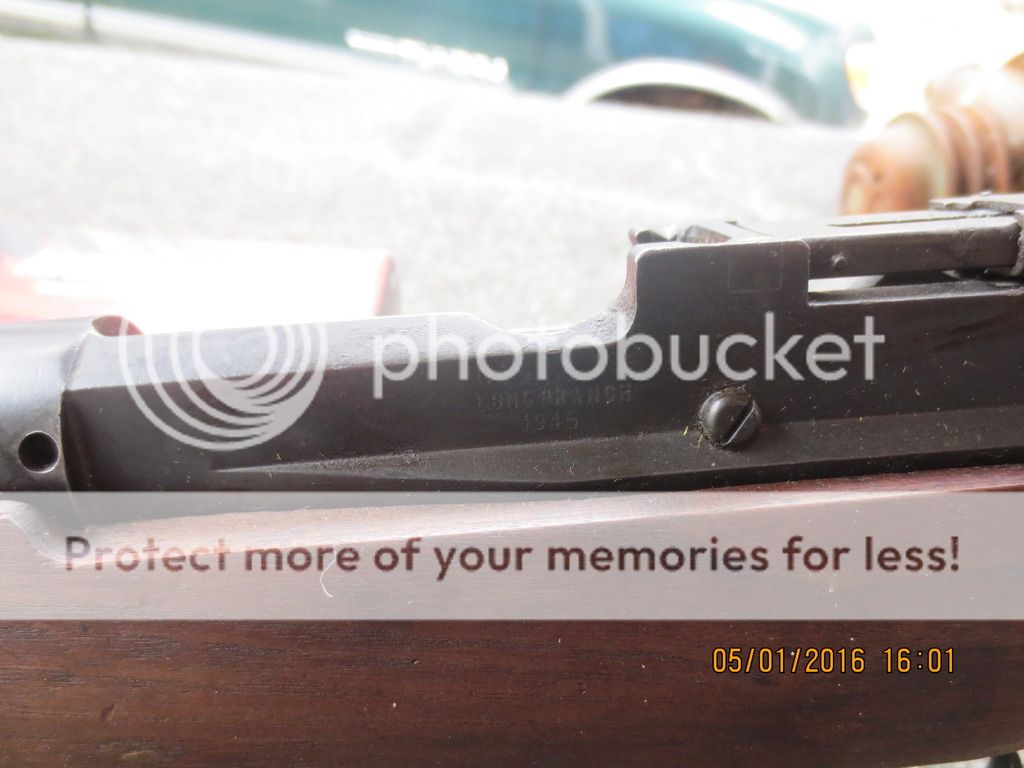
I recently picked up a Long Branch 1945 made rifle, and it is turning into a bit of a project. Would be interested to hear any info you folks might share about this one, as I am not a super knowledgeable guy on their markings, etc.

First of all, the stock is super clean, and very nice walnut. L marked butt, which is good for a big knuckle dragger like me. Top pieces do not look like they match. Wondering if a stock this nice is a replacement or maybe NOS? Finish is in super shape and there were actually traces of very old cosmoline outside and inside the action. Someone had cleaned it and fired it, but not very thoroughly and the bolt was a little gummy to work. I removed what remained.

Bore and rifling are super crisp and new looking.

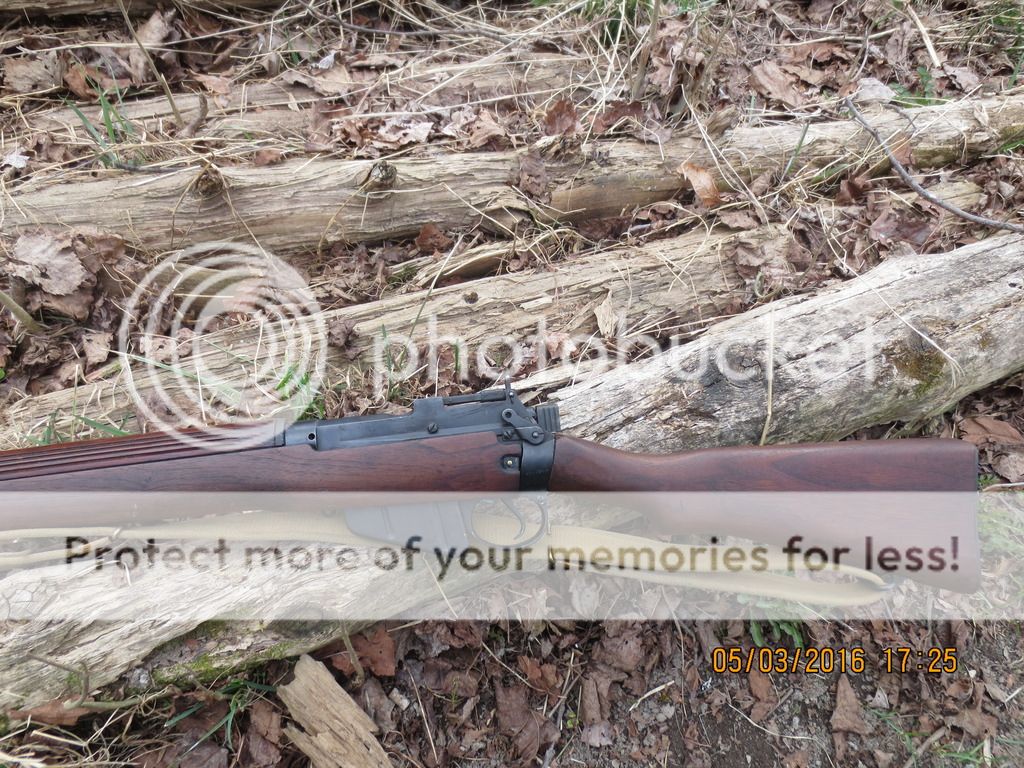
Bolt body and mag match the rifles serial number. Cocking piece, safety do not seem to.

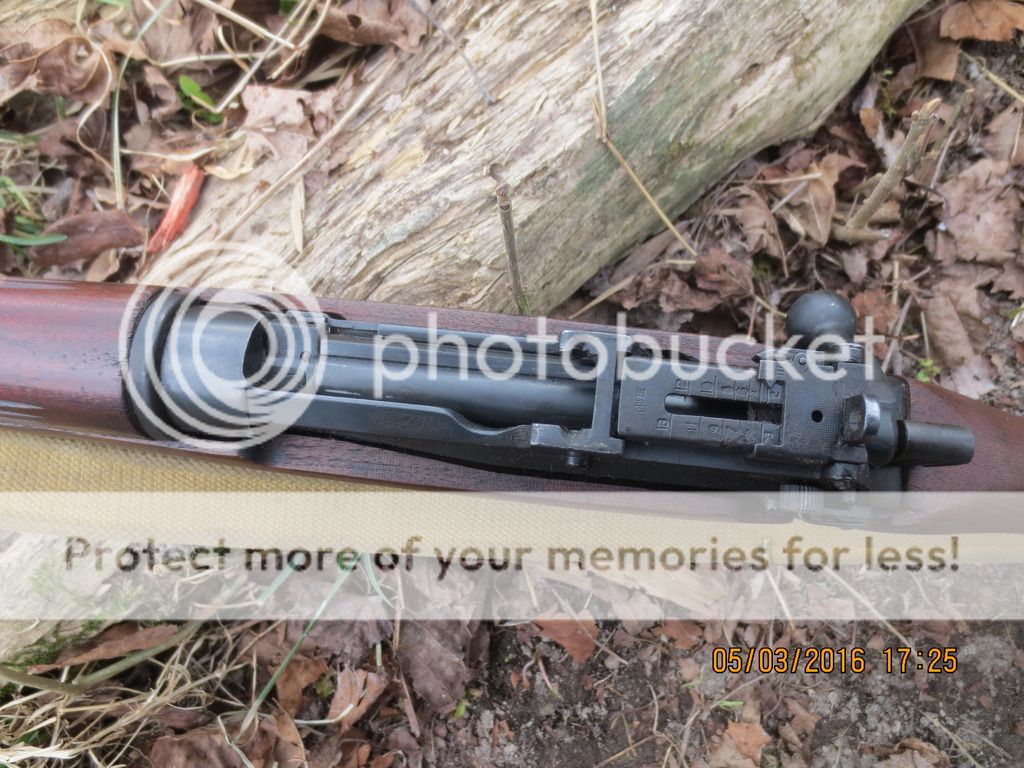
Strangely the front sight is the shortest one they make (-.3) marked. And the rifle seems to shoot very high at 100 yards. I say seems to because I only fired two factory Remington rounds. The second one produced a lot of smoke, and it turns out it had a pierced primer. I packed the rifle up and went home.

Guessing my first move here should be picking up a headspace gauge before messing with anything else? Bolt has a No 2 bolt head that looks visually in great shape, and is .634 in length according to my caliper. I have a hard time seeing a rifle this nice having excess headspace.

Anyway, here are some pics. Thanks in advance for whatever intel you fellows can provide!

IMG_2404_zpsttipcf5h.jpg


IMG_2403_zpsjb6kqfpq.jpg


IMG_2405_zpsznebdmmo.jpg


IMG_2406_zpscydkoovx.jpg


IMG_2396_zpsl1ksi6bw.jpg
 
Did you buy this around Calgary? The butt stock is sanded and the stock set looks like maybe a leather die was used to blend wood to match.
 
Slings on backward. Check your firing pin (pierced primer thing) and don't be overly concerned about shooting high at 100 yards (these are 300 + yard rifles). Aiming at center of mass (and lower {read belt buckle} if closer than 300 yards) will place rounds between the nipples of (unzee) target.

Lee Enfield; putting round holes in square heads for over 100 years! :)
 
Thanks for the info guys!

mr.e moose, this one came from a fellow in Quebec actually. If someone did sand and finish the buttstock, they did a very good job. It would explain why it looks so new. It does seem like it was not properly fit to the rifle right behind the tang, as the cocking piece rubs a tiny bit on the wrist of the buttstock when you operate the bolt. But just enough to say.

Plinker 777, indeed! Thank you! I guess it does sure still suit the purpose. I would not be too concerned if it was shooting high with the big ol 300 meter battle sight, but it was quite high with the ladder up and set to 200 meters also. Think I will swap that front sight out.

Firing pin looks a little pointy, might need to be blunted/rounded off a bit. And the primers were sticking out past the case a couple thou, enough to feel with your finger anyway, not sue if thats enough headspace to worry about.

Compared to a No1 MkIII at my buddys place it doesnt look like the pin is protruding too much but I can get a picture of that too.
 
Also meant to ask you gents, how tight should the barrel bands be? Is this a situation like a Garand etc where the top of the handguard should not touch the stock, and be free to move a little bit?
 
Nope, the wood and bands should be rock solid. No perceived movement whatsoever.

You're also spot on with the firing pin issues to look for. My friend Big Ed will be along shortly as he puts out about the best explanation of Enfield head spacing, but because it's a military rifle, the go/no-go gauges are very generous (not a critical measurement imho). As long as the bolt locks and the cartridge is chambered you're good to go.

...how high is "really high"?
 
OK! Thanks! I will cinch the band up a little tighter then!

Appreciate the info on the headspace too...I figure I should snag at least a "Field" gauge and see if she closes on that. As long as its under .074"I will not sweat it that much at all. Curious to try it with thicker (and thicker rimmed) brass like Herters or PRVI as well.

I really wish I could tell you how high it shoots exactly but I am thinking about 16" give or take. The trouble is I am guessing based on what I think are fresh holes in the berm. Since I only took two shots its tough to say. It was definitely not on a 16x16" cardboard though, but it looked like there were two holes in the sand above and to the right. This would make sense as well because the front sight is difted a bit left.
 
Taller front sight will cure a high shooting rifle. That is why they were made in numerous sizes.
 
Yes, the bands should be tight...but no so tight that you're stripping the threads or anything.

As for headspacing, with a .074 Field gauge...a light touch with 2 fingers is all you need. Just move the bolt handle till it stops with light finger pressure, Compare with no gauge and with it in. When you feel resistance...

Don't force it as with the bolt's leverage you can stress the action.


OK! Thanks! I will cinch the band up a little tighter then!

Appreciate the info on the headspace too...I figure I should snag at least a "Field" gauge and see if she closes on that. As long as its under .074"I will not sweat it that much at all. Curious to try it with thicker (and thicker rimmed) brass like Herters or PRVI as well.

I really wish I could tell you how high it shoots exactly but I am thinking about 16" give or take. The trouble is I am guessing based on what I think are fresh holes in the berm. Since I only took two shots its tough to say. It was definitely not on a 16x16" cardboard though, but it looked like there were two holes in the sand above and to the right. This would make sense as well because the front sight is difted a bit left.
 
That is a good looking rifle :) The upper handguards are very likely not the same wood as the lower handguard or stock, so if they're not exactly the same that's normal. It could be NOS wood stained to match and oil finished. It could also just be extremely well taken care of/new. It 100% does not look sanded to me. I have a Fazakerly no 4 with a NOS wood set and it fits a little big too nothing to worry about. Mine's "L" marked as well and I like it better even though I'm a dwarf :) The bands should be tight. Is the wood loose underneath the band, or is the band just loose? You can try shimming the lower forestock under the barrel and under the rear handguard at the rear. I've never been able to figure out exactly how to measure the exact force exerted against the barrel, but I do know that it's supposed to have upward pressure at the nose, and shimming in this way will accomplish that. I use plain paper.

As far as headspace is concerned, you have some fiddling room if necessary. If you know someone with some gauges or want to buy your own and check, it really wouldn't hurt. You can, however, set it up so you're head spacing on the neck instead of the rim and eliminate the problems associated with too much headspace (case head separation!) in all but the worst of the worst. For example, a go gauge is .064, no go is .068 (or .070 depending on if you're British or Australian) and a field gauge is .074. If you were to find that you could JUST close on a field gauge by a thou or two you would probably be ok if you headspace from the neck, but not if you've got .086.

To do this you'll need to buy some o rings. The assorted packs at most auto places is a good investment. Slide the o ring down over the cartridge until it's resting against the rim. Insert the round into rifle and fire. It should be moderately difficult to close the bolt. If it's too tight to close without hitting the bolt shut with your hand, try the next size down. The o ring holds the case head against the bolt face so that the brass expands as much as it possibly can on the initial firing. You then use those brass to reload for that rifle only, and only neck size.

Oh, and are we playing show ant tell? My desporterized no 4:
20150614_194002_zpssf1dims1.jpg
 
Thanks a lot for the further info guys, and the very detailed post mwjones.

That there is a beauty of a rifle!

I went ahead and snugged up the barrel bands, without putting king kong torque on it or anything. The rear top handguard has a little bit of spring right at the receiver, as if the band is keeping it down so tight its lifting the tail end a bit. Front one does not move at all, and pressure in the stock seems tight and nice!

I think she does not like Remington ammo, as it shot only about 3-4 inches high at 100 yards with my handloads of a Hornady 150 grain SST and a grain or two under book max charge.

Decided I won't worry much about headspace, but I will take a wee bit off the firing pin and re-round it, as its still popping the odd primer.

Gotta love these rifles, though!
 
Thank you! And thanks for the link! Looks like some great vids for sure, it will help to understand what I have been reading about.

As far as I know this one is not one of Lou's although it may be a rebuilt or desportered one still.

I was really surprised to find oooold cosmo gumming up the action/bit of the start of the chamber tho!
 
Don't think it's mine, but it does look decent :)

As mentioned by mr. e moose, the buttstock has been sanded; You can see that it's rounded where your pinky finger normally rests, originally that part is "sharper":

smle_029.jpg
 

Attachments

  • smle_029.jpg
    smle_029.jpg
    23.5 KB · Views: 95
Cheap bastards headspace gauge.

Measure a new unfired case or a full length resized case and write it down. You need the case to headspace on the rim and not the case shoulder which would give a false reading.

303gauge_zpsb1e333a7.jpg


Next use a fired spent primer and start this primer into the primer just using your fingers.

303primer_zpsae8fdb45.jpg


303primera_zps612343f9.jpg


Now slowly chamber this case and let the bolt face seat the primer, and then extract this case.

Now remeasure the case from the base of the primer to the case mouth and write it down.

Subtract the first case measurement from the second and this is your head clearance and the amount the primer is protruding.

Now measure your rim thickness and add it to your head clearance measurement and this is your actual headspace reading.

hedspace-b_zpsce06e3e4.gif


If you do not have a vernier caliper you can use feeler gauges between the right locking lug and the receiver.

Headspace%20Gage_zpsb53x54bp.jpg


IMGP6598b-1_zpshpoeikip.jpg


Place a empty new case or a full length resized case in the chamber and close the bolt.

Now push "HARD" on the cocking piece and slide feeler gauges in the gap of the receiver and right locking lug until you have a snug fitting feeler gauge. If you have a bolt tool you can disassemble the bolt and not fight the firing pin spring and not end up with a cocking piece imprint on your thumb.

The average rim thickness of a American made .303 British case is approximately .058, and if you can get a .016 feeler gauge in the gap you are approximately at the max military headspace of .074. A .006 feeler gauge would be minimum headspace of .064 and .009 feeler gauge would be .067.

Below is from the 1946 Australian Book by Jim Sweet "Competitive Rifle Shooting" and Australian gauges.

central-1_zpsyhcsooha.jpg


HSGauge-1_zpsjgqjipp5.jpg


Trust me I have actual headspace gauges below and the two cheap bastard methods do work.

IMGP5264-1_zpswnppidgt.jpg
 
Indeed!

Thanks here as well Ed, I will try that out over the weekend and see what it gets us.
 
Back
Top Bottom