Leuchtkafer
Member
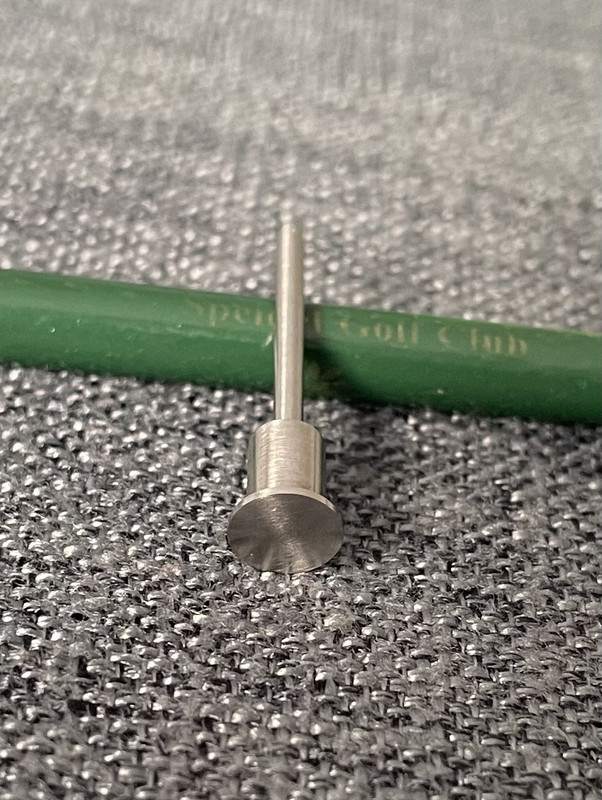
A fun little evening shop project to replace that dinky little plastic cocking indicator. I had a scrap of 1/2" aluminum round stock leftover from another project that was perfect for this job. Turning to a small diameter is done with a deep cut in one shot, so that the material ahead of the cut acts as support and prevents deflection like would be experienced if attempting to cut on a small diameter.

I've been wanting to put a Digital Read Out on my lathe, but for now the analog method works pretty good too")

Working with a collet chuck is nice because I can pull out more material to work on as I go and not worry about losing concentricity. Here I've got all the diameters cut and I'm ready to part it off.

Parting always leaves a nub so that'll need to be cleaned up

Zip across and the job is done

I've seen some commercially available cocking indicators with the flange at the end to seat on the spring and contact the firing pin, seemed like a good idea so I did the same.

Uncocked

Cocked.

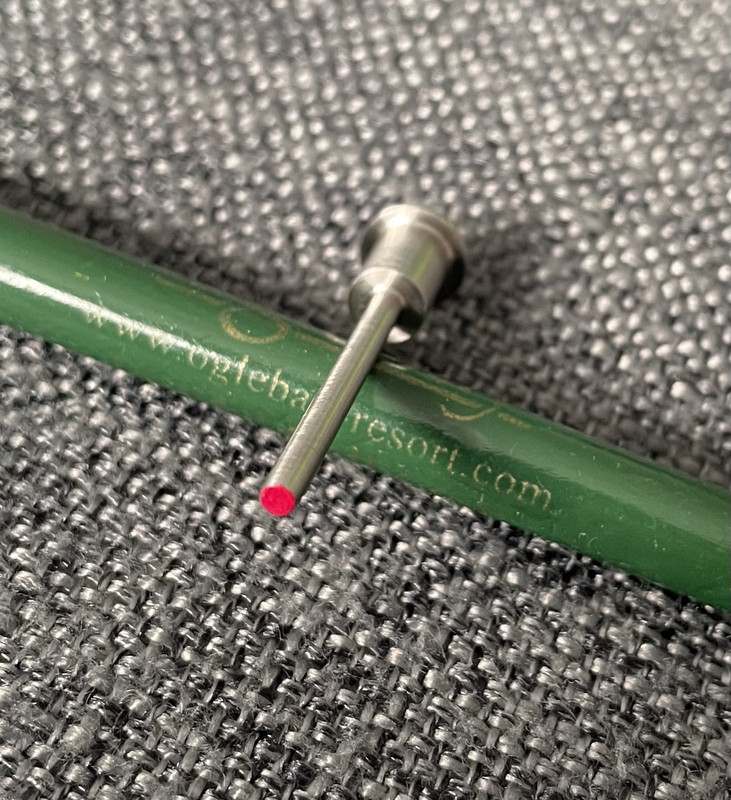
I'm undecided if I should add a red dot to the end, I think I like the bare metal better. Anywho, just thought I'd share.
I've been wanting to put a Digital Read Out on my lathe, but for now the analog method works pretty good too
Working with a collet chuck is nice because I can pull out more material to work on as I go and not worry about losing concentricity. Here I've got all the diameters cut and I'm ready to part it off.
Parting always leaves a nub so that'll need to be cleaned up
Zip across and the job is done
I've seen some commercially available cocking indicators with the flange at the end to seat on the spring and contact the firing pin, seemed like a good idea so I did the same.
Uncocked
Cocked.
I'm undecided if I should add a red dot to the end, I think I like the bare metal better. Anywho, just thought I'd share.
 been waiting for 6 months for a replacement.