Swede Rolling Block resto with questions... *UPDATED* near completion

Oddbawl

CGN frequent flyer
Rating - 100%
150   0   0
Location
Beyond
Well a Happy Festivus to you all.
I don't expect a timely response, what being Christmas Eve/day and all, but maybe some of you are in the same boat as me, hiding in the shop, lest we strangle certain relatives that just don't ever seem to leave.

So....
The terrible saga so far. I recently aquired a Swede RB in 50/70 from a CGNer (BTW is it bad etiquette to name someone?)
Anyway, I'm refinishing it, top to bottom. And this time I will name/blame someone. It's Claven's fault. His beautiful inspiratonal RB put what was a backburner "maybe one of these days" idea into a consuming project.

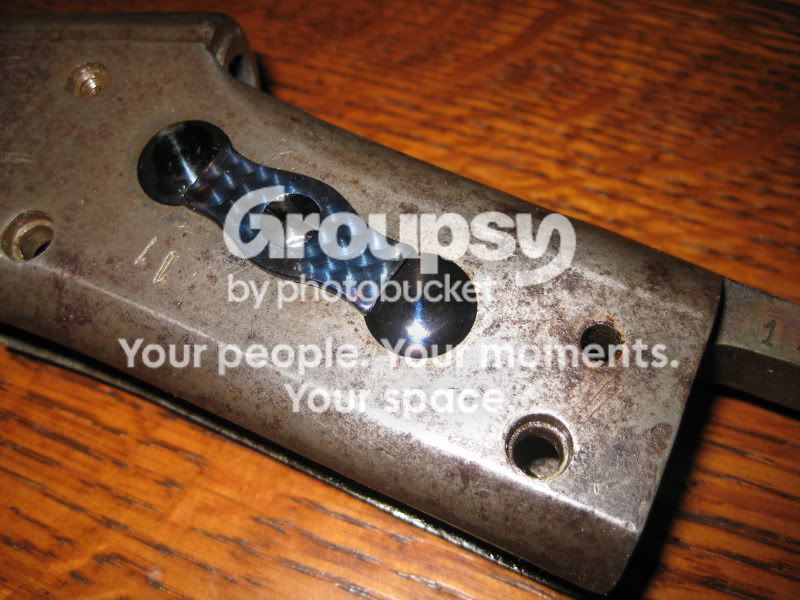
I tore it right down, awreddy cleaned up and nitre blued the pins, screws and other bits.
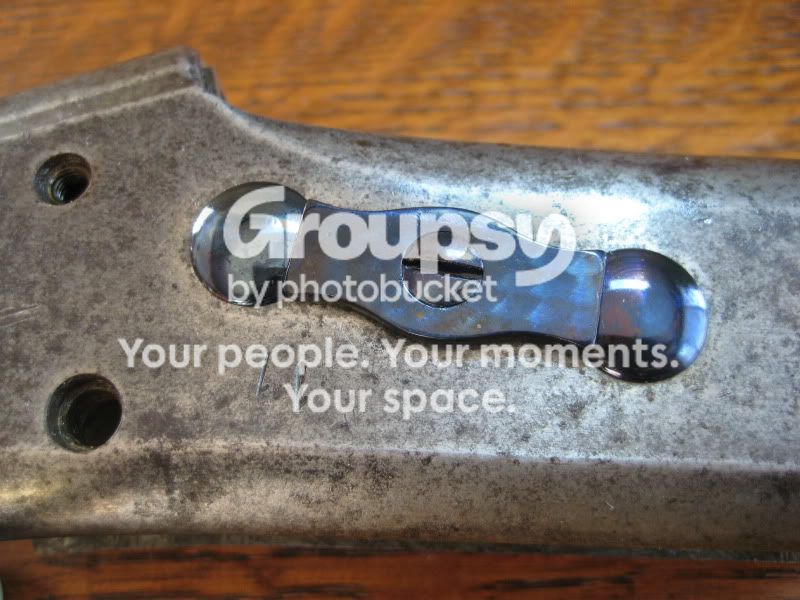
IMG_1389.jpg


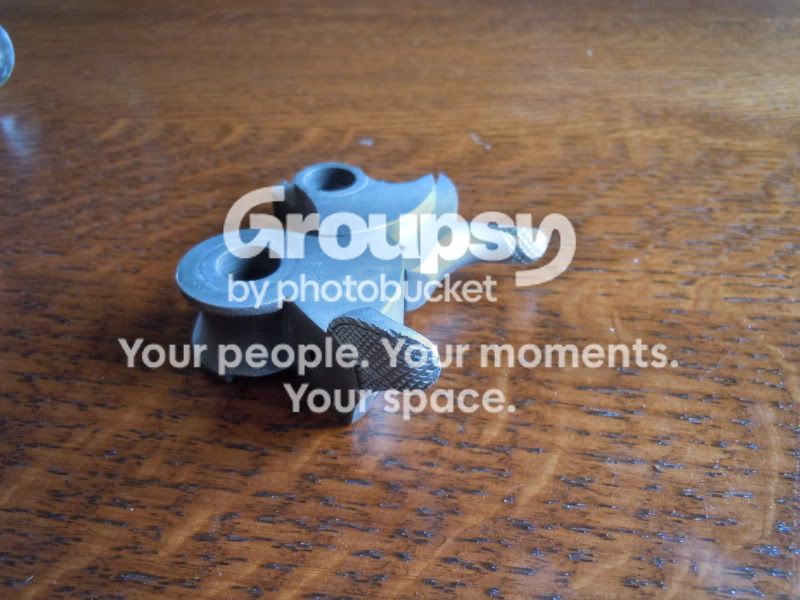
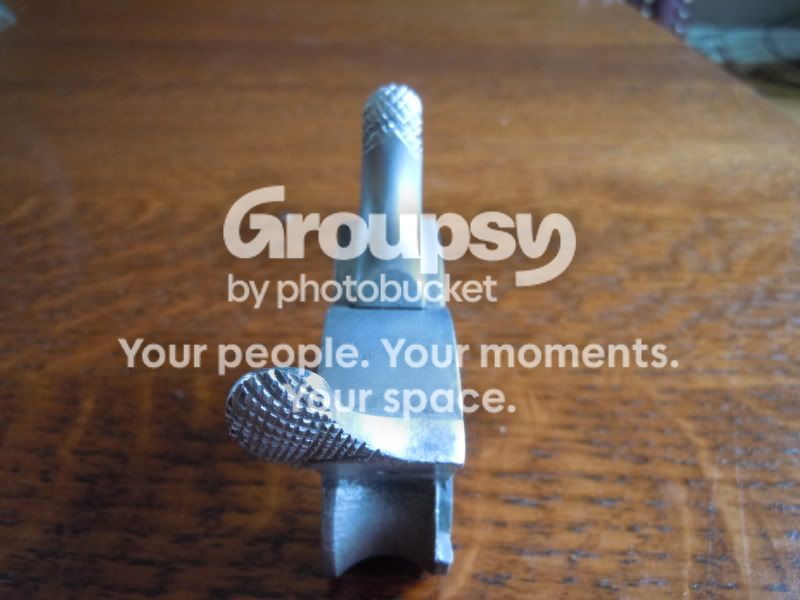
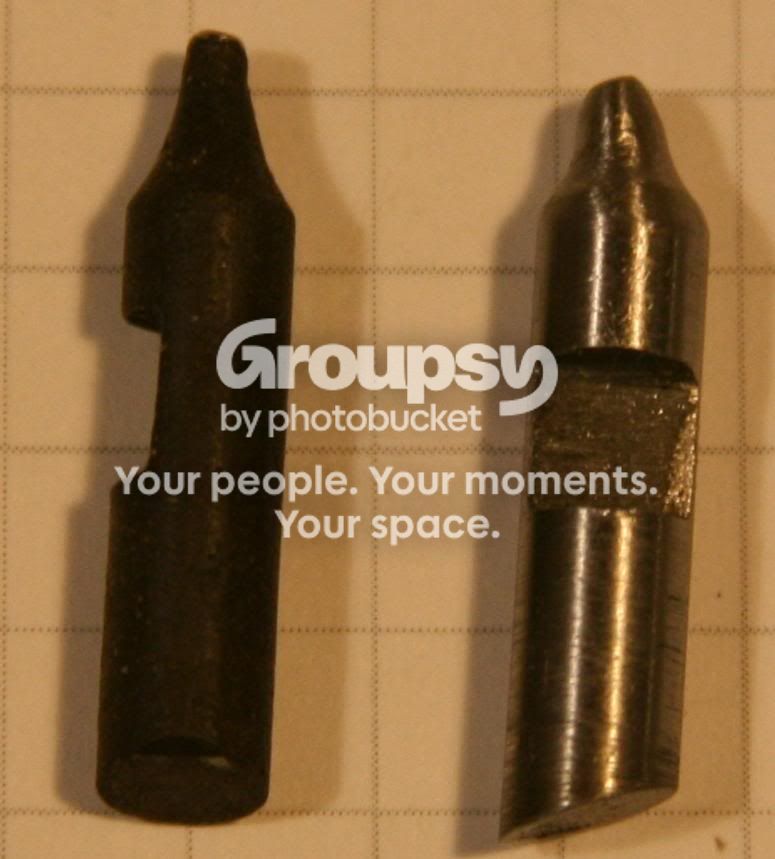
One thing that concerned me was the ratty looking firing pin,
so I turned one out of some drill rod to the same specs.

IMG_1393.jpg

IMG_1392.jpg


So far so good. It fits, and looks like it will work. I had to kind of guess as to the length of the firing pin because as you can see it's pretty worn. I would appreciate it if someone could measure the pin potrusion on their block with it bottomed out.
The original shows about .070", and that's what I set the new one to.

My next question is this: How sloppy are these supposed to be in the block? I know they're supposed to float, but the original is about .214" dia in a .220" hole. I made the new one a bit beefier at .216", but should I go even bigger to eliminate slop, or do you want it really sloppy so there's no way it will stick?
AND... I was thinking of maybe putting a spring in there to hold the pin back when it's at rest.
Good idea, or an answer to a question nobody asked?


Next...the reciever. I don't have a way to anneal it to clean it up, it snickers at draw filing, so I've resorted to lapping it on a plate of glass. Tedious as all hell, but at least I don't have to go back in the house...
 
Last edited:
Pins and keeper look good! Firing pin too.

Not sure the length that you want the pin to extend and measuring my worn old actions probably won't help much but a google hunt turned up:

"Rule of thumb for any firearm is:
Firing pin protrusion should be no more than half the diameter of the firing pin.
.050 dia. firing pin = .025 protrusion."

Might be some sense to it. Personally I would prime a few cases and take a magnifying glass to the results just to make sure that it looked right and was reliable. Reading around suggests anywhere from .025-.060.

Never heard of a rolling block having a spring in the firing pin but some had a little lever mounted in the top of the block to force the pin back when its opened. Personally I wouldn't put one in. Just make sure everything floats free.

Looks like a great project. Keep us posted as it comes together I could use some pointers for the 3 or 4 that I'm slowly working on too. :D
 
One look at that new firing pin tels me that you know what you are doing.
I always install a small spring to hold the firing pin back, and .004" clearance is about right, but you could go a little less, .004" does not sound like a lot but it feels a little sloppy when you put the pin in.
Great work so far, keep us updated.
 
Wow nice work!
I just happened to have a picture of my original unrestored fresh out of Grandad's hunting cabin in the woods Lafqvist.
Thought maybe a visual might help:

This one needs some love.
 
Did you do a "jeweling" job on the keeper..looks great.Getting inspired to finish some of my own projects...where to start:confused:

Yeah, it's a strange addiction I have. Can't help jeweling shiny bits.
Here it is using a flash. It pops a bit more but looks blotchy. It aint. Serves no purpose, but I like it.
IMG_1386.jpg
 
Last edited:
One look at that new firing pin tels me that you know what you are doing.

Well I can honestly say I've never been accused of that!
I'm working on a tighter tolerance mk 2 right now. I'm making the main barrel of the pin .002" under the hole and the striker/ pin itself about .003" under the hole.
My reasoning is this: methinks a sloppy pin in a large hole would make a dandy place to vent gas straight into my eyehole in the event of a pierced primer or some gas escape situation. I'm hoping this will minimize that a bit.
That's my unqualified, inexperienced theory based on no evidence whatsoever.
 
My impression is that .070" protrusion is about right for most firing pins. I don't think a return spring is all that necessary in a rolling block. The block and pin come almost straight back so you don't have to worry about them preventing the gun from opening like in a falling block rifle.
It is important that the pin does not stick tightly forward after firing, so as long as the pin is loose after firing, I would not worry
Excellent work by the way. How did you do the niter bluing?

cheers mooncoon
 
It is important that the pin does not stick tightly forward after firing, so as long as the pin is loose after firing, I would not worry
Excellent work by the way. How did you do the niter bluing?

cheers mooncoon

I can see for an originally BP military rifle keeping it sloppy in there to avoid it sticking, in worst case battlefield scenarios, but it's going to be babied and cleaned religiously, so I've kept the tolerances tighter on the new one. The first one I made in the pic there is up for grabs if someone needs it.

Nitre bluing is tres cool! All it takes is the highly polished part dipped for couple of minutes in a bath of molten saltpeter followed by a quench and a good oiling. Now I can't stop! Going to do a Cooey 75 bolt, (that yes, I jeweled- it's an addiction) the next time I get the pot brewing.
 
Last edited:

So, I need more opinions/recommendations/advice.
I'm sick of looking at this damn receiver, it is taking enormous amounts of time to polish out. I'm taking a break.
I'm going to putter on the hammer and block.
A couple of things. First, once the reciever's done, it's going off for case hardening.
Any reason I shouldn't get the hammer and block done as well?
Claven mentioned in his thread that when these guns got an overhaul and changed to the smaller caliber, they got a new, harder hammer and block. I assume this is a reamed 12mm and therefore wasn't refit.

Next is the checkering, or lack of.
IMG_1367.jpg


Sooo..... where to go from here?
The hammer is pretty much worn smooth. Should I clean it up, polish it and leave it, or cut new checkering?
You can see in the pic, there was a border with the checkering inset. That's beyond my capabilities.
I could probably handle something like this:

pix143394275.jpg


Same deal with the block. I could recut and clean up what's there, but how do you keep it within the border?
 
Baby steps. I'm under the gun (ha!) to get this finished for April, so have to get moving.
Brass is on the way, mold is here, dies at the ready.

Just finished the checkering, isn't the prettiest, but then again, it didn't look like the original was all that precise either.
DSCN0187.jpg


DSCN0188.jpg


Next, some clean up and drawfiling of the buttplate, and it all goes to Oskar for Case hardening.

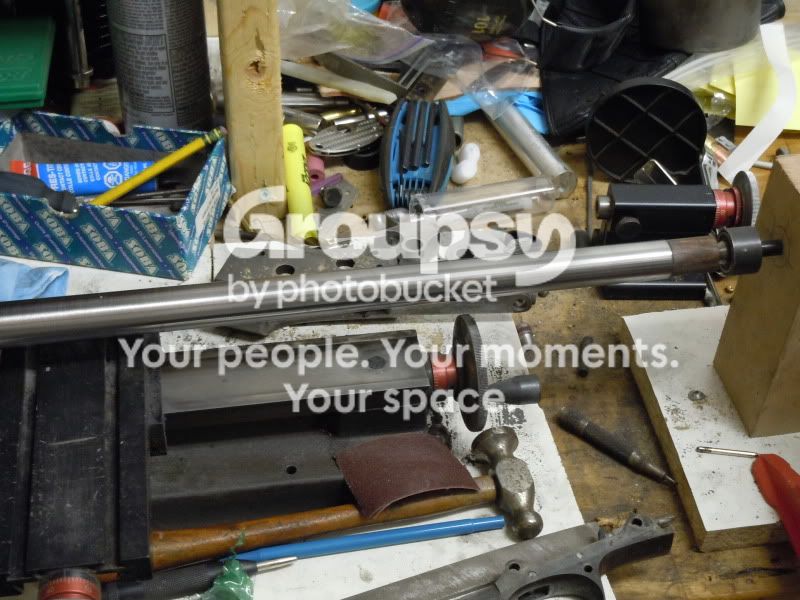
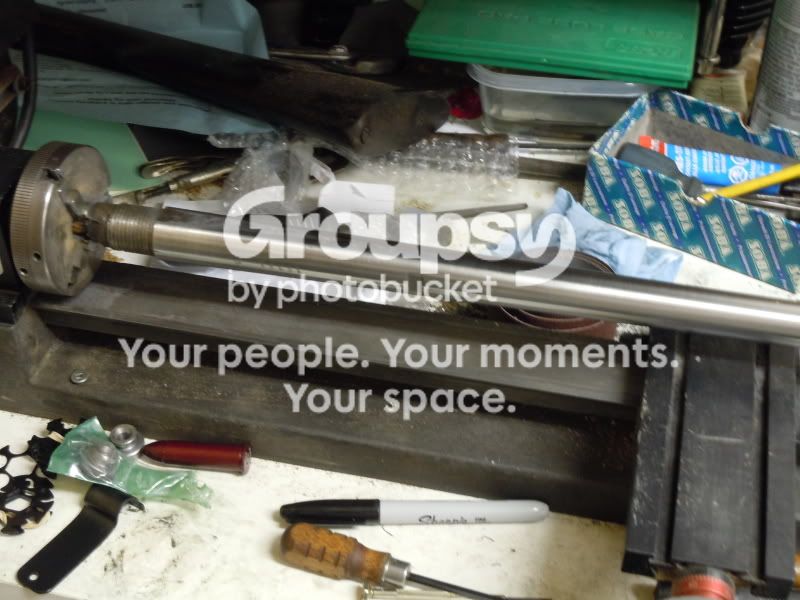
The barrel is coming along, I made up a jig on my Sherline to attack the light corrosion with some emery cloth. Just needs a mild polish now and it will be ready for rust bluing.

DSCN0191.jpg


DSCN0189.jpg


Little by little...
 
I like the cheep and cheerful tailstock. Great way to make use of a too small lathe to accomplish what many would have been defeated by!

Proof again that having some brains and the willingness to use them, can accomplish a great deal.


Cheers
Trev
 
Yeah, between the wood plug mandrels and the eyeballed tailstock height, runout is probably 1/16th". Who cares, I'm using emery cloth by hand, so it's just a nice vibrating message...
 
Nice job on the firing pin - there's a market for those if you ever decide it's worth your time.

As for protusion, I find that the 0.050-0.070" range works well - effective strikes without piercing the primer.

Concerning clearance, 2-3 thou makes sense to me. You want precision, but enough clearance that it moves freely. A prudent Rolling Block shooter always checks for free movement of the firing pin (just like a shooter of a semi-auto such as the SKS), but is also mindful that the Rolling Block does not have an effective gas venting design. In the scheme of things, 3 thou clearance is probably not measurably better in that regard than 8 thou. Safety glasses are the rule.
 
Very interesting thread.

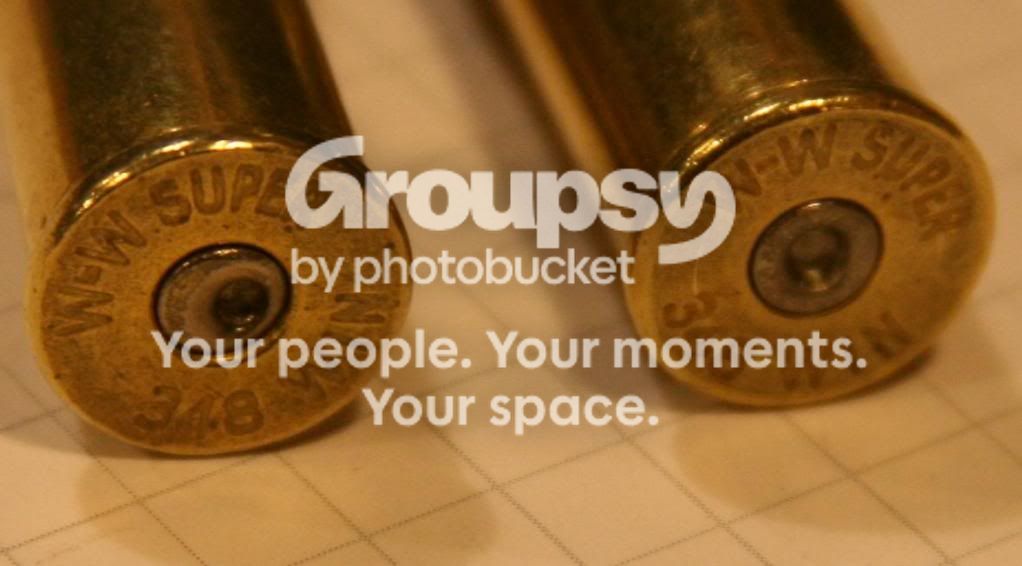
After fire forming some brass for a 12.7x44 the firing pin was almost driving a hole right through the primer, impact was terribly off center and coming in at quite an angle. The sharp angle is due to the conversion from rim fire to center fire, the re-drilled firing pin hole does not run parallel to the longitudinal axis of the barrel.

Second pic is the old and new firing pin (made from an old 1/4" drill bit) but the tip is offset with the contact face angled slightly so it impacts the center of the primer squarely. Protrusion is approx 0.070" Pin looks pretty rough, but that is mostly oil that shows up odd in the pic.

primer.jpg


pin.jpg
 
So...
I got my mitts on a TIG welder and filled in the sling swivel on the trigger guard, and a few spots of pitting. I haven't done a lot of TIG so it involved a lot more filing than it should've I'm sure. A bit more draw filing this eve and it'll be done. I finished polishing up the barrel and sweated the rear sight back on, I'm going to rust blue it, and nitre blue the other sight parts.
Pics to follow, I'll prolly just throw up all the before pics in one post, then the after case hardening. If I can hide in the shop and finish it tonight, it'll be in the mail to Oskar Monday morn. I'm trying to get this all done so I can take it up north with me in a few weeks. The push is on.

A question for the floor...
I want to put a Marbles tang sight on it, but the usual suspects seem to be sold out. Does anybody know of a dealer that has some, or if another mfg makes one that works on RBs?
 
Back
Top Bottom