


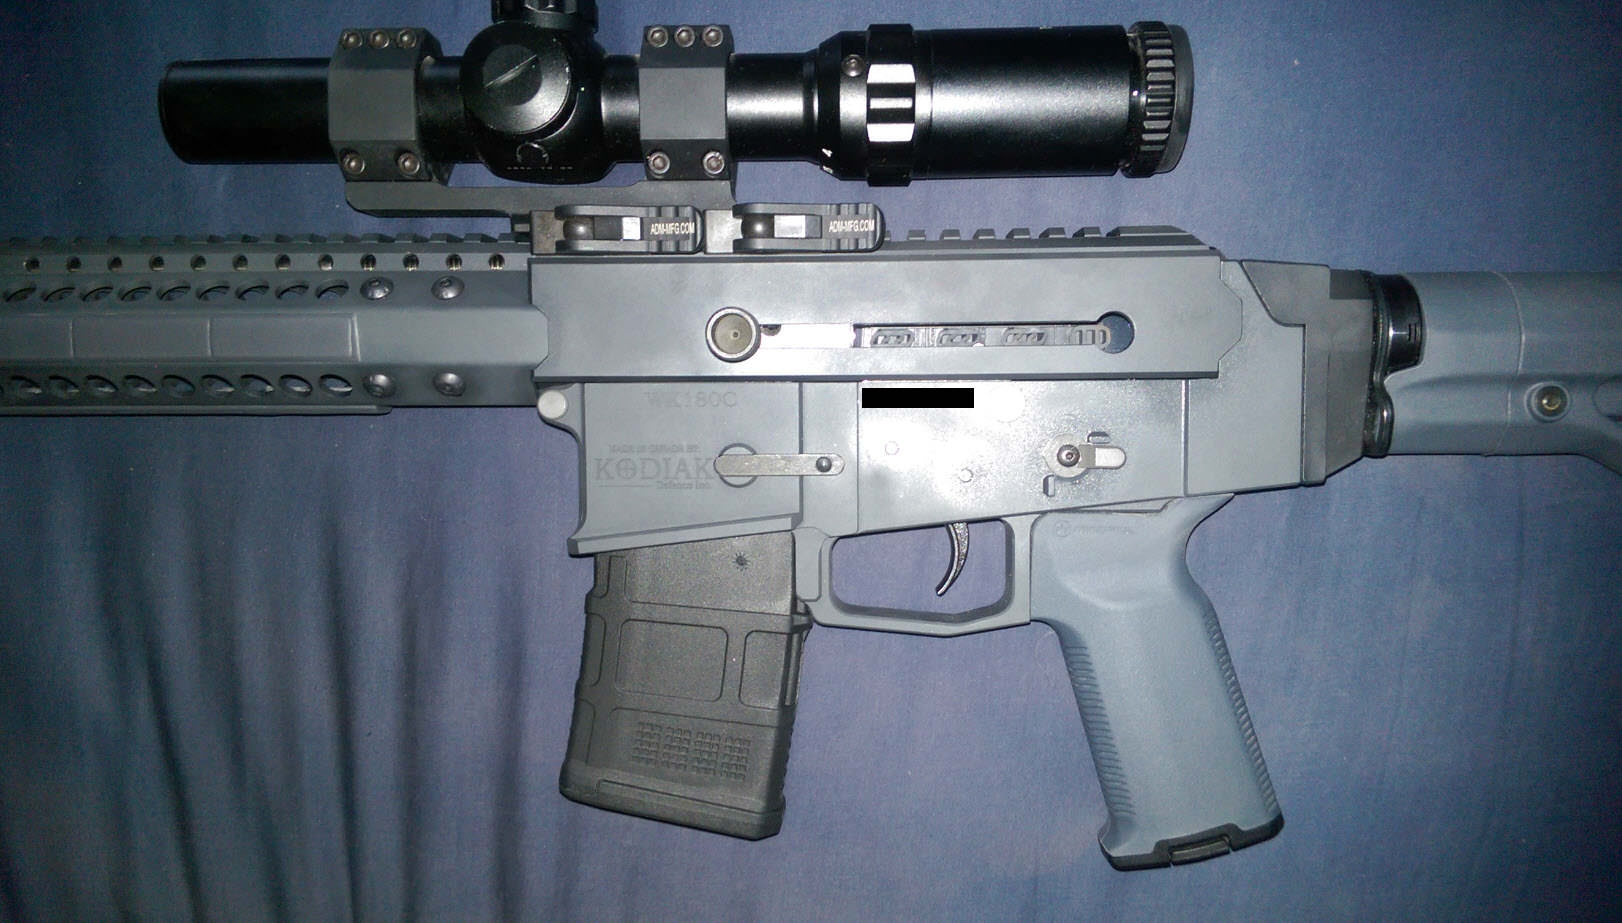
I have posted in the past my disdain for the amount of play between the upper and lower receiver.
I created a stepped pin to see how much play I could remove but it turns out the upper hole (single) is slightly bigger than the bottom (double).
Even with the minimal fitting of the pin, there was still movement between the two parts.
Other than reaming the holes to size them correctly ( and ruin the finish) this option did not pan out as expected.
Looking at the back of the receiver I noticed that the bottom slot had a machined countersink around it. The upper projection into this slot did not.
I then wondered if it was possible to fit an o-ring over the upper slot post and have it "partially sit" inside the groove when the two halves were fitted together.
Initial trials with standard plumbing O-rings proved a no-go as the diameter of the o-ring was too thick and didn't allow the upper to seat on the lower.
I then went to my auto parts store and rummaged around their O-ring board near the counter. I found what I think was a (.070) -013 and -014 O-ring (their distributor uses their own number instead of SAE numbers).
REFERENCE - FIND LOCAL SUPPLIER

O-RING INSTALLED

HAPPY RESULTS
The secret is to get an undersized ring which has to be forced over the upper post. The stretching of the ring results in a reduction of the diameter which just fits in the chamfered groove - removing slop between the two halves.
Note - make sure the latch is engaged properly locking the two parts together. The first time I thought it had but a little wiggling to check play resulted in the two halves coming apart.
In order to ensure the two parts fit I placed the long axis of the gun parallel to the floor (2"). I then lowered the butt until it rested on my carpet and supported the barrel with my other hand.
By placing my body weight at the rear of the gun while holding the front by the barrel I was able to easily lever the two parts together so the latch engaged properly. If you have mounted a scope this may be problematic. An alternative method will have to be devised.
End result is minimal play (wiggle instead of a clunk). Fore to aft is still there due to the front pin clearance issue but the side to side play has been reduced considerably.
The automotive ring has the benefit of being able to handle gun oils as well as elevated temperaturess.
Disassembly is still possible without tools (I had to place one thumb over the other - in order to get enough force to disengage take down latch).
The best part was the auto part counterperson gave me the O-rings for free.
Not sure how long my fix will last but at this price replacements every couple of months is no big deal.
Cheers,
L
I created a stepped pin to see how much play I could remove but it turns out the upper hole (single) is slightly bigger than the bottom (double).
Even with the minimal fitting of the pin, there was still movement between the two parts.
Other than reaming the holes to size them correctly ( and ruin the finish) this option did not pan out as expected.
Looking at the back of the receiver I noticed that the bottom slot had a machined countersink around it. The upper projection into this slot did not.
I then wondered if it was possible to fit an o-ring over the upper slot post and have it "partially sit" inside the groove when the two halves were fitted together.
Initial trials with standard plumbing O-rings proved a no-go as the diameter of the o-ring was too thick and didn't allow the upper to seat on the lower.
I then went to my auto parts store and rummaged around their O-ring board near the counter. I found what I think was a (.070) -013 and -014 O-ring (their distributor uses their own number instead of SAE numbers).
REFERENCE - FIND LOCAL SUPPLIER
O-RING INSTALLED
HAPPY RESULTS
The secret is to get an undersized ring which has to be forced over the upper post. The stretching of the ring results in a reduction of the diameter which just fits in the chamfered groove - removing slop between the two halves.
Note - make sure the latch is engaged properly locking the two parts together. The first time I thought it had but a little wiggling to check play resulted in the two halves coming apart.
In order to ensure the two parts fit I placed the long axis of the gun parallel to the floor (2"). I then lowered the butt until it rested on my carpet and supported the barrel with my other hand.
By placing my body weight at the rear of the gun while holding the front by the barrel I was able to easily lever the two parts together so the latch engaged properly. If you have mounted a scope this may be problematic. An alternative method will have to be devised.
End result is minimal play (wiggle instead of a clunk). Fore to aft is still there due to the front pin clearance issue but the side to side play has been reduced considerably.
The automotive ring has the benefit of being able to handle gun oils as well as elevated temperaturess.
Disassembly is still possible without tools (I had to place one thumb over the other - in order to get enough force to disengage take down latch).
The best part was the auto part counterperson gave me the O-rings for free.
Not sure how long my fix will last but at this price replacements every couple of months is no big deal.
Cheers,
L
Last edited:
")


