Flip-Flop recoil pad

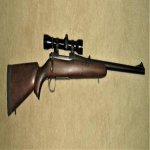
Okay..... Any ideas?

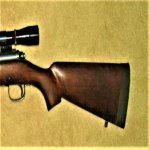
Congratulations on your first try, kjohn. Before you do anything, try the rifle out and see how well it tames the recoil. Please let us know how you find that.

If you want to replace the pad, just remove it, sand the butt to remove all the old Shoe Goo, and install a new one. Doesn't take long.

Originally I was using epoxy cements, but all I use any more is water-based contact cement because it works so well, and the only waiting is for the cement to dry. Have not had a single one come loose... so far.

Also, rather than trying to get a close fit, I rough out the pad at least 1/4 inch bigger than the butt all the way around. That's what I glue to the stock, then sand to fit. That gives you something to hold and move the pad around a bit with.

The best thing about using water-based contact cement is no noxious fumes, so can be used indoors at any time. Just be sure both the stock and the pad are both absolutely dry before pressing them together. Wait until the shine is gone from the cement, then touch it with a piece of dry paper. If the paper comes away without sticking at all, it is ready to bond.

Getting it on straight? Next best thing is, you can also keep a piece of paper between the pad and the stock while you align the pattern on the flip flop until it is exactly the way you want it, then slide the paper out as you press the pad on to bond to the stock. No parachute cord like I first used. No weights, no bungees, etc, the bond is instant. You just have to press it on hard after it first bonds, and it is ready to be sanded. :)

Best,
Ted
 
RJ, the first flip flop was done using Acraglass, the original, not the Gel. It is two part epoxy and worked fine. The pad is still on the rifle, and that was almost seven years ago. See post #1.

I did a few using Marine-Tex, also a two part epoxy, and that worked just as well. Did one for a friend using Bed Rock. He had it mixed up to bed his rifle, and there was some left over, so he put it in the feeezer. We used it a couple of days later.

A friend of mine used Barge Cement to put one on his 9.3X62 three years ago, and it has worked for him since then. I started using contact cement about the same time, and it was abit of a learning curve.

It is absolutely important that the cement on both pieces be DRY before attempting to bond. As well, it is important that there be enough on each piece to bond. By that I mean that on a wood stock, for instance, you may need to put two coats of cement on the wood because most of the first coat gets absorbed into the wood. This also happened with a couple of the flip flop materials. If you apply a second coat, the first caot must be dry before applying the second coat, and the second coat also allowed to dry.

The water based stuff I have been using for the past couple of years is an old gallon of Beaver brand. It is light blue in colour, and when I did the first double flip flop on a friend's Ruger 338 Win Mag you could see the colour in the bond between the two pieces of pad. It was an easy fix, with a black magic marker.

BTW, he says the double flip flop made his 338 feel like he was shooting his 270 Win. That is probably a bit of an overstatement, but was his take on it.

Ted
 
Last edited:
They live! Here's the latest flip-flop installation, a double on a Rem 721 in 300 H&H.

IMG_6577.jpg

Turned this old sweetheart into a pussycat. Literally feels like shooting a 308 Win.

IMG_6578 (2).JPG

With apologies for the poor quality pictures.
Ted
 

Attachments

  • IMG_6577.jpg
    IMG_6577.jpg
    33.1 KB · Views: 332
  • IMG_6578 (2).JPG
    IMG_6578 (2).JPG
    108.8 KB · Views: 335
I did take the old BSA M1917 out for a test shoot. Definitely a big difference with one layer of Dollar Tree flip flop. The buttstock is short enough to possibly go with two layers. Winter project for a couple more old kickers. I am going to try cutting out a rough pattern, then taking the dots off the backside with a sander. For the one I did attach, I put a wrap of black tape on to cover the gap left by the dots. If I can get the dots off a new pad, I will replace the first one and pay attention to getting the lines straight.
 
Hi kjohn.

Your experience with the recoil-reducing effectiveness of the flip-flop pad is typical. They really do work! A double is just that much better. I have done them on a couple of 9.3X62s and a 338 Win Mag. The 300 H&H is the first 30 cal magnum I have put one on, and it really does make it feel like shooting a 308.

I am not understanding your problem with the "dots" on the pad. I think you are referring to the tiny dimples on the surface that a foot would be in contact with when wearing them. If so, that is the side that I have been bonding to the stock, and the tread becomes the shoulder contact surface of the pad. There has never been any space between the pad and the stock when done this way.

Wondering if perhaps you are starting with the pad cut too close to the stock so there is not enough material to be "bent" over the edge when pressed to the stock? I leave at least a full quarter-inch all around to be glued, then sand to match the profile of the stock. You can see this in the first pictures in this thread.

The painted patterns on the up side of the flip-flops are the only place I sand. Just scuff them up, not completely remove, to ensure the cement will bond. A picture would help me understand what you are referring to.

Ted
 
Last edited:
Any advice on adhesive if one were to double up on the flip flops? 5 min epoxy works great on a single layer, but I can't see it working well with respect to flexibility with multiple layers.

** Or I could read a little harder to find out you useda water based contact cement...
 
Why not? WRT post #174, I think you nailed it with the "dots" problem. Next one I do I'll leave more and press down the edges a bit more. I will maybe stick another layer on the old M1917. I like shooting the old beast, but recoil is rather unpleasant. I am 70 now, and am pretty much done with impressing others with my physical prowess. :p
 
I have a husqvarna with a cracked plastic butt plate. It could use something like this. The butt of the wood has a slight curve to it. Do you think that could do this with the curve, or do I need to give the wood a trim to make the butt flat and level?
 
Why not? WRT post #174, I think you nailed it with the "dots" problem. Next one I do I'll leave more and press down the edges a bit more. I will maybe stick another layer on the old M1917. I like shooting the old beast, but recoil is rather unpleasant. I am 70 now, and am pretty much done with impressing others with my physical prowess. :p

Just wait until you are seventy-five! It gets better as you get older. ;)

It really wouldn't take you long to remove the pad that has the spaces and install a new one, kjohn. Then add a second thickness in exactly the same way, with a quarter inch of material all around before bonding. You can then do the sanding of both pieces at once to get the best job.

Ted
 
I have a husqvarna with a cracked plastic butt plate. It could use something like this. The butt of the wood has a slight curve to it. Do you think that could do this with the curve, or do I need to give the wood a trim to make the butt flat and level?

Why not give it a try and see? If it doesn't work, just cut it off straight and install another one. It really is quite simple, especially using water-based contact cement, as described in post #163.

Ted
 
Back
Top Bottom