fingers284
CGN Ultra frequent flyer
- Location
- Alberta Cowboy Ranges
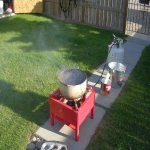
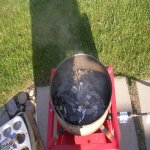
If you do try to make a bottom pour outfit use at least 1/2" pipe fittings or 3/4 as bertn shows in his photo. The first try I made at a pour spout was with 3/8 pipe and it froze off quite easily a short distance from the fire, even the 1/2 " will freeze if I try to pour slowly (the reason the 3/8 froze off was not enough volume flow to heat the spout to drain every time ) to many times in a row but if I pour at full volume I haven't had any trouble with it.
All of the above pertains to a "true" bottom pour (exits out of the bottom of the pot and requires a long spout to reach the ingot. A "side" pour outfit could get away with a shorter spout so 3/8 may work ok.
All of the above pertains to a "true" bottom pour (exits out of the bottom of the pot and requires a long spout to reach the ingot. A "side" pour outfit could get away with a shorter spout so 3/8 may work ok.
")