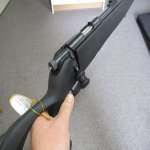
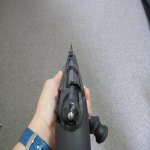
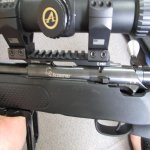
Scorpio EM332A mods - making a silk purse from a sow's ear

Hi everyone,

First, I want to thank Jerry Teo for sharing the mods to the EM332A he’s been playing with in the “Most Accurate Inexpensive .22's? thread (https://www.canadiangunnutz.com/forum/showthread.php/1874702-Most-Accurate-Inexpensive-22-s/page12). Reading that thread inspired me to add one of these economical toys to my small collection of 22LRs. Rather than mixing EM332A mods with the discussion about the most accurate inexpensive .22s, I thought I’d start a fresh thread specific to mods for this rifle.

So far, I’ve removed the rear sight, deburred and polished the bolt and raceways, cleaned up and polished the innards of the bolt with 1000 grit wet & dry sandpaper cleaned up the sharp edges on the mags (basically what Jerry already described in the other thread – link above). I bore-scoped the muzzle today and found lots of burrs there as well, so I’ll polish that up with a brass castle nut and lapping compound in the next few days.

For today, I thought I’d share my trigger clean-up. Trigger pull out of the box was 3lbs 5oz and lots of creep. Removing the trigger, once the barrelled action is off the stock is easy and only requires a #2 phillips screwdriver to remove two screws. Taking the trigger apart is equally easy since there’s only one phillips screw holding the steel side-cover to the steel trigger housing. Make note of how the safety catch is oriented as the trigger is being removed – it’ll make life a lot easier when re-assembling.

There are only two moving parts: trigger and sear. A spring pushes up on the sear and forward on the trigger. First, I stoned and polished the trigger to reduce the amount of sear engagement to 0.022” (use a jig to hold the trigger at a constant angle and to keep it from rocking on the honing stone - don’t do this if you’re unsure of what to do or you want to use your rifle in the bush hunting; taking off too much or incorrectly will make the trigger dangerous and unusable). The sear just needed the end touching the trigger to be honed square to get full width engagement on the trigger notch. The trigger and sear were finished by polishing the surfaces that engage each other with white polishing compound and a felt wheel on a Dremel. The surfaces on the side of the trigger and the sear that rub on the trigger housing were polished, as were the areas of the trigger housing touching the sides of the trigger and sear.

All parts were cleaned with acetone and set aside. I also decided to make my own trigger-sear spring using 0.023” diameter piano wire. The detail of this is what I really want to share. Below are pictures of the process I used to make the spring. First picture shows the two blocks of oak I used to pinch the wire and a mandrel (this is just a cheap torx key that comes with many scope rings) so the wire could be wound. Make sure the vice jaws are tight so the wire doesn’t pull out.

QJIJ6np.jpg
[/URL][/IMG]

Second picture shows how I gripped the piano wire with locking pliers. Third picture shows the beginning of the first coil on the spring.

FDrNKkZ.jpg
[/URL][/IMG]

wjqZKj8.jpg
[/URL][/IMG]

Fourth picture shows the spring with two coils wound. This continued for four coils then going past the bottom leg by about 160 degrees. When tension is removed and the pliers are taken off, the spring will unwind about 270 degrees as shown in the fifth picture.

vM2Gh1W.jpg
[/URL][/IMG]

YFszAtu.jpg
[/URL][/IMG]

After removing the newly wound spring from the blocks of wood and vice, the legs can be bent to shape to match the original spring for angles and lengths. Picture six shows this using needle nose pliers. The last picture shows the original heavy spring next to the new lighter spring just made. This particular spring needed to be opened up about 20 degrees beyond a right angle between the legs, otherwise there won’t be enough tension on the sear to pass the bump test.

9kLrUcO.jpg
[/URL][/IMG]

c5W2OUx.jpg
[/URL][/IMG]

Before installing, anneal the spring at about 500 deg F. for 30 to 60 minutes (I use a convection toaster oven I bought for heating nasty stuff my wife doesn’t want in the kitchen – it’s really important she stays happy; that means I get to go to the range more).

Install the new spring and polished trigger and sear in the housing. Re-assembly is simply the reverse of the steps to take the trigger assembly apart. I lubed assembled trigger with lighter fluid and re-installed on action.

Trigger now consistently breaks at 9oz and creep is almost completely gone. This trigger feels better and is lighter than one I have on a CZ455 which has been polished and has a Yo-Dave sleeve and spring kit installed. The EM332A trigger passes the bump test easily. Your mileage will likely vary. If rifle doesn’t pass bump test, either the trigger or sear surface engagement is wrong, or the spring is too light. Make sure rifle is safe before using.

Sorry for the long post. Hope this is helpful to at least a few of you. Enjoy! Joe.
 
Last edited:
Oh boy... oh boy. Do you feel like making a few more of those springs?

PM or email to discuss. I would love to get the trigger pull lighter.

IMG_3106.jpg

Today was threading a couple more bolts. Makes a huge difference in cycling and comfort. This action just flies when you have some addn leverage.

Mag mod to ensure they will not tilt. cycling should be smooth and fast. They will drop free with some TLC. The mag well can be flared properly and mag inserts are dead easy.

There are 3 rifles in our fleet so love to get their triggers lightened up... if possible.

If you dont mind me adding more pics and info, happy to do so.

Jerry
 

Attachments

  • IMG_3106.jpg
    IMG_3106.jpg
    26.9 KB · Views: 2,581
Last edited:
Hi everyone,

First, I want to thank Jerry Teo for sharing the mods to the EM332A he’s been playing with in the “Most Accurate Inexpensive .22's? thread (https://www.canadiangunnutz.com/forum/showthread.php/1874702-Most-Accurate-Inexpensive-22-s/page12). Reading that thread inspired me to add one of these economical toys to my small collection of 22LRs. Rather than mixing EM332A mods with the discussion about the most accurate inexpensive .22s, I thought I’d start a fresh thread specific to mods for this rifle.

So far, I’ve removed the rear sight, deburred and polished the bolt and raceways, cleaned up and polished the innards of the bolt with 1000 grit wet & dry sandpaper cleaned up the sharp edges on the mags (basically what Jerry already described in the other thread – link above). I bore-scoped the muzzle today and found lots of burrs there as well, so I’ll polish that up with a brass castle nut and lapping compound in the next few days.

For today, I thought I’d share my trigger clean-up. Trigger pull out of the box was 3lbs 5oz and lots of creep. Removing the trigger, once the barrelled action is off the stock is easy and only requires a #2 phillips screwdriver to remove two screws. Taking the trigger apart is equally easy since there’s only one phillips screw holding the steel side-cover to the steel trigger housing. Make note of how the safety catch is oriented as the trigger is being removed – it’ll make life a lot easier when re-assembling.

There are only two moving parts: trigger and sear. A spring pushes up on the sear and forward on the trigger. First, I stoned and polished the trigger to reduce the amount of sear engagement to 0.022” (use a jig to hold the trigger at a constant angle and to keep it from rocking on the honing stone - don’t do this if you’re unsure of what to do or you want to use your rifle in the bush hunting; taking off too much or incorrectly will make the trigger dangerous and unusable). The sear just needed the end touching the trigger to be honed square to get full width engagement on the trigger notch. The trigger and sear were finished by polishing the surfaces that engage each other with white polishing compound and a felt wheel on a Dremel. The surfaces on the side of the trigger and the sear that rub on the trigger housing were polished, as were the areas of the trigger housing touching the sides of the trigger and sear.

All parts were cleaned with acetone and set aside. I also decided to make my own trigger-sear spring using 0.023” diameter piano wire. The detail of this is what I really want to share. Below are pictures of the process I used to make the spring. First picture shows the two blocks of oak I used to pinch the wire and a mandrel (this is just a cheap torx key that comes with many scope rings) so the wire could be wound. Make sure the vice jaws are tight so the wire doesn’t pull out.

QJIJ6np.jpg
[/URL][/IMG]

Second picture shows how I gripped the piano wire with locking pliers. Third picture shows the beginning of the first coil on the spring.

FDrNKkZ.jpg
[/URL][/IMG]

wjqZKj8.jpg
[/URL][/IMG]

Fourth picture shows the spring with two coils wound. This continued for four coils then going past the bottom leg by about 160 degrees. When tension is removed and the pliers are taken off, the spring will unwind about 270 degrees as shown in the fifth picture.

vM2Gh1W.jpg
[/URL][/IMG]

YFszAtu.jpg
[/URL][/IMG]

After removing the newly wound spring from the blocks of wood and vice, the legs can be bent to shape to match the original spring for angles and lengths. Picture six shows this using needle nose pliers. The last picture shows the original heavy spring next to the new lighter spring just made. This particular spring needed to be opened up about 20 degrees beyond a right angle between the legs, otherwise there won’t be enough tension on the sear to pass the bump test.

9kLrUcO.jpg
[/URL][/IMG]

c5W2OUx.jpg
[/URL][/IMG]

Before installing, anneal the spring at about 500 deg F. for 30 to 60 minutes (I use a convection toaster oven I bought for heating nasty stuff my wife doesn’t want in the kitchen – it’s really important she stays happy; that means I get to go to the range more).

Install the new spring and polished trigger and sear in the housing. Re-assembly is simply the reverse of the steps to take the trigger assembly apart. I lubed assembled trigger with lighter fluid and re-installed on action.

Trigger now consistently breaks at 9oz and creep is almost completely gone. This trigger feels better and is lighter than one I have on a CZ455 which has been polished and has a Yo-Dave sleeve and spring kit installed. The EM332A trigger passes the bump test easily. Your mileage will likely vary. If rifle doesn’t pass bump test, either the trigger or sear surface engagement is wrong, or the spring is too light. Make sure rifle is safe before using.

Sorry for the long post. Hope this is helpful to at least a few of you. Enjoy! Joe.

Really nice work. Quick question; have you tried the bump-test with your new trigger? Put a mat on a hard floor, and firmly strike the but of the unloaded, cocked rifle on the floor mat. If it goes off, it is too light. I would likely have not annealed the spring, as it is going to get much lighter over time as a result.

Have fun! These are amazing for their money; and at twice the price, they would still be good value.
 
IMG_3114.jpg

There was a request about proper bedding. You can see that the fit is actually pretty good around the bolts. However, I find it beneficial to support the entire action including under the barrel.

You can also see the 'lugs' that form which act as a kind of recoil lug.

Just keep an eye that the action and/or stock is not flexed when you snug up the action bolts.

Jerry
 

Attachments

  • IMG_3114.jpg
    IMG_3114.jpg
    61.3 KB · Views: 2,490
IMG_3113.jpg

To help with faster and smoother mag inserts, I flared the plastic mag well more and kept the taper inline with the stock opening. The initial plan was to flare the stock as well but the opening is actually much bigger then the mag so haven't touched it. For my rifle, the bottle neck was the mag well which flaring solved.

IMG_3112.jpg

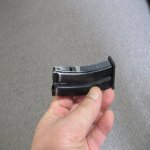
The mags are steel, welded and very durable. They do have sharp edges everywhere and some 400grit paper and light filing took care of that. You can see the bluing removed in several exterior spots. For my mag well, this allowed the mags to drop free.

The mag latch slot may need a bit of TLC if there are burrs in the opening.

I put a tab under the mag latch slot. This keeps the mags from rotating in the well and stops any feeding hiccups. Formed using a small blob of epoxy steel on a prepped and cleaned metal surface. Sand so that the mag cannot rotate but still drops free.

The mags have fed very well. Nice design.

Jerry
 

Attachments

  • IMG_3113.jpg
    IMG_3113.jpg
    64.8 KB · Views: 2,484
  • IMG_3112.jpg
    IMG_3112.jpg
    53.1 KB · Views: 2,485
Last edited:
IMG_3107.jpg

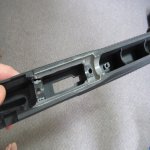
This is a #### on closing action so bolt lift is easy and fast but bolt closing can be very clunky and rough. The ramp on the action can be polished and contoured. When you close the bolt, you can feel when the handle gets hung up on the various sharp spots and ledges. Just round and polish especially on the outside bevels.

You have to make sure that the flat at the bottom of this ramp is untouched as that controls your headspace. In the pic, that area is still black where all other surface is 'white' from being contoured/polished

now the bolt closing is very fast, smooth without any notchiness.

With the extended bolt handle, this is one of the fastest bolt rimfire actions I have operated.

Jerry
 

Attachments

  • IMG_3107.jpg
    IMG_3107.jpg
    53.3 KB · Views: 2,473
Last edited:
IMG_3118.jpg

The action doesn't have any aftermarket canted scope rail but it does have a 'kind of' standard grooved slot... similar to a CZ452.

IMG_3119.jpg

so the job it to flatten the top of the receiver and fit the rail.

IMG_3110.jpg

Worked very nicely.

Jerry
 

Attachments

  • IMG_3118.jpg
    IMG_3118.jpg
    87.4 KB · Views: 2,480
  • IMG_3119.jpg
    IMG_3119.jpg
    78.1 KB · Views: 2,474
  • IMG_3110.jpg
    IMG_3110.jpg
    67.2 KB · Views: 2,472
Last edited:
I just received mine on Friday, Thanks for putting this thread up. I will follow enhancement closely and make some also.

Tag for interest on spring, creep not so good.will work this out.
 
Re-crowning the barrel muzzle

I had borescoped my EM332A barrel using an inexpensive borescope recommended by Grauhanen (thank you!) in another thread (https://www.canadiangunnutz.com/for...-Borescope-for-22-rimfire?highlight=borescope). The chamber and the leade looked quite good. The lands through the entire barrel looked very smooth. All was good until I reached the muzzle crown. It looked like it had been turned with a rounded rock in place of a cutter. There were burrs in several places. The ends of the lands were pushed to the side instead of being cut sharply. The two photos below are typical of what I saw around the perimeter (arrows point to my main areas of concern)

fJAZ2cp.jpg
[/IMG]

2QSNoHg.jpg
[/IMG]

I thought I’d address this by recrowning the barrel using a 6-32 brass acorn nut mounted on a 6-32 screw chucked into a cordless drill and some scope ring lapping compound. I threaded some 6-32 nyloc nuts onto the screw and timed the flats so I could chuck the whole thing in my cordless drill to turn the brass acorn nut without having it wobble.

6zQ2AQe.jpg
[/IMG]

m9SjlmB.jpg
[/IMG]

I put a dab (that would be the technical term for how much I used) of lapping compound on the end of the muzzle and another dab was spread around the dome of the acorn nut. I may re-do this with finer grit valve-grinding compound.

Y7hbpFP.jpg
[/IMG]

After placing the barrelled action in a gun cleaning stand, I spun the drill at about 30 RPM (quite slow) and pressed the acorn nut against the muzzle while rocking the drill continuously in a small circle (if you’re unclear about what I did, do a google search for “recrown a barrel DIY” – the first hit shows a fellow using a round-head brass screw in a drill to accomplish the same thing). I stopped every 5 seconds, or so, to redistribute the lapping compound and to rotate the barrelled action about 45 degrees clockwise each time so material would be removed evenly around the crown (sorry my auto focus preferred the mat on my bench).

D4yzDcD.jpg
[/IMG]

After about five minutes of this I cleaned up the barrel. A clear, even new bevel can be seen from the outside of the muzzle.

tz4xgfi.jpg
[/IMG]

After looking at the muzzle from the inside using the borescope again, I decided to repeat the process for another five minutes. Below are close-up pictures of the new crown. Most of the burrs are gone, although a few are still pretty obvious (see arrows in pics). Rather than try more lapping with the acorn nut, I’m going to shoot a brick of ammo – far more fun! Then I’ll have a look again with the borescope to see if things have smoothed out from shooting. If not, I’ll re-crown on a lathe with a freshly sharpened HSS bit. Pics below are of the end of the muzzle after the second round of lapping; still not perfect, but getting better. These pics also suggest, to me, that the lapping compound I used, 200 grit, might be too coarse.

orFo3U4.jpg
[/IMG]

7JtCzu1.jpg
[/IMG]
 
jdac, nice work and a big improvement... simple job that might be necessary.

I see in the pic that you are prepping some mags for the front support. Remember to put some release agent inside the mag well and mag latch just in case. Clear shoe polish applied with a Qtip worked for me.

A blob of epoxy steel about 1/8" tall should form the tab you need.... and the excess will just squish out of the way

Good luck.

Jerry
 
When you insert the mag with blob, keep the mag rolled 'back'... bottom towards the trigger guard.

This will force the top rear of the mag as high as possible which is important for proper feeding. Just close the bolt while holding the mag to ensure it doesn't jam/rub. Adjust the mag position if needed so the bolt will close smoothly over the top.

once the epoxy cures, you can sand for a drop free fit. There will be a bit of wiggle created but the tipping at the top of the mag will be almost eliminated and feeding should be smooth

This is actually a common fix for most rimfire rifles.... bracing the mag so that it stays aligned with the bolt.

Jerry
 
Pillar bedding the EM332A

In addition to regular bedding with steel epoxy, I decided to pillar bed the stock. My son had pillar bedded an NS522 several years ago using 1/8IPS lamp tubing (0.260” ID and 0.385” OD, available at most hardware stores), so I thought I’d try the same with the EM322A. For this project, I needed two pieces of IPS tubing cut to a length of 1.070” (based on the depth of the action screw holes in my stock).

8si5kMN.jpg
[/IMG]

Examining the stock revealed a very thin area just behind the rear action screw, immediately ahead of the trigger. In order to pillar bed, I needed to build this thin area up using steel epoxy before the action screw holes could be enlarged to accept steel pillars. After roughing the area where epoxy was going, I used plasticine to build a dam where the action sits. The stock was held butt-end up in padded jaws on my vice. I mixed 13g of steel epoxy and filled the area that had been dammed. Three hours later I removed the plasticine. And while the epoxy was still pliable, much like thick toffee, I pressed the action (with bedding screws to guide it into the correct orientation in the stock – action screws are 6mm – 1.0 thread) into place.

IzuKuc1.jpg
[/IMG]

This left an imprint of the front trigger screw in the epoxy. From here I added a bit of clearance by pressing a large brass drift into the epoxy. It is far easier to shape the epoxy to clear the trigger housing at this point than it is after the epoxy has fully hardened.

6tN0m9z.jpg
[/IMG]

UvjdGpZ.jpg
[/IMG]

After a full 24-hour cure for the epoxy, the stock was ready to have the action screw holes enlarged. I’ve never had much luck enlarging action screw holes with regular twist drills. For this stock I turned a simple reamer on a lathe and then put two flutes in it on a mill. It’s just mild steel and should last long enough to complete this stock. The smallest diameter is a few thou smaller in diameter and ¼” longer than the existing action screw holes in the stock. The step-up diameter is 0.395” and ½” longer than the depth of the action screw holes. I know access to a lathe is not something everyone has, use whatever works for you to enlarge the holes. The slightly oversize holes will let the steel sleeves be pushed into the stock while the epoxy is setting around them - alignment of the sleeves will be accomplished by centring them on the action screws which are lightly tightened (i.e., no more than 10 in*lbs) to the action making this a stress-free fit between the sleeves and the action.

xuhO9C6.jpg
[/IMG]

The reamer was chucked in a drill press and the existing action screw holes centred on the narrow end of the reamer. The stock was held upside-down on the drill-press table. There’s no need to clamp the stock with this kind of setup since the reamer is self-centering.

c6QHwmb.jpg
[/IMG]

I ran a 10mm tap through the oversize holes (to give the epoxy something to grip mechanically) and then loose material was cleaned up by blowing compressed air into each hole. Finished cleaning by swabbing the holes with a Q-tip soaked in acetone. The smooth surfaces of the action were waxed and put plasticine was placed in any hole I didn’t want epoxy to get into. Taped and waxed the action screws and used them to hold the pillars to the action. Wrap enough tape around the action screws that they centre the pillars on themselves.

As a side-note, when the pillars were slid onto the waxed action screws, I noticed there was only about 1/8” of threaded screw exposed. While this may have been fine with the plastic stock, I don’t believe this provides maximum thread engagement in the action. My action is 0.243” thick where the action screw holes are located. Since my steel pillars are 1.070” long, the total length from the bottom of the pillar to the inside of the action is 1.313”. Deducting the 0.013” for clearance to ensure the screw doesn’t bind the bolt, my action screws need to be 1.300” in length from the bottom of the head shank to the very end of the threads - I'll be fitting new, longer action screws to my rifle before it goes to the range. If performing this mod, check your dimensions to make sure you engage as many threads as possible to reduce the possibility of stripping the threads in the receiver when it’s torqued.

OQNCL5Z.jpg
[/IMG]

Put enough epoxy to coat the threads on the pillars and have just a little bit of excess, particularly at the ends of the pillars furthest from the action. A total of 3.5g of epoxy was mixed to do both pillars. I used a toothpick to coat the inside of the holes in the stock with more epoxy.

Sorry, I forgot to take pics.

Slide the action, with the pillars attached, onto the stock and hold with surgical tubing just as when doing a regular bedding job. Fold a few large cleaning patches to make a shim about 1/8” thick; place it between the barrel and the end of the forearm to make sure the barrel floats.

AaLIvSf.jpg
[/IMG]

v8GraZ9.jpg
[/IMG]

Two to three hours after mixing the epoxy, remove the two action screws, but don’t disturb anything else. Set the rifle aside, preferably where it's warm, to allow the epoxy to cure 24 hours. I placed mine in a spare bedroom near a heater vent when my wife wasn't looking. Then I drape a rug over top to help keep the heat in.

LFBTw6M.jpg
[/IMG]

pSJsIL5.jpg
[/IMG]

Remove action and prep for bedding as described by Jerry earlier in this thread. The epoxy that squeezed out onto the bedding surface will be removed and the stock material will be spot drilled randomly with a 1/32" carbide bit (to a depth of about 1/16") to give the bedding mechanical grip to the plastic stock.

v62b0w1.jpg
[/IMG]
 
Last edited:
I've finished bedding my EM322A, as per Jerry's description. I do have an update to what I wrote above regarding pillar bedding. I measured my action thickness and added the length of my steel pillars to determine the length of the action screws for full, or very close to full, thread engagement. My math suggested action screws needed to be 1.300" long. This was correct for the rear screw. There was no interference with the bolt. The front action screw, however, had to be made 1.240" long because it bottomed out on the barrel (checked with layout dye) before seating on the steel pillar.

The action screws are now torqued to 50 in*lbs. All I need to do now is wait for a warm, at least by Alberta standards, and relatively calm day to see how this thing actually shoots.
 
Admire you guys that can do all of that work to accurize a "sows ear" to that extent. I'm better off buying a Tikka 1X for 600.00, if you paid yourselves minimum wage for that work, it would be 1000.00 rimfire...….congrats on some mad skills.
 
Admire you guys that can do all of that work to accurize a "sows ear" to that extent. I'm better off buying a Tikka 1X for 600.00, if you paid yourselves minimum wage for that work, it would be 1000.00 rimfire...….congrats on some mad skills.

yeah, but what do you do when it is freezing cold outside or we are in lock down????

Not hard work to do ... and really doesn't need much in the way of tools. My goal with my project was to do this with handtools... just because. It can definitely be done at home if someone chose to.

For me, it is a fun part of the hobby so like reloading, there is no cost to personal time spent. Beside, if you screw up, it is dirt cheap... so who cares. And the best part, this fugly critter shoots....

Jerry

Nothing but admiration...…..and I know there is satisfaction from turning a sows ear into a silk purse in all hobbies...…...lol
 
Admire you guys that can do all of that work to accurize a "sows ear" to that extent. I'm better off buying a Tikka 1X for 600.00, if you paid yourselves minimum wage for that work, it would be 1000.00 rimfire...….congrats on some mad skills.

Thanks for the compliment. Many of these mods will work well to make the T1X into a $1500 rifle (worth $600). Next project! :)
 
Thanks for the compliment. Many of these mods will work well to make the T1X into a $1500 rifle (worth $600). Next project! :)

I'll keep an eye out for it in the EE....:) Thanks for tutorials though much appreciated. If my T1X turns out to be a lemon I have a thread to fall back on...…..keep the info coming and am really looking forward to the results. Not sure if I saw any but do you have any baseline data from firing the gun prior to accurizing? That would be an interesting comparison.
 
Back
Top Bottom